Destiny 2 Last Wish Raid Guide: Defeating Riven of a Thousand Voices

Riven, the last Ahamkara, has been Taken. Venture into Destiny 2’s Dreaming City and rip out her heart so she can be saved. This is Destiny 2’s Last Wish raid, one of the game’s most difficult and rewarding activities. Grab five friends and clear your schedule for some of the most fun you can have in a Destiny raid.

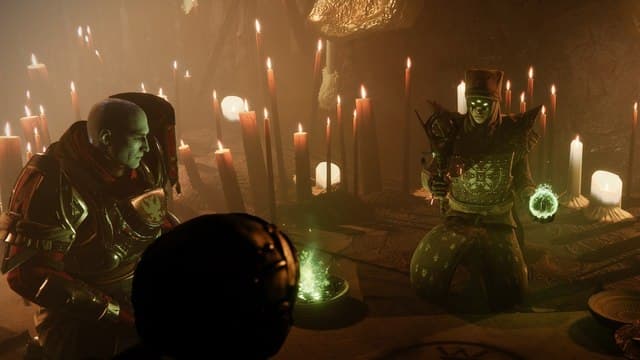
Kalli, The Corrupted

The first encounter of Last Wish is with an Awoken Techeun who has been Taken. Her name is Kalli, and she is not happy. Around the center of the room, six symbols are hanging in pairs of two. Split your team into three teams of two and match to the symbols. Each of the symbols can be found on platforms around the outside of the room, so head to your corresponding symbol.

Under the symbols will be platforms that are split into three sections. Two of the sections will have Taken orbs on them, so stand on one that doesn’t. The platforms will cleanse, and the sections will change, so keep moving to the section that doesn’t have an orb and kill adds while you do it.

If Kalli teleports to you, just shoot her in the face a few times and she will eventually retreat.

Once you cleanse the platforms enough, a Taken Knight will spawn. Kill it, and continue on to help out any of your friends who might need it, but relocate to the middle of the arena.


Soon, Kalli will teleport near the middle of the room and the DPS phase will begin. Drop a Well of Radiance or an Empowering Rift in the center of the room and empty those rounds into her. Use Power ammo and sniper rifles to deal the most damage.

After a while, she will begin to chant, which means she’s going to try to wipe your team. Thankfully, six of the doors underneath her will open up. Have each person take a door and hide inside until she claps her hands, and you will be safe. Clear out the adds in the middle, head back there, and begin the DPS phase again. You can do this up to three times. If Kalli is not dead after that, the whole cycle of cleansing platforms begins again, but the symbols in the middle will change.

Repeat the process until she is dead, and move on to the next area. Traverse beneath the broken bridge and make your way to the next fight with another Techeun.

Shuro Chi, The Corrupted

Be ready for an uptick in pace, because this next fight against Shuro Chi is all about tempo. Once the big doors open, Shuro Chi will teleport to a platform on the left side of this grand hallway and a countdown called Shuro Chi’s Song will begin. That’s the clock you are racing against.

At the start, your focus should be on clearing adds and creating orbs, so equip your fireteam with supers like Nightstalker’s Tether and roaming supers to get kills and make orbs to chain more supers with your team.


Make sure to kill an enemy named Eye of Riven, because it will drop a ball that will allow you to shoot Shuro Chi to stun her during the DPS phase. Picking it up will give you a debuff called Taken Essence Antumbra, and if it reaches x10, it will kill you. Make sure to use the item’s super to get rid of it before then.

Once all of the adds are dead, Shuro Chi’s tempo will quicken, and three crystals will spawn on the three platforms around her. Have three of your team members grab the crystals, jump on the platforms in unison, and then shoot at the crystal-holder to their right to basically form a triangle of lasers.

If done correctly, Shuro Chi’s shield will break, and it’s DPS time. Pay attention to how Shuro Chi’s health bar is broken into six segments. You will need to deplete one segment to make her move again. She will begin a similar wipe mechanic to Kalli, and she must either have the health bar depleted or be stunned by the Eye of Riven ball.

Once the health bar has been emptied, the chase will continue. Shuro Chi will head to a second platform, and the process of killing adds and spawning orbs is repeated. When DPS begins, deplete her second health bar and move on into a room with three symbols on the wall and nine platforms on the floor.

The symbols will have four of its tiles blocked out. These corresponding tiles are the nine platforms on the floor. Have four members of your team assigned to jumping on the correct platforms while the other two clear out adds. All four platforms must be jumped on at the same time. If done correctly, the input will be accepted, and you must then turn and do the same thing for the symbol on the wall to the right.

Three inputs for the three symbols must be accepted before Shuro Chi’s song hits zero. Once done, platforms will rotate from above and allow you to climb on them to the next area where the process of clearing adds, shooting crystals, and DPS begins anew.

Damage her twice more, and you will enter another symbol room where the same process must be completed. Climb up again, damage her twice more, and the fight will be completed. Drop down into the next area and continue on until you cross a bridge in the Ascendant Realm and get ready for the next fight.

Morgeth, The Spirekeeper

That big Taken blob in the front of the area is an ugly ogre named Morgeth, and it is the next boss fight—arguably the easiest battle of the entire Raid. To begin the encounter, one player must grab the big Taken orb in the front of the area.

Get acquainted with what it looks like, because it’s an important facet of the fight.

Morgeth will stand up and Taken will spawn everywhere. Break your team up into two groups of three and have them flank the left and right sides of the arena.

Kill the adds that spawn, and eventually four of those orbs will spawn in the arena—usually two on left and two on right. Have one player on each side grab two of the orbs, and it will give you a Taken Essence buff.

Kill more adds, and Morgeth will freeze one of the players with Taken Essence x2. In order to free them, one of the players without Taken Essence will need to kill an Eye of Riven enemy that spawns, take its orb, and run over to the frozen teammate and use their grenade ability. This will transfer the Taken Essence to the other player.


It’s important to note that x2 Essence is the maximum that anyone can have, as going any higher than that will kill them. Repeat the process a few times until five players have Taken Essence x2, and one more orb will spawn in the middle of the area near Morgeth.

Have your team filter to near the end of the broken bridge with sniper rifles (Whisper of the Worm is a near must-have here). The final person who does not have Taken Essence must take the last orb, and the DPS phase begins. Huddle up around a Well of Radiance with your sniper rifles and begin to open fire on Morgeth’s disgusting bubbly back, which is its weakpoint.

The whole while, Morgeth will be gathering strength, and a percentage will pop up periodically on the bottom left. If it reaches 100 percent, Morgeth will wipe the team, but it can be stunned with an Eye of Riven ball super just like the bosses before it. Repeat the process until Morgeth is dead, and head further into the Dreaming City.

The Vault

Now it’s time to open up a vault where Last Wish’s big bad is locked up. To kick it off, have three of your fireteam stand on the three platforms that surround the mechanism in the middle of the room.

Each plate corresponds to a room around the outskirts of the area—let’s call them trees room (left), pillars room (right), and temple room (back). Standing on the platforms at the same time will reveal three symbols to each of the players.

By now, you will have come up with callouts for the many symbols found throughout the raid. Use whatever works best for you.

Have one player call out their symbol that is found in the middle of the three, as it will be found on either the right or left side of the symbols of another player. That player must announce whether it’s right or left, then call out their middle symbol, allowing the third player to announce if it’s on their right or left.

If the symbol is on the right, keep in mind that that platform needs an Antumbra cleanse. If it’s on the left, that platform needs a Penumbra cleanse. Keep that in mind for what’s up next.

The other three players, meanwhile, will be killing all of the Taken adds that spawn in. Eventually, a Taken barrier will block off two of the three rooms. The open room will spawn an Eye of Riven, and it will drop a ball like usual.

Two of the rooms will be blocked off again, so the players must then move around the area. One player must pick up the ball and read if they have received an Antumbra or Penumbra buff on the bottom left of their screen. That ball must be taken to the correct plate and cleansed.


Meanwhile, a large Taken Knight will spawn in one of the three rooms. It will sprint towards one of the platforms and attempt to stick its sword in it, which will lock the Vault and kill your team, so make sure to focus damage on it.

Once the first platform is cleansed, another Eye of Riven will spawn in the open room, and the process continues. The ball must cleanse the correct plate once again. This time, two Knights will spawn. Once the second platform is cleansed, repeat the Eye of Riven killing, and three Knights will spawn. Cleanse all three platforms to complete one of three cycles needed to open the vault. Repeat this process three times and the Vault will open, allowing you to enter into the lair of Riven.

Riven of a Thousand Voices

There are six platforms in this main room that surround the giant Taken bubble in the middle. Have your team stand on all of the platforms, and be prepared for a drop. The floors will open, and you will set your eyes on the massive Ahamkara known as Riven of a Thousand Voices.

Once the awe dissipates, your team will split off into two groups of three to enter the two doors found at the bottom of the room. In both rooms, lots of Taken will spawn in. One room, however, will get a special visit from Riven.

She will either open her mouth and spew fire, or reveal four tentacles from her neck. If she spews fire, shoot her in the mouth until she gets stunned. If she shows tentacles, one of them must be baited into an attack that will get it stuck in the floor, exposing it as a weakpoint that must be shot. Either way, she will be stunned and open the flaps on her face to reveal her ten eyes. Two of the eyes will glow. Those two eyes must be communicated to the team on the other side.

This map is a common set of callouts for the eyes, split into the left and right side of her face. Keep it handy, or memorize them to know which eye is which. While the first team is dealing with Riven, the other team has a different job.

An Eye of Riven will spawn in and drop an orb, allowing the bearer to look to the back of the room and find a symbol on the wall. Another player needs to jump up on the platform in the back-middle of the room and look through the blue glass. Looking through the blue glass will reveal a litany of symbols throughout the room, and it will look something like this:

The player with the orb must call out the symbol that they see and the player in the looking glass must direct them to the corresponding symbol. For example, if the orb holder sees “two-headed snake facing down,” the looker can then say “left stairs, three quarters of the way up, close to the middle.”

This process will unlock an elevator that will take the team to the next level. Heads up, however—once the other team damages Riven and calls out her eyes, she will switch rooms.

At that point, the first team will get an Eye of Riven and do the symbol callouts to unlock their elevator. When Riven enters the second room, her face and mouth will be open. Players should empty as much damage as they can into the giant black Taken orb in her mouth. Once her mouth closes, the two eyes must be shot and popped, and she will be stunned. If not, she will wipe the team. Shooting the wrong eye will also wipe the team, so make sure to get the symbols correctly.

At this point, both teams move up to the second floor, and the process is repeated. Once two more eyes are popped and the symbols are cleansed in both rooms, both teams will elevate to the original arena where they dropped in from. Riven will pop up in one of the windows of the area, and a bunch of Taken will spawn. Clear out adds as best you can, and get ready to stun Riven again—shoot her in the mouth if she spews fire, or shoot her tentacle, etc.

When she’s stunned, two more eyes will glow. Two team members must assign themselves to an eye each. She will appear twice more, for a total of six eyes, one for each team member. The fourth time she appears in the room, she will open her mouth and her face, and it’s DPS time again. Drop a Well of Radiance and snipe her mouth until it closes, and then each team member must shoot their eye. Pop all six eyes correctly and she will leave.


Everyone must now return to their original platforms and they will open and drop you past Riven again. This time, however, she will have several weakpoints on her body, which look a lot like Ahamkara acne. Pop the weak points to deal massive, massive damage. But look out—popping them will send highly-damaging Taken orbs in your direction, so make sure to shoot them before they kill you.

Once you reach the bottom, it’s a matter of rinse and repeat until Riven has taken enough damage to leave her with about 10 percent health, which can be seen as a segment on her health bar. At this point, you will be teleported into the Ascendant Realm onto platforms surrounding Riven.

Climb up the platforms and kill the Taken Phalanxes that spawn, and eventually, you will find a portal. One person must enter the portal, and you will be teleported back into the main room again. It’s time for Riven’s last stand. She will enter the room with her mouth open and her empty eye-holes bleeding a disgusting black mucus. DPS her mouth once more and empty her health bar until she explodes.

But it’s not over yet. Once her mouth is left open, jump inside and run down her throat until you reach her heart, a giant black bubble. DPS it as much as you can, and the fight will finally be over. Catch your breath, and get ready to escape with Riven’s heart.

The Escape

It’s time to head back to the rescued Techeuns, Kalli and Shuro Chi, who will attempt to cleanse Riven’s heart. But your team has to carry it back through the area against an army of Taken.

The heart will choose one player as its carrier. Pick it up, and run through her throat. The heart carrier will have a massive bubble around them, and the rest of the team must stay inside the bubble to avoid taking damage over time. The carrier must also keep an eye on the countdown timer that will appear on the left side of their screen. They will have 15 seconds before the heart will teleport you to inside of it—yes, inside the heart—and the rest of the team will take over.

While the team carries the heart, the person inside of it will fight enemies that spawn, but a Taken Essence orb will spawn, too—much like the ones in the fight against Morgeth. The person carrying the heart must communicate the countdown to the team, and once the countdown reaches one or two seconds, the player inside the heart must grab the orb to extend the countdown, effectively allowing the team to continue on.

This encounter is all about killing adds and moving until teleported into the heart, when it then becomes about grabbing the Taken orb at the correct time. With each person teleported into the heart, a new Essence orb will spawn. The heart must be carried through the Vault, but there’s a catch—two of the doors are locked off again, so it must be taken through the open door and down the side hallways until it makes its way to the hole that the team entered into the Vault from in the first place. Drop down the hole, and run up the stairs to Kalli and Shuro Chi. Dunk the heart, let them do their thing, and one Last Wish has finally been granted. Congratulations on beating Destiny 2’s most difficult raid, and enjoy your loot!

About the Author

Scott Duwe

Scott has been writing about video games for the better part of a decade, with bylines at sites like PC Gamer, Dot Esports, Red Bull Esports, and more.