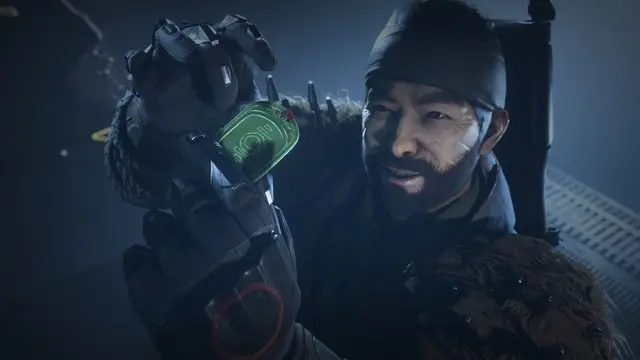
Over the next three months of Destiny 2: Season of the Drifter, we’ll get to experience the backstory of our friend (?) the Drifter. And the Destiny 2 Allegiance Quest is our first hands-on experience working for the man himself. It’s also a first-of-its-kind mission in Destiny, with character choices and some unique lore. So let’s get right to the quest steps in our spiffy new guide.
Keep in mind that your decision actually matters. By choosing the Vanguard or the Drifter, you’ll be locked out of the other side of the Allegiance quest on that character. You’ll get different rewards depending on your choice as well. More importantly, Bungie says both sides will remember your decision and that it “may impact future content for this character.”
Time to dust off your second character, then! You can always just redo the quest on your alt. Also: big thanks again to light.gg for being an awesome source of raw data.
Spoilers for the Destiny 2 Allegiance Quest follow! You’ve been warned!

Vanguard Side
Defy the Drifter to stand with the Vanguard.
This decision has consequences:
- This character will experience different quest content and receive different rewards than characters who stand with the Drifter.
- The Drifter will remember your choice.
- This character will have complete access to the “The Warlock Aunor” lore book.
- This choice may impact future content for this character.
Ikora gives a Praxic Loyalty Package for sticking with the Vanguard.

1. Signed, Sealed, Delivered – Find a Terminal
Find a terminal to compose a message to Aunor. The terminal is on your right-hand side as you enter the hangar. Hang a right into the little, brightly lit alcove near the yellow scaffolding with stairs leading up. The terminal is on a desk next to what looks like a microscope.
You’ve chosen to steer clear of the Drifter. You should probably tell your new friend Aunor… Find a terminal in the Tower Hangar where you can compose an encrypted message.

2. A Message of Solidarity – Find the Hidden Agent in the Tower
Find a Hidden agent in the Tower Hanger to send your message. Where is the Hidden Agent? Well, as the description implies, they’re also in the Tower. Go towards where Dead Orbit hangs out — on the left-hand side of the Hangar itself. This is also the general vicinity where you find Xur when he stops by. Except, instead of pressing on up the stairs to Xur’s location, go to the right of where Dead Orbit usually stands. There’s a big mass of crates and scaffolding next to where the ships dock. The agent is standing next to the pile of junk, among a smattering of other nameless NPCs.
Aunor is one of the Hidden, a covert group of Guardians who gather sensitive intelligence. You’ve heard rumors that they’re embedded on just about every active Vanguard front, including the Tower. With your message in hand, you begin to look around, hoping to find one of them. Maybe they can get your message to Aunor. Find the Hidden agent in the Tower Hangar to drop off your message.
3. Wiretapping the Annex – Plan Audio Surveillance Devices
Plant wiretaps in the Drifter’s Annex. Remember that you can now fast travel directly to the Drifter’s location in the Tower!
Aunor wants you to bug Drifter’s new haunt in the Annex. She believes that eavesdropping on Drifter remotely will yield valuable intel on his next move. Find suitable locations in the Annex to plant audio surveillance devices.
4. Surveillance – Activate the Terminal
Activate the terminal. It’s the same terminal in the Hangar that you found in Step One.
“That’s one to check off our bucket list,” Ghost remarks dryly. “Let’s see if the feed’s working.” Return to the Tower Hangar terminal you used to author a message to Aunor. Activate the terminal to monitor the bugs you just planted.
5. Sting Operation – Visit Spider
Visit Spider to try and intercept the Drifter’s package.
You picked up a lead while you were spying on the Drifter’s conversations. He’s sending someone to pick up an important shipment from Spider. Maybe you can get there first… Visit the Spider in the Tangled Shore.
6. A Reasonable Price – Pay 50,000 Glimmer to Spider
As per usual, Spider is willing to help… for a price. Gather some Glimmer for him.
Spider is willing to stop trading with the Drifter… for the right price. He’s asking for quite a lot of Glimmer. You’re not happy about the arrangement, nor do you trust Spider, but after a quick consultation with Ghost, you both agree it’s likely worth it. Spider does keep his word, after all. Pay off Spider.
7. Looking for a Lead – Complete Heroic Siren Song
The Drifter is up to something. Complete Siren Song on Titan. This is the adventure where you destroy a Hive crystal at the end.
Spider told you Drifter might be planning something on Titan. Aunor agrees it’s worth taking a look around. Without any sense of where to start, you set a course for the Rig. Complete a Heroic reprise of adventure “Siren Song” on Titan.
8. Prime Research – Bank Motes in Gambit Game Modes
The jig is up! At least according to the official description. Either way, we need to grab some more Motes for the Drifter.
Keep spying on the Drifter for Aunor by playing his games. Drifter knows your true motivations, but he also needs Motes. Bank Motes while playing Gambit or Gambit Prime.
9. Lifeguard Duty – Defeat Guardians in the Crucible
Time to get your fellow guardians back in line. Teach them a lesson in the Crucible.
Aunor says that the Drifter has been flooding the Crucible with his followers. She’s worried that Drifter’s fake-Dredgens will collide with genuine Dredgens, and someone might get legitimately killed. But your reputation precedes you. If you’re there as a lifeguard, people will likely behave. Defeat Guardians in the Crucible.
10. Field Maintenance – Return to the Terminal
We’ve got a lead! Head to the Hanger to investigate. It’s the same terminal from earlier in the quest.
Ghost tells you that the bugs you planted around the Drifter’s shop in the Annex have flagged a possible lead to investigate, but they’ll require on-site decryption. Return to the terminal in the Hangar to audit your logs.
11. Bomb Threat – Complete Mystery and Potential
Here’s where things get good, we’re heading to the Derelict!
You’ve extracted a number of keywords from your surveillance transcript that suggest, perhaps, the Drifter has planted explosives somewhere—but the Drifter’s Gambit takes place throughout the solar system. They could be anywhere. You resolve to head up to the Derelict to begin your investigation. Maybe there’s a clue there somewhere. Enter the activity “Mystery and Potential” via the Gambit Director and search the Derelict for some kind of clue.
12. The Survival Guide – Collect the Drifter’s Tapes
We still have some hunting to do though. Various tapes are scattered throughout the EDZ patrol areas and lost sectors. Collect them all.
After investigating the Drifter’s Haul, you discovered he has hidden messages around the EDZ for his protégé. One of those tapes could contain the final piece of evidence that you and Aunor need to prove for once and for all that the Drifter is up to no good. Search the EDZ for Drifter’s tapes. One tape can be found near computer consoles in each of the following patrol areas and Lost Sectors: Trostland, Skydock IV, Flooded Chasm, Soujourner’s Camp, Excavation Site XII, Winding Cove, and Scavenger’s Den.
13. Hard Truths – Visit the Drifter
Time to talk to the Drifter about everything that’s happened.
You are a Guardian of the Last City. You live by your principles: loyalty, honor, justice. It chafes at you that you’ve heard messages the Drifter intended for someone else. You send him a message to let him know—and further, that you intend to visit him in person. Visit Drifter in the Annex of the Tower.

Drifter Side
Turn your back on the Vanguard to stand with the Drifter.
This decision has consequences:
- This character will experience different quest content and receive different rewards than characters who stand with the Vanguard.
- The Drifter will remember your choice.
- This character will not have complete access to the “The Warlock Aunor” lore book.
- This choice may impact future content for this character.
Gives you a Crew Loyalty Package for picking him.
1. Black Market Deals – Visit Spider
The Drifter wants… “The Jerky.” Visit Spider to get it.
Drifter tells you he regularly does business with the Spider. Spider is all too happy to supply Drifter’s scams with equipment and fresh fodder, and he has a fresh shipment waiting for pick up. “Ask him for ‘the jerky,'” Drifter tells you, winking. Visit Spider in the Tangled Shore.
2. Shady Deal – Purchase The Jerky from Spider
Buy said Jerky from Spider with Glimmer.
You’ve discovered that Spider has a whole array of illegal goods for sale to those who know what to ask for. Among those is “the jerky” that Drifter asked you to pick up. Purchase The Jerky from Spider.
3. Dead Drop – Complete Thief of Thieves
Complete the Thief of Thieves heroic adventure on Titan. This is the one where you go through the catwalks, reclaiming stolen caches.
The Jerky is dialed into a Fallen transponder somewhere on Titan. You’ll need to pick up the goods in person to complete your errand for Drifter. Complete a heroic reprise of adventure “Thief of Thieves” on Titan.
4. Time to Regroup – Visit Drifter
The Drifter is worried about Shin Malphur. Time to talk to him about it.
While you were picking up the Jerky for the Drifter, he received a call with bad news. One of his old enemies, Shin Malphur, might have broken an agreement. Drifter wants you to come back to the Tower to “regroup.” Visit Drifter in the Annex.
5. Show Your Strength – Defeat Guardians in the Crucible
To keep Shin Malphur in his place, defeat Guardians in the Crucible.
Drifter’s concerned that his old enemy, Shin Malphur, is roaming the EDZ. As a preemptive show of strength, he wants you to get into the Crucible and make it a bad day to be a Gunslinger. Defeat Guardians in the Crucible.
6. Motes! Fast! – Bank Motes in Gambit Game Modes
The Drifter needs Motes, we provide Motes.
“Okay. You bought us some time, but we gotta pick up the pace. Work on an accelerated timeline. Listen. I need you to get as many Motes as you can. Route ’em straight to me. I’ll explain everything later.” —The Drifter Bank Motes in Gambit or Gambit Prime.
7. Farm to Table – Defeat Vex and Cabal Strike Bosses
We’re going to need to hunker down for a bit. Gather fuel by killing Vex strike bosses. And gather meat by…defeating Cabal strike bosses. Are we eating Cabal???
“Good. Good. We got Motes—those’ll keep the defenses runnin’ for a while. But, we’re gonna need fuel and we’re gonna need food. Lots of food.” —The Drifter Gather fuel by defeating Vex strike bosses. Gather meat by defeating Cabal strike bosses.
8. Drifter’s Hideaway – Complete Mystery and Potential
Time to head to the Derelict and grab a message for the Drifter!
“All right. We got everything we need, kid. Uh… If you wanna bring it all up to the Derelict, I… maybe… left a message for you up there.” —The Drifter Enter the activity “Mystery and Potential” via the Gambit Director and search the Derelict for the tape the Drifter made for you.
9. Cold Feet – Visit the Drifter
We weren’t supposed to listen to the tape? We should probably talk to the Drifter about this.
“You heard it? You heard the tape? Ah, damn. Damn! I didn’t expect you to just go DO it. Listen, kid, I got the jitters about this. Come see me before you go lookin’ for the rest of those stupid tapes.” —The Drifter Visit the Drifter in the Annex of the Tower.
10. Hidden Messages – Collect the Drifter’s Tapes
Drifter left us some messages in the EDZ. Naturally he didn’t tell us where they were. Visit computer consoles in patrol areas and lost sectors. These include Excavation Site XII, the Flooded Chasm, Scavenger’s Den, Skydock IV, Soujourner’s Cam, Trostland, and the Winding Cove.
Drifter has left a series of personal messages for you in the EDZ. Naturally, he won’t tell you where you can find them… Search the EDZ for the tapes Drifter left you. One tape can be found near computer consoles in each of the following patrol areas and Lost Sectors: Trostland, Skydock IV, Flooded Chasm, Soujourner’s Camp, Excavation Site XII, Winding Cove, and Scavenger’s Den.
11. We’re in This Together Now – Visit the Drifter
Time to talk to the Drifter about everything that’s happened.
After hearing everything Drifter has to say, you feel compelled to visit him. Visit Drifter in the Annex of the Tower.
That’s all we know about the upcoming Allegiance Quests! Which side will you pick?
If you’re looking for coverage of the latest Destiny content, check out our Thorn Exotic Quest Guide or our Revelry Guide to see what Bungie has planned for this spring’s event!