The Presage mission in Destiny 2 is the gift that keeps on giving. There’s been a few reasons to keep running it week after week. At the most basic level, it’s the only way to get new random rolls of the Dead Man’s Tale exotic. But there are also a ton of triumphs and lore to collect by scanning various objects aboard the ship which rotate in groups that won’t switch until you’ve found every one in the set. There are also a number of datapads and hidden chests which all amount to a whole lot of things you may not even know about.
Today, however, as the season begins to come to a close, the community has discovered that collecting each of these datapads and their associated hidden chests gives you access to a room containing the Crown of Sorrow. Up until now you’ve had to do one data pad per week, but now that all are available, you can collect all of them in one go and get yourself a free Ascendant Shard. In this guide we’ll be sharing the locations of each of these data pads and their chests.
The problem? It appears as if you need to play through Presage 12 times to unlock the ability to pick the pads up. If you’ve already played Presage that much, you can blast through all of these in one run. Otherwise, you’ll need to grind it a few more times to reach the hidden room.
Note: You can complete more than one run per week by playing on other characters.

Presage Datapad 1 Location
The first datapad is hard to miss. When you first get aboard the ship make your way through the vents and keep your eye on the left-hand wall. Eventually you’ll see it jut away from you with a vent cover behind some darkness growth. The associated chest is behind the doors right in front of you.

Presage Datapad 2 Location
The second datapad is further along in the vents on the floor. You can’t miss it. The doors on the floor behind you will open up, revealing a chest to open.

Presage Datapad 3 Location
After you make your way through the first barrier using the darkness spores, search the ground in the room for another datapad. Again, the door is right next to it in the screenshot.

Presage Datapad 4 Location
There’s a pretty sizable gap to the next datapad. After you drop into the electric room, do the usual tasks, get the spore buff, make your way across the gap and into the dark room. On the floor where the Screebs spawn is another pad with a small door to the left of it.

Presage Datapad 5 Location
Immediately after this, jump up to the next ledge and hang a left. There’s a datapad hiding back here. The door is off screen to the right of the Guardian in this picture.

Presage Datapad 6 Location
Once you’ve finished the trash compactor sequence, jump into the whole and the datapad awaits you at the bottom. This door is the hardest to find comparatively. Jump back up into the trash compactor, shoot out a vent on the opposite side of the room and drop down.

Presage Datapad 7 Location
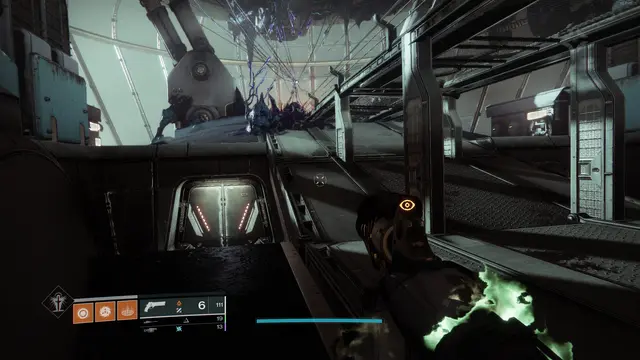
Once you drop down into the first real combat encounter with a bunch of Scorn, continue onwards and keep moving forward until you get to the next flashlight section. The datapad and door are directly to your left.

Presage Datapad 8 Location
After clearing out the first hanger, make your way to the very back of the room against the wall.

Presage Datapad 9 Location
Make your way around the outside of the ship and into the second hanger before heading straight to the back of it. Another pad awaits you here.

Presage Datapad 10 Location
After dropping down from the next set of ventilation shafts and into the room with the dead Scorn in the center, turn to your right and there’s another pad here that is a bit easier to miss.

Presage Datapad 11 Location
When you get to the ventilation shaft maze, drop down and look back up. Align yourself so that the ledge above is in front of you. Take the open shaft immediately to your right, make the first available right and on the floor you should find the penultimate datapad.

Presage Datapad 12 Location
The final datapad is in the mission where you pick up Dead Man’s Tale. After you’ve done that go back to the other side of the room and the door below will be open, giving you access to the Crown of Sorrow room. Head inside to get new dialogue and open the chest for your Ascendant Shard!