Destiny 2 King's Fall Guide - How to Beat Every Encounter

Regicide

Avast Guardians, Season of Plunder is here! This space pirate-themed Destiny 2 season is all about crossing blades with Fallen House of Salvation, hunting for buried treasure, and working with everyone’s favorite scoundrel, the Drifter. Of course, there is a bunch of new loot to chase and activities to complete. Of course, the biggest piece of content added into the game is the reprised raid from the original Destiny, King’s Fall. Set aboard Oryx’s ship, this raid is considered by many to be one of the best activities in the franchise’s history. However, Bungie has made a few tweaks to each encounter which can throw players for a loop. So if you’re a King’s Fall veteran or newbie, here’s how to complete every encounter in this Destiny 2 raid:

How to Beat King’s Fall in Destiny 2

Destiny 2 King's Fall

Opening the Gate – Destiny 2 King’s Fall

When you arrive at the raid, divide up into three teams of two. Your job in this encounter is to dunk two orbs that spawn in separate rooms on the right and left sides of the main chamber you arrive in. The placement of these orbs will vary as the encounter progresses, with them spawning farther and farther away. Both orbs are linked to a single timer, which will cause the orb to vanish from the player’s hands when it hits zero. Your job is to have a player on both the left and right team grab an orb, run back to the main chamber, and deposit them in the glowing receptacle at roughly the same time.

Once you grab an orb, Taken energy will block several of the doors leading to the main chamber on both sides. Have your escorting teammate shoot the Taken Blights in the center to destroy the barrier preventing you from going forward. Their job is to also kill any enemies trying to stop the orb runners. As for the folks in the middle, you will want to just kill enemies that spawn and open the doors that get blocked when possible. Xenophage is surprisingly good at this since it will one-shot the Blights blocking the doors.

After your team deposits 12 orbs across six receptacles a wave of enemies will spawn down the hall in the next room. Kill all the foes that spawn and go through the portal to complete this encounter.

Destiny 2 King's Fall

Jumping Puzzle #1 – Destiny 2 King’s Fall

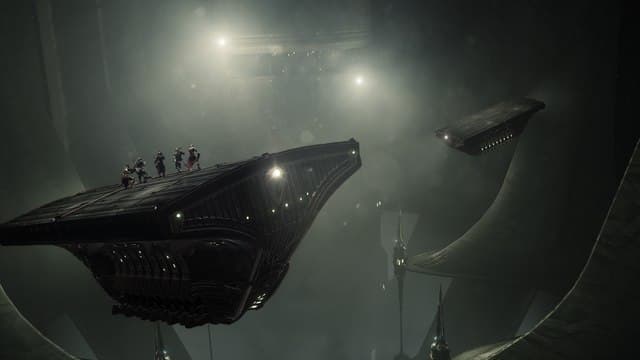
The next portion of the raid is a series of jumping puzzles, with the first just running across some giant, swinging chandeliers. This part is quite simple, just take your time and only jump when they are close to one another. After you pass this test, you’ll enter a massive room with a large Hive ship guarded by some enemies. Kill the foes around it and hop onto the ship that’s docked. Once a few seconds have passed, this ship will begin floating out into space.

Eventually, the ship you’re on will begin to vanish, forcing you to jump to another Hive ship that should have just spawned. Your job in this puzzle is to go from ship to ship, hopping onto ones that just arrived right as your ship begins to vanish. There’s a small platform along the left side of this room. Standing on it will create a checkpoint, acting as a spawn location if you die. Keep riding the ships until you reach the large wall on the other side.

Destiny 2 King's Fall

Now battle the remaining enemies on this wall and make your way around this structure until you see another docked Hive ship. On the left and right will be plates that players need to stand on. Have one player stand on each plate causing the shield to lower. Now have a third person jump onto the vessel and ride it through the gate. On the other side, you’ll see more enemies. Clear them out, stand on the plate to lower the shield, and have the rest of the group join you via the ship that respawns at the dock. The people on the original plates can hop off if someone is standing on a plate on the other side of the gate.

Destiny 2 King's Fall

Totems – Destiny 2 King’s Fall

Welcome to your first real encounter. This area is divided into three separate areas, with Hive and Taken-themed rooms connected to the middle chamber on the right and left. Both of these lower chambers will do damage to players when they enter them. On the hill leading down to these side rooms will be an orb that you can pick up. Doing so will give you a buff called Brand of the Weaver, which will make users invincible to the passive damage each of these rooms normally do. They also create a small aura around the buff holder that makes anyone who stands inside them invincible to the passive damage from the rooms. Keep in mind enemies can still hurt you in this aura!

Before you start the encounter divide into two teams of three. Both teams will be doing the same things, just on opposite sides of the room. When the fight begins, have one person on each side run down, grab the orb to get the Brand of the Weaver buff and go stand on the plate in the back of their respective side chambers. That person then just needs to stand on the plate and kill enemies. Meanwhile, the two in the center should kill the Hive Wizards and Taken Knights. These enemies will spawn on the left and right raised platforms in the center room.

Destiny 2 King's Fall

When the Taken Knight dies he will drop a Taken Orb that you can pick up. Doing so will give you a buff called Brand Claimer. Once a person has Brand Claimer, they should immediately run down to the person on the plate in their team’s side room and approach the person with the Brand of the Weaver aura. You will get a prompt to steal their brand once you’re in the aura’s radius. Upon stealing the brand you will gain the Brand of the Weaver buff and the timer will reset.

The person who had their brand stolen will have stacks of Deathsinger’s Power and should run back to the center room. With the Deathsinger’s Power, go stand on the middle room plate to deposit them. At the same time, the third person should be killing the Hive Wizard and Taken Knight that respawned on the middle balconies. Now that third teammate will brand the Brand Stealer buff, go down and steal the Brand of the Weaver buff from the second member of your team.

Each team of three will keep looping who is stealing the brand, holding Brand of the Weaver on the plate, and depositing stacks of Deathsinger’s Power in the center. Your main threats will be Hive Knights and Taken Minotaurs that spawn in each side room, along with an Unstoppable Hive Ogre that appears in the middle room. I recommend burst damage supers to let you quickly kill the Hive Knights and Champions when they spawn. Keep this loop going until all the glowing rooms on the center door are ignited.

Destiny 2 King's Fall

War Priest – Destiny 2 King’s Fall

War Priest is the first boss in Destiny 2’s King’s Fall raid. This room is divided into three areas: the middle, right, and upper.  Divide into three teams of two, with each group covering one of these three areas. You will want to equip long-range boss damage weapons such as linear-fusion rifles, snipers, and Divinity. Additionally, you should have Warlocks run Well of Radiance, Titans can throw on their bubble, and Hunters can use Golden Gun or tether.

When the fight starts, the War Priest will spawn on the back stage and a bunch of enemies will pour into the room. Kill all the Hive enemies that enter for now. Eventually, an orange bar Hive Knights called Revenant Knights will run out in each of three sections of this room. Each duo should prioritize and kill their Revenant Knight to begin the glyph sequence.

Destiny 2 King's Fall

Now have someone from the center duo step on the middle plate. They should quickly look up at the three massive pillars in front of them. A rock on the back (shown above) should be glowing white. If you don’t see a glowing rock on the right or left pillars then it will be glowing on the middle pillar. The middle plate person should step off it and whoever’s side had the glowing rock should step on theirs. So if the middle plate person called out that the left rock was glowing, they should step off the middle, and someone on the left side should stand on their plate.

Once that person stands on their plate they will see one of the rocks on the other pillar glowing. Call out which side’s pillar is glowing and have them stand on their plate. Do not get off the plates after the middle person initially steps off theirs and calls out which side needs to hop onto their plate. After the second person is on their plate, the last person should go on theirs to begin the damage phase. The sequence of events for plates should look something like this:

  • Kill the Revenant Knights to begin the glyph sequence.
  • Middle person stands on their plate and determines which side starts the sequence.
  • The middle person steps off their plate.
  • Someone on the side with the glowing rock steps on their plate.
  • That person on the plates calls out which pillar is glowing next.
  • The second team has someone stand on their plate.
  • The third team steps on the plate, ending the glyph sequence and beginning the DPS (damage-per-second) phase.

After the last person steps on their plate, they will glow red with a buff called Brand of the Initiate. Players can only damage the War Priest in this aura and it will only last for 15 seconds. Additionally, you should DPS by one of the three main pillars in the room. As the Brand of the Initiate timer countdown, someone else on your team should search for a Taken Knight called a Brandstealer. This knight will never spawn in a section of the arena where the last plate is. Meaning, that if the last plate someone stood on was the right one, the Taken Knights will appear in the middle and top left.

Once you kill the Brandstealer, take the orb and run back to the red aura that everyone should be standing in. Steal the Brand of the Initiate from the aura holder when there are only a couple of seconds left to extend the damage phase. Now have someone else run out and search for the second Taken Knight. Kill the knight, take the Brand Claimer buff, and go steal the aura for a second time. No more Taken Knights will spawn, so focus on damaging the boss until the DPS phase ends. Do not run when the damage phase is over, as the boss will unleash a wipe mechanic that kills anyone not hanging out behind a pillar. Once the wipe ends, the pillar your team is behind will vanish and cannot be used for protection again.

Now repeat the same process above until you kill the War Priest. You will have four damage phases, with the fourth one killing the entire team at the end since there won’t be any more pillars.

The Maze

Just go right, left, left, right, and straight. Oh and try not to fall into any of the holes along the way.

Destiny 2 King's Fall

Golgoroth – Destiny 2 King’s Fall

The second boss of Destiny 2’s King’s Fall, Golgoroth is a lot easier than it seems. For loadouts, I recommend running roughly the same weapons you used in the previous fight. Snipers and linear fusion rifles are terrific for this battle, along with Well of Radiance and Ward of Dawn Supers. You will want to divide your team into a group of two and four. The former will be the people pulling Golgoroth’s gaze while the latter are the folks damaging the boss.

When the fight begins, enemies will spawn along the right walkway, left walkway, and the back of the room. Focus solely on clearing all the foes until a yellow-bar Hive Wizard appears. Kill this wizard and then have the team of four go back to where the rally flag can be dropped. Above them, you will see a large, gooey orb above the middle pit where Golgoroth is hanging around. When this orb is destroyed, it will drop a pool of light that your team will need to stand in to deal damage to the boss. If you’re not in the pool, you’ll do a significantly decreased amount, making killing this boss nearly impossible.

Destiny 2 King's Fall

A pool of light will only last for around 15 seconds before you’ll need to shoot down another orb and rotate to it. There are a total of six orbs hanging from the ceiling and they will always spawn in the order shown in the photo above. Golgoroth’s weak spot is the gaping wound in his chest and your damage will increase with each subsequent pool of light. I recommend having all Warlocks run healing rift and Well of Radiance as there are several Hive Thrall, Knights, and Taken Phalanx that will attack during the damage phase.

Finally, every pool of light has a chance to give one of the people standing in it a debuff called Unstable Light. This has a 6-second time and will cause the player to explode. While the person with the debuff will be unharmed by this explosion anyone around them will instantly die. To prevent this, move away from your team until the explosion before rejoining them. People with Unstable Light should damage the next orb in the sequence so it can easily be destroyed when your damage team needs to move.

As for the gaze team, your job is to keep Golgoroth’s gaze during the damage phase. This is achieved by shooting the large, glowing growth on its back. Doing so will cause Golgoroth to turn around and begin attacking that player. That user will get a debuff called Golgoroth’s Gaze and it will last 18 seconds. It also causes Golgoroth’s chest to open up for the damage team. The two players pulling Golgoroth’s gaze should always be on opposite ends of one another. You do this so one member of the duo always has a shot on his back, ensuring they can pull his gaze before the timer hits zero.

I recommend starting the sequence with one player standing on the blue X (shown above) since Golgoroth is usually looking at a team of four. Once you get his attention, run to where the first orb drops but don’t drop into the pool of light. Instead, stay on the upper level so the damage team is between you and Golgoroth. This boss will fire homing axion darts at the person holding the gaze until it’s pulled away. Just use a primary weapon to destroy these before you take damage. You will need to keep swapping Golgoroth’s Gaze between players, moving along the six-orb sequence until the damage phase is over.

Keep doing this until Golgoroth is eventually laid low.

Destiny 2 King's Fall

Jumping Puzzle #2 – Destiny 2 King’s Fall

The next jumping puzzle is remarkably easy. Just travel along the narrow wall, avoiding the massive pistons trying to shove you off. Eventually, you’ll reach an area with a plate. Stand on the plate to make some platforms appear and have everyone but the person on the plate cross. They will find another plate there, which someone should stand on to create another pass. Repeat this process two more times until four people are standing on different plates. This will solidify the platforms, allowing everyone to reach the piston wall and progress to the next encounter.

Destiny 2 King's Fall

Daughters of Oryx – Destiny 2 King’s Fall

The Daughters of Oryx is the next boss. Before you will be two Hive Wizards on pillars that are protected by an impenetrable bubble. There will also be four plates on large podiums, two of which are on the opposite side of the room. For the sake of clarity we will be naming these R1, R2, L1, and L2. This will make your callouts easy and concise since you’ll be standing on these for the last two encounters.

As for the Daughters of Oryx fight, you’ll want at least one Well of Radiance while the rest of the team runs add-clearing Supers. Also, consider using the exotic rocket launcher The Wardcliff Coil as it does a comical amount of damage to these sisters. You will also want a ranged primary weapon such as a pulse rifle or scout rifle so you can pick off snipers that spawn out in space.

Before beginning the fight, assign each player a designated plate with the last two members acting as floaters in the center. The duty of those assigned to each plate is to stand on them if necessary. Occasionally, this won’t be possible due to the mechanics of the next two encounters. If this happens it’s the floater’s responsibility to stand or defend that plate. You’ll be using this same layout for the final boss too, so get comfortable with your role!

When the fight begins, kill the Hive Knight that has randomly spawned on one of the four plates. Once he’s dead, have the person assigned to that plate go and stand on it. This will cause a random player other than that person to become Taken. If you become Taken and were assigned a plate you should let a floater know so they can cover it. The Taken player should run to the plate the person is standing on and look at the other four plates.

Destiny 2 King's Fall

Above one of these plates, they will see a glowing ball of light. Call out which plate is under that ball of light so someone can hop onto it. Doing so will create a bridge that only the Taken players can traverse. Make your way across the platforms and grab the ball of light at the end. You will get a text notification in the bottom left corner of your screen when you do. Once you grab it, everyone should get off their plate, and repeat this process two more times. A new Hive Knight will spawn on one of the four plates each time, marking your starting point. Do not get off the two plates until the runner reaches the ball of light otherwise, the platforms will vanish.

On the third run, you will instead need to interact with the orb to get the Brand Claimer buff. At the same time, everyone on the team should move to one of the small ledges right below the sister. You’ll want to stand on the ledge opposite of the Hive Wizard that isn’t glowing green. The person with the Brand Claimer buff should jump into that Wizards bubble and hold interact to steal her shield. This makes anyone standing inside it invincible to outside damage. Now just stand on the ledge and damage the sister. If you’re using The Wardcliff Coil/Divinity combo you should utterly obliterate her with little effort.

When the sister is killed, repeat this process to slay the other sibling. For those that don’t one phase the first daughter, stay in the bubble you stole until the boss releases her party wipe attack. Being inside will keep you alive. You will always be swapping between sisters for damage. Meaning if you started on the right one, the next boss you can damage is the one on the left regardless of how much damage you did.

Keep repeating this process until both sisters are dead.

Destiny 2 King's Fall

Oryx, The Taken King – Destiny 2 King’s Fall

Now Oryx may seem intimidating, but your roles are relatively the same as the last boss. Once again assign someone each of the four plates with the last two hanging out in the middle. You’ll want to run sniper rifles, linear fusion rifles, Divinity, Well of Radiance, Ward of Dawn, and any burst damage Supers like Golden Gun.

At the start of the battle, a bunch of enemies will spawn including some Taken Knights on each of the four plates. Kill the Knights and wait for Oryx to move to either side of the arena. He will randomly choose one of the four plates and slam his fist down onto it. Don’t stand on the plate when he does this unless you want to become past tense. After Oryx slams his fist down, that plate will glow green so have someone stand on it. A member of the fireteam will become Taken and should run to that plate. Just like before, a ball of light will appear over one of the other three plates. Call this out and have someone stand on the other plate to form some platforms the Taken player can traverse.

Destiny 2 King's Fall

While this is going on, enemies called Light-Eater Ogres will spawn next to each plate. You must kill these enemies as quickly as possible, so work together to swiftly bring them down. When they die a large Taken orb will appear, but you shouldn’t stand near it right now. Additionally, Hive Knights will spawn diagonally across from each plate and rush towards the Taken orb (shown above). Kill these Knights before they get to the orb, otherwise, they will consume it and shorten your damage phase.

After all, the Knights are killed and the Taken player has grabbed the orb of light one of the four plates will glow green. Stand on this to begin the platforming process again and make a member of your fireteam Taken. No more Ogres or Hive Knights will spawn, so you can focus on killing the other Taken enemies roaming around the arena. After two more times of this, a Hive Knight will spawn where Oryx initially started at the beginning of this fight and rush towards the center. They will have the Daughters of Oryx immunity bubble around them.

The third Taken player should grab the Brand Claimer buff that spawns at the end of their platforming sequence, drop down, and steal the shield from the Knight. Now kill the knight and have each player who was assigned a plate stand next to the Taken orb that the Light-Eater Ogres dropped. Countdown from three and step into them at the same time. Wait until text appears in the bottom left corner saying you’ve detonated the bomb before running back to the center.

Destiny 2 King's Fall

Doing so will stun Oryx and begin the damage phase. Now shoot his chest with your weapons until he moves back to the back of the arena. Oryx will now launch one of two different attacks. The first is he will spawn bombs that appear right on top of you and instantly detonate. Either keep running around the platforms or up and down the center of the arena to avoid being killed.

The second sees each member of your fireteam randomly sent into an alternate realm where Oryx will float around and attack you. You’ll need to survive and kill this fake Oryx to escape, otherwise, he will wipe out the entire fireteam. Since each player is sent into this room, it will become progressively easier to damage Oryx. The best method is to wait until he rushed out with his sword, as he will be extremely easy to hit with Supers or Heavy weapons. Upon his death, everyone who is in this realm will be sent back to the arena.

Now repeat this process until you reach the Final Stand portion of this fight.

When Final Stand begins, Oryx will move to the back of the room and spawn a Light-Eater Ogre next to the R2 and L2 plates. Kill them and have one player stand next to one of the two Taken bombs they drop. Oryx will then open his chest and begin channeling his attack. Have one player step into their bomb to detonate it and stun Oryx, allowing for your fireteam to keep damaging him. Once he begins charging up his attack a second time, have the other member of your group step into the second bomb to detonate it. He will become stunned once more, giving you more than enough time to bring down the Taken King.

And that’s it! You have successfully completed the King’s Fall raid in Destiny 2 and can claim all that sweet, sweet loot for yourself. Maybe you’ll even get lucky and snag a Touch of Malice exotic like I did!

About the Author

Collin MacGregor

Collin MacGregor is the Guide Staff Writer at Fanbyte. He's also the person who willingly plays the support class (you're welcome) and continues to hold out for an Ape Escape remake.