Now that you’ve unlocked the newest Deep Dungeon, let’s step straight into Eureka Orthos in FFXIV. In general, the first floors introduce you to the way mobs behave and the mechanics of the Deep Dungeon. Almost everything in here that can be avoided will kill you in one hit — even through any protomanders you have running and buffs from Dread Monsters. The key to effectively clearing Deep Dungeons is pulling no more mobs than you can handle and avoiding damage when possible. There really aren’t many DPS checks outside of very specific mobs.
Eureka Orthos Floors 1-10
You can pull multiple mobs or even entire rooms during these lower levels quite comfortably. I highly advise you to find all chests in the lower floors and stock up on protomanders if you plan to go deep into the dungeon, too. If you’re just clearing the first 30 floors, though, feel free to use any that you find.
Unless you encounter a Dread Monster, there is not much to fear here mechanically speaking. The worst moves are telegraphed, slow casts that you can avoid just by reacting to the orange AoE indicators on the ground (just as you do in most FFXIV group content).
A couple exceptions include:
- Orthos Behemoth: When this enemy gets low, or too much time passes, it will cast “Ecliptic Meteor.” This is a massive AoE centered on the behemoth that will deal a very heavy amount of damage. If you are not a tank with a defensive protomander you are likely to outright die. Either kill the behemoth or retreat. The main way this will wipe a party is when you don’t realize it was one of the mobs you pulled while pulling large packs, so just pay careful attention.
- Orthos Fachan: Its gaze attack is easy to miss for newer players fighting large packs, or if you’re simply unaware of it. Being hit by the gaze while facing towards the enemy will kill you, so make sure to keep your character’s back to this enemy.
- Mimics: After a few seconds they will cast “Infatuation.” This will charm you and make you unable to flee the follow-up point blank AoE, “Deathtrap,” which will kill you instantly. Be careful, as these too often catch you by surprise.

Dread Beasts
If you do encounter a Dread Beast, you simply want to avoid it. However, if you feel up to the challenge, isolate it from all other enemies first before engaging.
There are three types of Dread Beast:
Meracydian Clone
This one deals heavy auto-attacks and casts an interruptible “Berserk,” which will send it into a fury, granting it extra damage and likely killing you within seconds. You must stop this cast until it is almost dead to have a chance to defeat it. Unless of course you use a storm protomander to reduce its HP to 1 and instantly kill it after.
Eventually the enemy will cast “Allagan Meteor.” Just like with the behemoth, leave the spell’s range, line of sight, or kill before the cast ends. Finally, it will use Berserk again. By now you are unlikely to be able to interrupt it, however. This will give the enemy a damage up and its already heavy auto-attack will kill you quickly. This is basically its enrage timer.
Your reward for killing the monster is a 30-minute long Damage Up Buff.
Demi-Cochma
This is another auto-heavy boss. As your fight with the beast progresses, he will continually gain “Vulnerability Down.” Make sure to front load your burst damage before this defensive buff goes up. Once he is low, he will begin to enrage by casting “Genesis.” If he acquired too many Vulnerability Down, you will be unable to kill, until you eventually die yourself.
Your reward is a 30-minute Vulnerability Down Buff.
Lamia Queen
This fight will start off with “Petrification.” Look away or be killed. “Circle Blade” is then a point blank AoE; make sure to dodge. This mini-boss does have “Regen,” allowing it to heal over time, but it’s by far the easiest of the three.
Your reward this time is a 30-minute Regen Buff.
Now, on to the boss of floor 10.

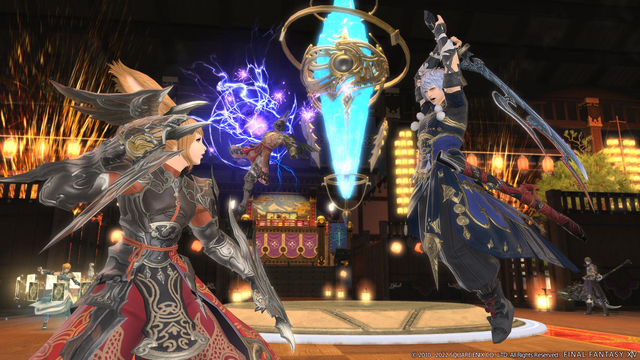
Boss: Gancanagh
The battle will start off with Authoritative Shriek.
You’ll notice that the arena is basically a 3×3 grid. When Authoritative Shriek is cast, a few of the tiles will start to radiate electricity. This indicates that very soon these tiles will erupt in a circular ground AoE. Just make sure to stand towards the inside of a tile that is not currently electrified. The explosions will not instantly kill you, but they apply a stacking Vulnerability Up debuff.
This happens twice before…
Mandrastorm
This is a proximity based AoE centered on the boss. Simply move away and wait for the cast to resolve.
As soon as it does resolve, the center column of tiles will electrify and have a 1 limitcut marker over them. Then another column will electrify with a “2” marker. The final column will be marked with a “3.” This is the order in which they will explode. So stand on the 3 column, and move into the 1 column after it explodes.
This series of mechanics repeat, (Authoritative Shriek → Authoritative Shriek → Mandrastorm) until you die, the boss dies, or your instance timer runs out. That’s all there is to it!

Eureka Orthos Floors 11-20
Notable new mobs include:
- Orthos Sawtooth: Has a tendency to do a frontal cone attack, but if you dodge behind it, it will cast “Mean Thrash.” This cleaves behind it and has a very short cast time.
Boss: Cloning Node
Offensive Command
Spawns Dragons around the Arena that cast “Flame Breath” down the center of the room.
You have some time to adjust after the AoE is shown. You can also stand next to any dragon that does not have a tether opposite to it and be safe. The AoE does not do much damage initially but applies a stacking Vulnerability Up.
This repeats twice. Then the boss will use Piercing Laser, a line AoE targeting a random player. If you’re in the line, just move.
Order Relay
Four dragons will be tethered at the start of the cast followed by the other four at the end. The dragons will attack in the order they are tethered. Find a safe spot to go to for the first, and then be ready to go to the next once the AoEs hit. This will be followed by two more Piercing Lasers.
These mechanics repeat (Offensive command → Order Relay → Piercing Laser → Piercing Laser → loop) until you win or lose.

Eureka Orthos Floors 21-30
Notable new mobs:
- Orthos Brobinyak: Combo of “Cold Gaze” (a simple gaze mechanic that you dodge by facing away from the enemy) into “Body Slam.” Dodge the gaze as per usual and just step out of Body Slam range.
- Orthos Demolisher: Will enrage under 30% HP, casting “Self-detonate.” Kill it quickly once it’s low, or flee past its line of sight.
- Othoknight: This will cast “Electromagnetism.” The attack will pull in players before hitting them with “Headspin.” This won’t kill you from max HP by itself, but it will bring you down to roughly 20%. Make sure to kill this particular mob quickly before this goes off, get out of line of sight, or outrange the attack.
Orthos Vanara: Late telegraph point blank AoE that one-shots at its base and stuns if you somehow survive the damage. Make sure to step out of range or kill the creature. - Lesser Orthos Dragon: Late telegraph ability: Swinge. Large conal AoE in front that you can dodge.
Boss: Tiamat Clone
1 – Creature of Darkness
Summons multiple Dark Wanderers in a line with a small gap. The line proceeds across the arena from one end to the other. Find the gap and pass through.
2 – Dark Wyrmwing
Cleaves the outer edges of the arena; stand in front of Tiamat to dodge.
This will also spawn more Dark Wanderers. Each side will alternate between a space and a Dark Wanderer. One side’s gap will be the other’s Dark Wanderer. Move to one side of the arena between one of the gaps, then move behind the Dark Wanderer to be safe from the other side.
3 – Dark Megaflare
Multiple ground AoEs appear. Dodge them as per usual.
Three of them will spawn large Dark Wanderers that move towards wherever the non-tank players were standing when the monsters first spawned.
This hits four times, but only the first two spawn Dark Wanderers, so there will be six Dark Wanderers moving around the arena in total. Just keep dodging the Wanderers and the ground AoEs.
4 – Whei Morn
This will spawn a marker under one player. Shortly afterwards, ground AoEs will pulse in the direction of the marked player. Five hits will happen and five more Dark Wanderers will spawn, each selecting a random player to travel in the direction of.
Stand on one side of the arena. Then, when the marker disappears, stand on the opposite until the last hit goes off, before finally moving away.
At the end of the Dark Wyrmtail is the opposite of the earlier Dark Wyrmwing, cleaving the center of the arena. Stand to the side.
Like the Wyrmwing, this will spawn alternating Dark Wanderers. However, since they start in the center, you can stand in a gap and simply wait.
This set of mechanics repeats (Creature of Darkness → Dark Wyrmwing → Dark Megaflare → Whei Morn → Dark Wyrmtail → loop) until you win or lose.
Have a party and are ready to move beyond? Head on over to our next guide which walks you through Eureka Orthos floors 31 to 70!