If you have no idea what a deep dungeon is in FFXIV, I can’t really blame you. There were only two in the game, after all, and the last one released way back in May 2018. If diving into Eureka Orthos as fast as possible is your goal, we’ve put together this guide for you which explains everything. From what the feature even is, how to unlock it, what all these weird words mean (Protomanders, Demiclones, etc) and what kind of rewards you can expect, we cover it all.
What is Eureka Orthos?
Eureka Orthos is a Deep Dungeon like Palace of the Dead or Heaven-on-High. Unlike those, however, it’s aimed at high level players and is significantly more difficult. You start off on floor 1 and work your way higher and higher with the difficulty increasing as you go. Whereas getting to floor 60 isn’t too hard of a task in the others, Eureka actually has a floor cap of 30 before it forces you to jump in with a premade party.
Every Floor in Eureka Orthos is a random mix of rooms and enemy encounters. Your party can tackle these in any order, trying to find any treasure and the exit to the next floor. Every ten floors, you will encounter a boss monster, but you can also find harder enemies called Dread Beasts.

How to Unlock Eureka Orthos
Once you’re level 81, have completed Endwalker, and have beaten floor 50 of Palace of the Dead, you can head over to Mor Dhona to unlock Eureka Orthos.
How to Get to Eureka Orthos
The entrance to Eureka Orthos is located in Eight Sentinels, through the Crystal Gate in Mor Dhona (X: 34.8, Y: 19.2). Once unlocked you can fast travel by talking to Burnel in Mor Dhona (X: 21.8, Y: 8.1) to fast travel there from near the aetheryte.
How Many Floors Are There?
There are 100 floors in Eureka Orthos, but only floors 1-30 are accessible to matched parties. If you want to go higher than that you’ll need to put together a fixed party in party finder or with friends. The good news is that story content ends at floor 30, anything after that is purely for the challenge and rewards.
We’ve split our floor guides up into three parts!
- FFXIV Eureka Orthos Floors 1-30 Guide – Mobs, Bosses, Tips
- FFXIV Eureka Orthos Floors 31-70 Guide – Mobs, Bosses, Tips
- FFXIV Eureka Orthos Floors 71-100 Guide – Beating Excalibur, Administrator, & Proto-Kaliya

How to Navigate the Map
Floor are randomly generated and your party will need to find and activate the Pylon of Passage on each floor. Activating it is as simple as killing enough enemies on the floor to power it up. The Pylon of Passage is displayed as a key on your minimap. It will be white with a blue glow when powered up. Gold, silver, and bronze coffers will also be displayed on your map. The final icon is the Pylon of Return which is also powered up by defeating enemies.
Resurrection
Speaking of the Pylon of Return, this is a method of resurrecting KO’d party members. Your healer can revive party members, of course, but should you lose access to those, this is the way to bring them back to life.

Strengthening Your Character
Even if you’re level 90, you’ll begin Eureka Orthos at level 81. As you eliminate enemies and bosses in the dungeon you’ll gain XP and level up to 90. This level is entirely independent of your level outside of the dungeon (though you do earn XP towards the class you enter with). All XP earned is fixed and doesn’t change based on party size or level difference.
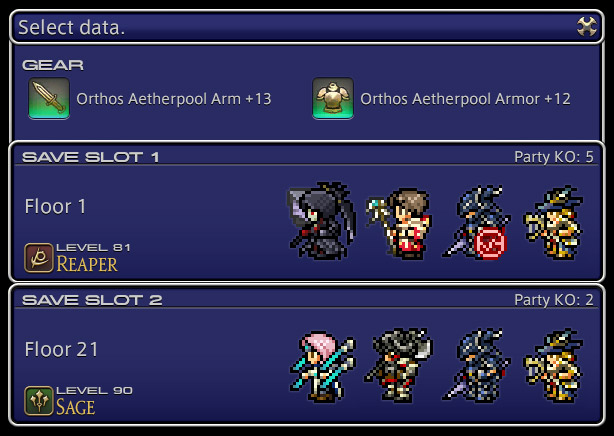
Your gear stats don’t matter either just like with the other deep dungeons. Rather than use your gear score, item level, and stats, deep dungeons use aetherpool arms and armor which starts at +1 and (sometimes) grow stronger when you open silver chests.
Growing stronger in Eureka Orthos is about level up to 90 and maximizing your aetherpool levels. Aetherpool gear level is retained throughout Eureka runs, meaning you can grind the lower levels to power yourself up for higher floors. The maximum strength of aetherpool gear is +99.

Protomanders
For Eureka Orthos, Square Enix has renamed Pomanders as Protomanders. You can find these consumables in golden chests, storing up to three of each at once. The inventory is shared across the entire party.
Each of these Protomanders provides a temporary buff like revealing the entire floor, transforming the user into a strong monster, or decreasing damage received.
Demiclones
When enemies drop silver coffers, there’s a chance for a Demiclone Generator to be inside. Using one of these summons an NPC to fight alongside the player that activated the tomestone. Just like with Protomanders, you can only hold three of each at once.
To learn more about each of the three different Demiclones and when it’s best to use them, head on over to our dedicated FFXIV Demiclones guide!
Traps
The floors of Eureka Orthos are littered with invisible traps that activate when stepped on. Some are simple land minds, exploding and dealing roughly 80% of HP to nearby players. Others can suddenly spawn enemies nearby, transform you into a toad, or silence you for 30 seconds.
Floor Effects
There is a chance for every floor to have an enchantment. Auto-heal penalty completely turns off HP regeneration. Inability completely disables the use of abilities. Others are less inconvenient and simply reduce accuracy, disable sprint, or turn off knockbacks.
Not all floor effects are bad, however, there are just a few that increase HP or decrease recast time.
Treasure Coffers
There are three types of treasure coffers: gold, silver, and bronze.
- Gold Coffer: May contain a protomander, but may also be a deadly Mimic.
- Silver Coffer: May strengthen either your aetherpool weapon or aetherpool gear or may explode, damaging everyone nearby.
- Bronze Coffer: May yield normal items like potions or Orthos aetherpool fragments.

Accursed Hoard
There’s actually a fourth type of coffer called the Accursed Hoard. These hard to find chests are invisible and only show up if you stand on their location for a few seconds. That’s obviously difficult to do in huge dungeons, but it can happen by accident. It’s far more likely that you’ll find them by activating a Protomander of Intuition which reveals them.
Based on what floor you’re on, you’ll either get a Bronze-tinged Sack, Silver-tinged Sack, or a Gold-tinged Sack. After leaving Orthos, bring these to Valeroine in Mor Dhona (X:34.9 Y:19.1) to discover what’s inside.

Rewards
Aside from the aforementioned Accursed Hoard sacks, Eureka Orthos does have some rewards built in. The most enticing reward is probably the Orthos weapons themselves which can only be obtained by sacrificing ten levels from both your aetherpool arm and aetherpool gear. But you can also earn Orthos Aetherpool Fragments and exchange those for Materia IX and Xs, a furniture item, and a few framing kits. The Synthesis Node in Mor Dhona (X:34.9 Y:19.0) is where you bring these.
Looking for all of the exclusive rewards like mounts, minions, and more? Head on over to our Eureka Orthos rewards guide!
If your class is level 90, you’ll receive the following:
- Floor 10
- 10 Allagan Tomestones of Poetics
- 20 Allagan Tomestones of Astronomy
- 5 Allagan Tomestones of Causality
- 1,000 gil
- Floor 20
- 20 Allagan Tomestones of Poetics
- 40 Allagan Tomestones of Astronomy
- 10 Allagan Tomestones of Causality
- 1,500 gil
- Floor 30 and beyond
- 30 Allagan Tomestones of Poetics
- 60 Allagan Tomestones of Astronomy
- 15 Allagan Tomestones of Causality
- 2,000 gil
If you are not yet max level, the rewards are a little different:
- Floor 10
- 10 Allagan Tomestones of Poetics
- Experience
- 1,000 gil
- Floor 20
- 20 Allagan Tomestones of Poetics
- Experience
- 1,500 gil
- Floor 30 and beyond
- 30 Allagan Tomestones of Poetics
- Experience
- 2,000 gil


