Final Fantasy XIV Patch 6.5 is finally here and with it, Warrior of Light gets near to their final confrontation in the Thirteenth. Before the whole journey that began by venturing into a voidgate gets to an end, Eorzea’s savior must first go to The Lunar Subterrane as their first step into stopping Golbez.
Players can unlock the Lunar Subterrane dungeon as they progress through the latest Mains Scenario quests. To assist them in facing off each boss in the dungeon, this guide covers each fight so they can quickly complete this dungeon and move on with the story.

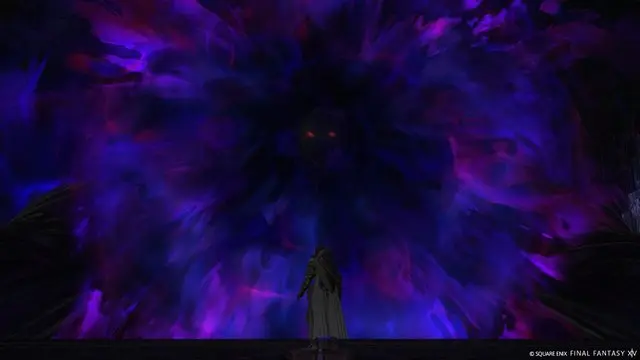
First Boss: Dark Elf in FFXIV
During their journey into the Lunar Subterrane, the first major boss players face is the Dark Elf. The arena of this fight is split into squares, which players must use to solve the mechanics. This is not a complicated fight but mistakes might lead to wiping out the whole party. The main mechanics of the fight are as follows:

- Hexing Staves: This is the main mechanic of the fight. Dark Elf will summon from two to three staves and place them in the arena. Players should keep in mind which squares the staves are in.
- Ruinous Confluence: When the boss casts this ability it means that the saves will explode. From each stave location, an explosion in a cross pattern unfolds. Players should avoid getting hit by them since the attack not only causes damage but it also afflicts Doom.

- Shadowy Sigil: This mechanic covers the whole arena with two symbols, a triangle and a square. Around the boss, one of the two will appear. Players should stand on the squares with the opposite symbol of the one that is around the boss.
- Sorcerous Shroud: By casting this ability, the boss will hide the staves conjured with Hexing Staves. Their position won’t change, but since they aren’t visible anymore, players must try to memorize their location.
- Void Dark II: Casted right after Sorcerous Shroud, this ability hits each player with an AoE attack, forcing the party to spread. Because the attack is resolved before the next Ruinous Confluence, players have a lot of time to get far from each other and then return to a safe spot.
Dark Elf also uses a tank buster and a quite strong party-wide attack called “Abyssal Outburst”. After Dark Elf has used each of these abilities, the rest of the fight is just combinations of Hexing Staves, Shadowy Sigil, and Void Dark II.
Second Boss: Damcyan Antlion in FFXIV
Damcyan Antlion is the second boss in the Lunar Subterrane dungeon. The arena is surrounded by pillars that eventually fall during mechanics. Players need to prepare to constantly move and worry about position themselves correctly in this fight.

- Sandblast: This is a party-wide attack with a long cast, making it easier for healers to prepare.
- Landslip: The boss will put four signs on the ground pointing north or south. Players will get pushed to these directions depending on where they are. Players should avoid getting thrown at the limit of the arena where players are afflicted with Filthy, taking damage over time.

- Antlion March: This mechanic is the usual sequence of thrusts. Players must find a safe spot based on where the boss is going to run through. Getting hit by it gives players stacks of Vulnerability.
- Earthen Geyser: This ability marks a player with a stack sign. Once the attack is resolved, players should spread since it leaves an area of quicksand based on where the group is stacked.
- Pound Sand: A simple AoE attack that usually follows the Earthen Geyser.
During the fight, when the boss casts Antlion March, it will hit the pillars that are marked by an exclamation sign. These pillars are the ones that will fall during the next Landslip. So players need to position themselves correctly to avoid getting caught by them when they fall. Besides that, nothing new happens during the fight.
Final Boss: Durante in FFXIV
In a circular arena, players face the last boss of the Lunar Subterrane dungeon, Durante. This is not a complicated boss to deal with but like the previous two, positioning is quite important.

- Old Magic: A party-wide attack that takes half of the HP bar from dps and healers. Preemptive healing should be timed to top players as soon as possible.
- Duplicitous Battery: One of the main mechanics of this fight, Duplicitous Battery consists of three sets of circular attacks cast on the arena. Because they are resolved in the same order as they appear, the best way to avoid getting hit is to stay in between the boss and the edge of the arena. Once the first attacks fall, players can move close to the boss.
- Forsaken Fount: This mechanic places spheres on the arena. The first time they appear, the spheres stay still and explode hitting a circular area around them.
- Fallen Grade: This attack usually appears during the Duplicitous Battery and hits each player with an AoE attack, forcing them to stay away from each other.
- Contrapasso: Always following the Forsaken Fount mechanic, Contrapasso splits the spheres and moves them around the arena. Players need to find the safe spot considering that each piece of a sphere explodes in a small circular area.

- Antipodal Assault: This attack marks one player with a linear stack sign and players must group to share the damage.
- Hard Slash: Based on where Durante went after using Antipodal Assault, the boss will cast this ability, which is a large frontal cone attack. Players should position themselves close to the boss and near the edge to avoid it.
- Twilight Phase: When using this ability, the boss conjures two sets of purple spikes, each facing one side of the arena. They hit anyone that is in front of them. Stay in the opposite direction to avoid their attacks.
- Dark Impact: Durante summons a giant purple orb that points to a specific spot on the arena and casts the ability. Players should stay away from this spot as much as they can to avoid getting hit by the explosion after the casting is finished.
- Death’s Journey: This last mechanic places purple lines on the ground all over the arena. Players must stay in the space that separates one line from the other – and far from the boss – to avoid the linear attack that will come out of each line.
After players have gone through all these mechanics and Durante is still alive, the boss gets back to Forsaken Fount and keeps using the same abilities from there.