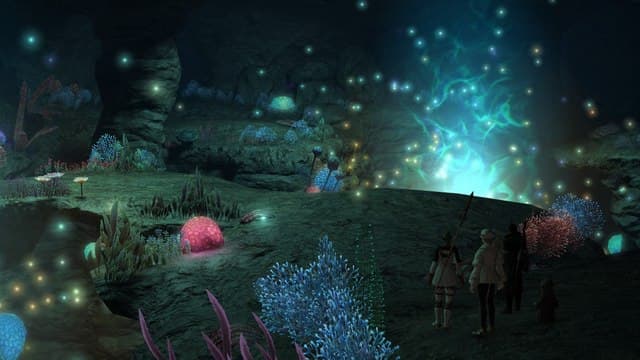
The dense forests of the Black Shroud hide all manner of beasts that threaten Gridania and its surrounding towns. At a dig site, the Warrior of Light will find something much worse, however. Here lies The Tam-Tara Deepcroft, a forgotten crypt of the Gelmorran civilization and the place where a group of acolytes seek to connect with the Void.
The Tam-Tara Deepcroft is the second dungeon in Final Fantasy XIV: A Realm Reborn. It’s a level 16 duty unlocked as part of the main scenario quest “Fire in the Gloom.” After your foray into Sastasha, Square Enix turns up the heat and begins a plotline that continues on through A Realm Reborn. The Void is bad, kids.
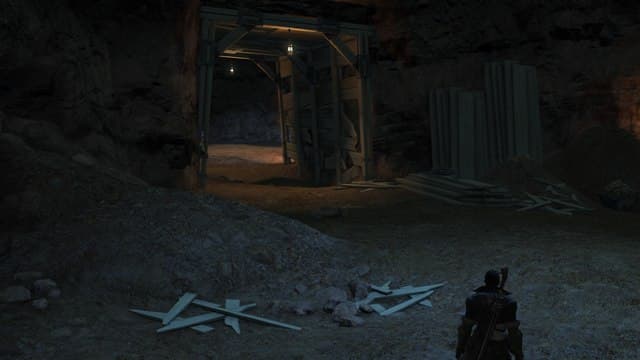
First Mob Pulls – Greenwood Altar
The Tam-Tara Deepcroft has a unique shape to it. Rather than being a straightforward path, it’s a dungeon where your journey will see you curving around the central floating summoning orb. The orb is protected by shields that can only be taken down by interacting with four Cultist Orbs.
The first encounter you have is with two Ak-Inik Varlets, humanoid enemies who use basic Lancer weaponskills. After killing them, you can’t move forward; instead, you’ll head to the east, around the outer part of the chamber. You’ll face two Fleshfly Swarms, and beyond them to the northeast will be a door. More Fleshfly Swarms, Ak-Inik Varlets, and Carrion Beetles will bar your path to the first “boss.” Along the way is a small offshoot room with a treasure chest guarded by two Croftlights, but you can avoid this room if you want.

First Boss: Void Soulcounter
This type of fight will repeat on your way through the Deepcroft. Here, you’ll face off against a Dalamud Priest and two Gravediggers. The Priest will cast Fire, which is interruptible, but moves so quickly and hits so weakly that it’s not worth your time. The Gravediggers will cast Blizzard.
When all three are dead, a Void Soulcounter will appear. Its basic attacks include Dark Orb and Enthunder, which are both single-target attacks. It also hits you with…
- Condemnation: A conal AoE that simply deals damage.
Once the Void Soulcounter dies, a treasure chest will spawn and you can interact with the Cultist Orb on the altar to weaken the summoning orb. Head south to move on.
Second Mob Pulls – Hardwood Altar
On this second leg, you’ll run into a new humanoid enemy, the Ak-Mena Groundsman. These are essentially Marauders and have the only attack you need to watch out for, the conal AoE Overpower. Otherwise, there will be a mix of Fleshfly Swarm, Croftlights, Deepcroft Mitelings, and Ak-Mena Varlets (Thaumaturge).
Follow the path and you’ll run into another Void Soulcounter fight, this time starting with a Dalamud Priest and three Gravediggers. It all dies the same however, leaving you with a treasure chest and another Cultist Orb.
Third Mob Pulls – Wormwood Altar
The only addition here is the Yarzon Feeders. Nothing special and nothing you need to worry about. Just keep going slow and steady.
There will be a Sealed Barrier preventing you from touching the last two Cultist Orbs. Kill the group in front of the barrier itself, then head northwest to find another group guarding a Cultist Rosary. Take the Rosary and go back to the Sealed Barrier to open it.
You’ll fight the named enemy Octavel the Unforgiving and four Gravediggers. Despite the name, Octavel fights and dies just like any other Dalamud Priest. In death, every enemy gives way to another Void Soulcounter. You know how this goes — kill the Soulcounter and interact with both Cultist Orbs. This will raise a bridge to the center platform.

Second Boss: Galvanth the Dominator
This is the final boss of The Tam-Tara Deepcroft. This monster of the Void seeks your death and the death of those who summoned it. You’ll fight in a circular arena with various altars around the outer edge.
- Water: A single-target spell on the tank.
- Drain Touch: Drains HP from the boss’s target and transfers it to the boss.
- Mind Blast: A circle AoE that deals damage and inflicts Paralysis.
When Galvanth hits 80%, 60%, and 30% health, it’ll summon one or more Inconspicuous Imps and tether them. While the Imps are alive, Galvanth will be invulnerable, so burn them down to damage the boss again. Later versions of this mechanic will also summon Deepcroft Mitelings and Skeleton Soldiers. Tanks, make sure to pick up these additional enemies.
Outside of the adds it summons, Galvanth is nothing more than a Voidnoob whom the party can burn down in short order. With the Deepcroft cleared of evil, you’ve finished your second dungeon! Good job, young Warrior of Light! We shall follow your career with great interest. If you need help with the next FFXIV dungeon, we’ve got you covered here at The Linkshell.

The Tam-Tara Deepcroft Gear and Loot
We all know why we’re doing this, right? To protect the peace of Eorzea sure, but also for that sweet, sweet experience and gear. Below, you’ll find a list of all the gear you can roll on throughout the dungeon. The items are all for level 15 classes/jobs at item level 17. If you want to see how each piece of gear looks, you can check that out in our model viewer!
Void Soulcounter #1 Treasure Coffer
| ITEM | SLOT | LEVEL | ILVL | CLASS/JOB/ROLE |
| Plundered Celata | Head | 15 | 17 | GLA/MRD/PLD/WAR/DRK/GNB |
| Plundered Goggles | Head | 15 | 17 | Disciple of War |
| Plundered Cavalier’s Hat | Head | 15 | 17 | Disciple of Magic |
| Plundered Gauntlets | Hands | 15 | 17 | GLA/MRD/PLD/WAR/DRK/GNB |
| Foestriker’s Mitts | Hands | 15 | 17 | Disciple of War |
| Acolyte’s Halfgloves | Hands | 15 | 17 | Disciple of Magic |
Void Soulcounter #2 Treasure Coffer
| ITEM | SLOT | LEVEL | ILVL | CLASS/JOB/ROLE |
| Plundered Celata | Head | 15 | 17 | GLA/MRD/PLD/WAR/DRK/GNB |
| Plundered Goggles | Head | 15 | 17 | Disciple of War |
| Plundered Cavalier’s Hat | Head | 15 | 17 | Disciple of Magic |
| Plundered Gauntlets | Hands | 15 | 17 | GLA/MRD/PLD/WAR/DRK/GNB |
| Foestriker’s Mitts | Hands | 15 | 17 | Disciple of War |
| Acolyte’s Halfgloves | Hands | 15 | 17 | Disciple of Magic |
| Plundered Ear Cuffs | Earrings | 15 | 17 | All Classes |
| Plundered Earrings | Earrings | 15 | 17 | All Classes |
| Aetherial Brass Gorget | Necklace | 15 | 17 | All Classes |
| Aetherial Brass Wristlets | Bracelets | 15 | 17 | All Classes |
Void Soulcounter #3 Treasure Coffer
| ITEM | SLOT | LEVEL | ILVL | CLASS/JOB/ROLE |
| Plundered Cuirass | Body | 15 | 17 | GLA/MRD/PLD/WAR/DRK/GNB |
| Foestriker’s Tabard | Body | 15 | 17 | Disciple of War |
| Acolyte’s Robe | Body | 15 | 17 | Disciple of Magic |
| Plundered Trousers | Legs | 15 | 17 | GLA/MRD/PLD/WAR/DRK/GNB |
| Foestriker’s Skirt | Legs | 15 | 17 | Disciple of War |
| Acolyte’s Skirt | Legs | 15 | 17 | Disciple of Magic |
Galvanth The Dominator Treasure Coffer
| ITEM | SLOT | LEVEL | ILVL | CLASS/JOB/ROLE |
| Plundered Falchion | Weapon | 15 | 17 | GLD/PLD |
| Plundered Battleaxe | Weapon | 15 | 17 | MRD/WAR |
| Plundered Guisarme | Weapon | 15 | 17 | LNC/DRG |
| Plundered Knuckles | Weapon | 15 | 17 | PGL/MNK |
| Plundered Knives | Weapon | 15 | 17 | ROG/NIN |
| Plundered Shortbow | Weapon | 15 | 17 | ARC/BRD |
| Plundered Staff | Weapon | 15 | 17 | THM/BLM |
| Plundered Grimoire | Weapon | 15 | 17 | ARC/SMN/SCH |
| Plundered Cane | Weapon | 15 | 17 | CNJ/WHM |
| Warded Round Shield | Shield | 15 | 17 | GLD/PLD |
| Plundered Sabatons | Feet | 15 | 17 | GLA/MRD/PLD/WAR/DRK/GNB |
| Foestriker’s Boots | Feet | 15 | 17 | Disciple of War |
| Acolyte’s Thighboots | Feet | 15 | 17 | Disciple of Magic |
| Faded Copy of Dark Vows | N/A | N/A | N/A | N/A |
Extra Treasure Coffer #1 (X: 9.2 Y: 7.8)
| ITEM | SLOT | LEVEL | ILVL | CLASS/JOB/ROLE |
| Plundered Sabatons | Weapon | 15 | 17 | GLA/MRD/PLD/WAR/DRK/GNB |
| Foestriker’s Boots | Weapon | 15 | 17 | Disciple of War |
| Acolyte’s Thighboots | Weapon | 15 | 17 | Disciple of Magic |
| Plundered Ear Cuffs | Earrings | 15 | 17 | All Classes |
| Plundered Earrings | Earrings | 15 | 17 | All Classes |
| Aetherial Brass Gorget | Necklace | 15 | 17 | All Classes |
| Aetherial Brass Wristlets | Bracelets | 15 | 17 | All Classes |
Extra Treasure Coffer #2 (X: 7.9 Y: 9.3)
| ITEM | SLOT | LEVEL | ILVL | CLASS/JOB/ROLE |
| Plundered Cuirass | Body | 15 | 17 | GLA/MRD/PLD/WAR/DRK/GNB |
| Foestriker’s Tabard | Body | 15 | 17 | Disciple of War |
| Acolyte’s Robe | Body | 15 | 17 | Disciple of Magic |
| Plundered Trousers | Legs | 15 | 17 | GLA/MRD/PLD/WAR/DRK/GNB |
| Foestriker’s Skirt | Legs | 15 | 17 | Disciple of War |
| Acolyte’s Skirt | Legs | 15 | 17 | Disciple of Magic |
Extra Treasure Coffer #3 (X: 4.7 Y: 9.9)
| ITEM | SLOT | LEVEL | ILVL | CLASS/JOB/ROLE |
| Plundered Falchion | Weapon | 15 | 17 | GLD/PLD |
| Plundered Battleaxe | Weapon | 15 | 17 | MRD/WAR |
| Plundered Guisarme | Weapon | 15 | 17 | LNC/DRG |
| Plundered Knuckles | Weapon | 15 | 17 | PGL/MNK |
| Plundered Knives | Weapon | 15 | 17 | ROG/NIN |
| Plundered Shortbow | Weapon | 15 | 17 | ARC/BRD |
| Plundered Staff | Weapon | 15 | 17 | THM/BLM |
| Plundered Grimoire | Weapon | 15 | 17 | ARC/SMN/SCH |
| Plundered Cane | Weapon | 15 | 17 | CNJ/WHM |
| Warded Round Shield | Shield | 15 | 17 | GLD/PLD |
| Nightprowler’s Targe | Shield | 15 | 17 | GLA/CNJ/THM/PLD/WHM/BLM |
| Pirate’s Bandana | Head | 15 | 17 | Disciple of War |
| Plundered Haubergeon | Body | 15 | 17 | GLA/MRD/LNC/PLD/WAR/DRG/DRK/GNB/RPR |
| Plundered Jacket | Body | 15 | 17 | Disciple of War |
| Plundered Bliaud | Body | 15 | 17 | Disciple of Magic |
| Plundered Moccasins | Feet | 15 | 17 | Disciple of War |
| Plundered Duckbills | Feet | 15 | 17 | Disciple of Magic |