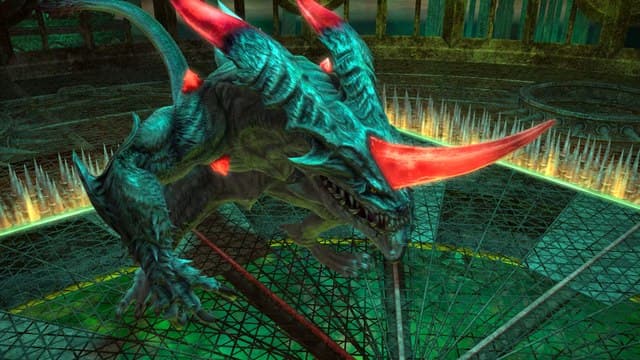
Abyssos: The Eighth Circle Raid Guide (Pandaemonium) - FFXIV Patch 6.2

With the final entry into our Abyssos raid guides, we help you face the master of Abyssos.

Another round of circles comes to an end in Final Fantasy XIV with Abyssos: The Eighth Circle. At the end of all things, Themis and Lahabrea join the Warrior of Light in facing Hephaistos for the last battle of this raid tier. This twisted shade of Lahabrea seeks to bring back Athena, his wife and the mother of Erichthonios. If neither aspect of Lahabrea is behind Pandaemonium’s fall, then who is?

Each encounter in Abyssos is a single fight, similar to a trial, which you’re probably aware of by now. So, we welcome you to the final fight of this wing with our Abyssos: The Eighth Circle raid guide. You’ll fight Hephaistos within a square arena. The edge is a burning hazard zone that will kill you instantly. In fact, fire seems to be the overall theme of this encounter.

Be warned that raid guides contain light spoilers for the fight. If you prefer to preserve the surprise of raids for yourself, give them a try first before referring to a guide. Then, come back here for some help if you have trouble!

FFXIV Abyssos Eighth Circle Sunforge

How to Defeat Hephaistos – Phase One

Hephaistos has his own attack patterns, but some of them recall the previous bosses that you’ve faced in Abyssos. Overall, this is a more straightforward fight than Sixth and Seventh Circles. 

  • Genesis of Flame: A raid-wide AoE that takes more than half health for non-tanks. Healers, be prepared.
  • Sunforge: This attack comes in two versions, but Hephaistos will move to the center for both. If you see the burning Chinese dragon twisting around him, he will attack with medium-sized line AoE through the center of the arena (north/south). Move to the sides to avoid damage. If you see the phoenix behind him, then the line AoEs will be on both sides of the arena (east and west), with the center as the safe spot. Getting hit by Sun’s Pinion will give you a Vulnerability Up stack.
  • Flameviper: The boss targets the main tank with a line AoE. If you get the marker, move away from the rest of the raid. This will also inflict a Bleeding debuff on the target.


  • Reforged Reflection: This is Hephaistos’ main mechanic, where he shifts forms to mirror previous Pandaemonium bosses, either Hippokampos or Hegemone. The order may be different in your run, so refer to the section that reflects his transformation.

FFXIV Abyssos Eighth Circle Blazing Footfalls

How to Defeat Hephaistos – Hippokampos Form

As the name suggests, this form looks like the Hippokampos from Asphodelos: The Second Circle.

  • Blazing Footfalls: Hephaistos moves to one edge of the arena. During the cast, there will be a series of knockback markers that appear in order. The first, Trailblaze, will be a charge through the center, pushing the entire raid to either side. Stay near the center yourself to avoid being pushed into the instant kill hazard zone. The subsequent attacks, Quadrupedal Impact, will see Hephaistos pouncing on the edge of the arena previously marked. You have to remember the order and get close each time to prevent from being knocked back into the hazard zone.
  • Rearing Rampage: A raid-wide AoE. Doesn’t hit too hard, heal through it.

  • Fourfold Fires: This will come after his first Reforged Reflection form. Hephaistos will mark the four corners of the arena with proximity markers; stack in the center to minimize damage. The markers will resolve into four fire puddles and Hephaistos will immediately tether to two of them with..
  • Cthonic Vent: Two of these fire puddles become active, indicated by a tether from the boss and the puddles’ rumbling with magma. Eventually, they’ll explode in large circle AoEs. Stay away from active puddles to avoid damage. Shortly after, dragons will leap from the explosions to two different puddles, making them active and repeating the attack. You merely have to pay attention to where the dragons land and position yourself away from both. The dragon will reposition one more time before moving on.

FFXIV Abyssos Eighth Circle Into the Shadows

How to Defeat Hephaistos – Hegemone Form

This form somewhat recalls Hegemon from Abyssos: The Seventh Circle.

  • Into the Shadows: Hephaistos moves to the center of the arena. He’ll summon two gaze markers that zip around the arena separately. When they stop moving, Gorgons will appear and cast Petrifaction. Face away from both of them to avoid being petrified. The Gorgons will begin casting…
  • Gorgoneion: Both adds have to be burned down by the party, otherwise they’ll… well we actually don’t know. It’s probably bad.
  • Gorgospit: Hephaistos will target a random raid member with a long and wide line AoE. Avoid this or get poisoned.
  • Ektothermos: Raid-wide AoE that hits pretty hard. Heal through it.

FFXIV Abyssos Eighth Circle Volcanic Torches

  • Volcanic Torches: This comes after the second Reforged Reflection. Blue flames will trace around the major segments of the arena. They will eventually trace out two or three rectangular columns. You don’t want to be inside any of them when they enclose, because you’ll get hit with Torch Flame and a Vulnerability Up. Pay attention to the shapes being traced. 
  • Hemitheos’ Flare: Hephaistos marks four raid members with circle AoE markers. Move away from the party to avoid damaging others. 

From here, Hephaistos will keep switching between forms until the end of the fight. It’s worth noting that after this point, Fourfold Fires and Volcanic Torches will be used together, alongside Hemitheos’ Flare on the entire raid. Keep calm and Abyssos’ end will be your reward.

Abyssos Eighth Circle – Loot Table

Finishing off Hephaistos will reward the raid with two Treasure Coffers. These coffers will have a mix of gear tokens. You can only pick up one token from each circle of Abyssos each week, so you have to choose wisely.

These tokens can be traded into Mylenie in Labyrinthos (X: 8.3, Y: 27.6) or Djole in Radz-at-Han (X: 10.3, Y: 9.6). Each piece of gear requires a certain number of tokens:

  • Head: Unsung Helm of Abyssos x2
  • Body: Unsung Armor of Abyssos x4
  • Hands: Unsung Gauntlet of Abyssos x2
  • Legs: Unsung Chausses of Abyssos x4
  • Feet: Unsung Greaves of Abyssos x2
  • Accessories: Unsung Ring of Abyssos

You will also automatically get an Unsung Blade of Abyssos token once a week for completing the Eighth Circle. Once you have seven of these, you can trade them to Djole or Mylenie for an Ultralight Tomestone. (It’s the last option in “Unsung Relic of Abyssos Exchange”.) Once you have this tomestone and 500 Allagan Tomestones of Causality, you can talk to Cihanti in Radz-at-Han (X: 10.8, Y: 10.4) to gain one of the new Item Level 620 Lunar Envoy weapons.

If you’re tackling this raid, then you’ve already dove headfirst into Patch 6.2! It’s a big meaty patch with a whole lot of things to do. If you wanted to dive into the Island Sanctuary, we’ll tell you exactly how to unlock it and some helpful guides on how to progress! Those who are looking to raid might want to take a look at all our Pandaemonium Abyssos guides. Either way, we have a ton of FFXIV content over at the Linkshell!

The rest of our Abyssos guides are available at the links below.

About the Author