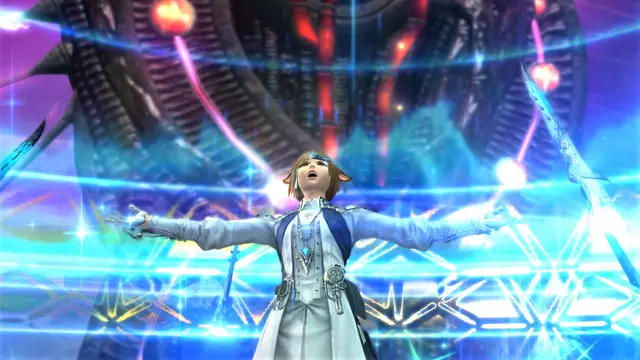
Stand tall, Warriors of Light! You have entered the Tower of Babil, the second dungeon of Final Fantasy XIV: Endwalker. While the Tower of Zot was simply the first foray into the monstrous plans of the Ascian Fandaniel, this is the focus of the immortal’s plan.
Be warned that dungeon guides contain spoilers. If you prefer to preserve the surprise of dungeons for yourself, give them a try first before referring to a guide. Then, come back here for some help if you have trouble!
First Mob Pull
You’ll begin by hiding on a Garlean supply train and sneaking into the tower itself. You’ll run into various groups of enemies, but none of them have any notable attacks you need to watch out for. Gather them up and burn them down as you make your way through the train. Eventually, you’ll come to your first boss encounter.

First Boss: Barnabas
This hulking Frankenstein’s Monster-like creature mirrors his previous appearance in Final Fantasy IV. Like in that game, he’ll begin by trying to mercilessly dispatch his creator, Dr. Lugae, with his first attack. The circular arena will be covered with a small ring on the outer edge. Touching this will cause you to take damage and get a vulnerability debuff. Barnabas’ major attacks are as follows:
- Ground and Pound: The is a line area-of-effect (AoE) aimed at a single player. The marking of this attack is delayed, but Barnabas will aim directly at the player it’s attacking and rear back with its right arm.
- Dynamic Scrapline: This action tethers the entire party to the boss and marks players with a Plus or Minus Polarity. A small point-blank AoE with its own Polarity marker will telegraph around the boss. If your Polarity is opposite the boss’, you’ll be pulled toward it; if it’s the same, you’ll be pushed away. You want to position yourself so that you’re not pulled into the AoE, but also not pushed out into the electrified ring.
- Shocking Force: This is a simple stack marker. Stack the entire Light Party to minimize damage.
- Dynamic Pound: Barnabas moves to one edge of the arena and begins to cast a line AoE. Similar to Dynamic Scrapline, the AoE marker will have a Polarity and the entire party will be tethered to the boss, with each member receiving their own polarity icon. As before, position yourself so that you’re not pulled into the AoE nor pushed out into the electrified ring. The east and west sides of the playable space have enough room for positioning.
- Thundercall: Barnabas summons four electrified orbs at the cardinal positions (north, south, east, and west) of the arena. Eventually, these will explode in circular AoEs when the boss casts…
- Rolling Scrapline: A point-blank AoE around the boss. You have to find the safe zones between this and Thundercall to avoid damage.
There’s nothing else to Barnabas. You’ll see the above attacks in roughly the listed order, and then it’ll repeat the attacks in various combinations. Dodge the damage, burn the boss.
Second Mob Pull
This is an elevator ride into the tower proper. You’ll face four waves of enemies, each getting stronger until they culminate in a Babil Colossus and Babil Rearguard. These hit slightly harder than the rest but aren’t difficult at all. You’ll find yourself in a hallway with one more trash pull and then you’ll face the second boss.

Second Boss: Dr. Lugae
This fight can seem confusing, but it’s rather simple. Dr. Lugae begins on the northern end of a square arena while the center is flanked on either side by two square icons. The left Green Icon will turn you into a frog when it’s active; the right Purple Icon will shrink you down. These are both key to avoiding a major damage source of the fight.
- Thermal Suppression: A medium-damage party-wide AoE. Heal through it.
- Magitek Missile: Dr. Lugae will shoot two missiles into the air that will come down on two random circle AoE markers.
- Magitek Ray: A line AoE that will target one random player.
- Magitek Explosive: Dr. Lugae will summon three huge spike ball mines. After a delay, these mines will perform line AoEs in four directions. You need to find the safe spot in-between these overlapping AoEs.
Then, Dr. Lugae will cast one of two attacks — both will kill you if you’re not prepared. Once cast, the will activate the Green and Purple Icons on the arena.
- Downpour: This applies the Breathless debuff to everyone in the arena. The debuff will force you to move slower and kill you outright at eight stacks. You want to jump into the Green Icon, which will turn you into a frog for 20 seconds and remove Breathless. Don’t step onto the plate again as it will refresh the frog buff; it’s meant to last the length of Downpour. You’ll turn back into yourself once it’s done.
- Magitek Chakram: This attack will summon a line of chakrams that will cover the entire arena. These will attack twice, taking away around half your HP each time. You want to stand on the Purple Icon, which will shrink you down and allow you to avoid the damage.
Dr. Lugae will cast either Downpour or Magitek Chakram during the fight at normal intervals. Once you have those two mechanics down, this is an easy fight.
Third Mob Pull
The final leg of the Tower of Babil is upon us. Here, you’re navigating the upper reaches of the tower itself, all decked out in weird, H.R. Giger-esque voidsent carapace. It’s worth noting that each circular section of these catwalks is guarded by a massive claw. This claw will hit the center of the platform with a circle AoE on a set interval. You can avoid it by pulling the enemies to the straightaways or fighting on the edges, which are safe from the AoE.

Third Boss: Anima
And so we face the Eikon of Eikons, born of the shattered hopes of the Garlean Empire. While Anima looks like something out of your nightmares, you’ll be able to survive with the proper knowledge. This is a two-phase fight, moving from the first stage to the second, and then back again. You’ll be facing Anima in a square arena.

Phase One – Anima
This is the feel-out phase, where Anima gives you some of its basic attacks to let you know how the fight works. These attacks will likely come in this order at first, and then at random as the fight continues.
- Lunar Nail: This places Lunar Nails around the arena, dividing it into quadrants. These nails will then tether to each other. The space inside of these tethers is dangerous because of the next attack.
- Phantom Pain: An AoE attack covering the spaces defined by the Lunar Nails. Stay out of those spots to avoid damage.
- Mega Graviton: A simple party-wide AoE. Heal through it.
- Pater Patriae: A line AoE down the center of the arena. Avoid this, but also stay away from the corners because Anima will simultaneously cast the following attack…
- Aetherial Pull: This tethers every player in the party to their own Void Orb. Your tether will start purple with massive arrows pointing at you. Move away from your orb until your tether becomes an orange thread. This is the safe distance. At the end of the Aetherial Pull cast, you’ll be dragged to your Void Orb. If you’re not at a safe distance, you’ll take damage.
- Boundless Pain: This pulls the entire party in the center of the arena. The boss will begin casting a circle AoE attack that does consistent damage and expands outwards. You’ll want to run out to the corners of the arena to avoid taking too much damage.

Phase Two – Anima’s Dimension
When this phase begins, Anima will pull you down into the arena itself and deposit you into another dimension. A Chaos gauge will appear; if this fills up, it’s likely a party wipe. You need to kill this form of Anima before that happens. You have very few attacks to worry about.
- Obliviating Claw: This summons a series of claws, first on one side of the arena and then the other. Each claw will cast a line AoE across the entire platform. Look to the spaces between claws to avoid the damage. Make sure to keep track of the second set of claws on the other side, as they have a different series of safe spots. Dodge one set, and then the other.
- Coffin Scratch: This will select two party members with a circular marker and set of arrows. When this attack is cast, it will summon a series of claws that will track the path of their marked targets. Marked players should drag these away from the others and make sure to not cross paths.
- Oblivion: This is the attack that comes once you defeat this phase of Anima. The boss slams the ground a few times before creating an explosion that covers the entire arena. The damage taken is dependent on the amount of energy in the Chaos gauge.
At the end of the Oblivion cast, Anima will return back to the first phase. The only difference here is the addition of a new attack.
- Erupting Pain: This marks every player in the party with their own personal circle AoE marker. Spread out to avoid sharing the damage.
And with that, you’ve finished the Tower of Babil. Anima has been defeated and it’s time to turn your sights to a completely different location entirely — one that’s perhaps a bit less terrestrial.
If you’re curious about how to play the new Sage or Reaper in Endwalker, check out our guides for those Jobs as well as the expansion’s aether currents, dungeons, and trials.
If you’re looking for other dungeon or trial guides, you’ll find the links to those below:
- FFXIV Endwalker Dungeon Guide: Tower of Zot
- FFXIV Endwalker Trial Guide: The Dark Inside
- FFXIV Endwalker Dungeon Guide: Vanaspati
- FFXIV Endwalker Dungeon Guide: Ktisis Hyperborea
- FFXIV Endwalker Dungeon Guide: The Aitiascope
- FFXIV Endwalker Trial Guide: The Mothercrystal
- FFXIV Endwalker Dungeon Guide: The Dead Ends
- FFXIV Endwalker Trial Guide: The Final Day