Final Fantasy 14: Shadowbringers is the next addition for Final Fantasy 14, the fantastic MMO from Square Enix. The expansion arrives on July 2, 2019 (or June 28 if you pre-order), and with it comes an entirely new series of dungeons, storylines, and locations to explore. Naturally, you want to spend your free time in those new areas as much as possible, right? The savvy player should knock out as much of the old stuff as they can before progressing to the new. And that, dear reader, is what we’ve got for you: a checklist of everything you should do to before Shadowbringers and Final Fantasy 14 version 5.0! Let’s take a look at the tips.
- Navigating the Confusing, Horny World of MMO Roleplay
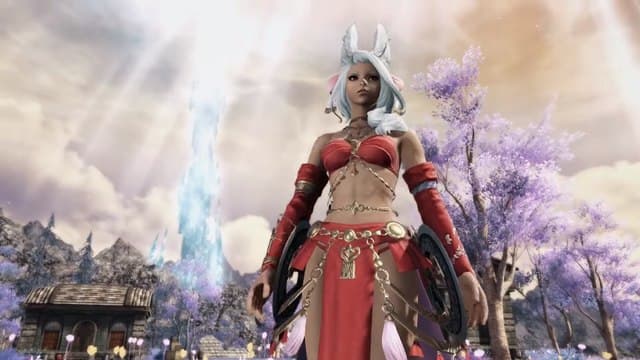
- Final Fantasy 14: Shadowbringers Has a Release Date and a NieR: Automata Crossover
- A Definitive Ranking of All Seven Copies I’ve Owned of Final Fantasy IX
Buddy Up With Beast Tribes (Kojin, Ananta, and Namazu)
Every Final Fantasy 14 expansion has a core set of side quests to complete that delve into the lore of the land and its inhabitants. As with the Vanu Vanu, Gnath, and Moogle quests in Heavensward, Stormblood brought three new “Beast Tribes” into the game: two combat-related tribes and one all about crafting. These Beast Tribe quests offer a closer look into the non-city-state denizens of Eorzea, and reward players with two main things. You get Job EXP (and loads of it, scaled to your level), as well as pets and mounts. The Namazu dailies in particular are fantastic for saving money and time while leveling your crafting jobs.
If you are unsure about what Job you want to play in Shadowbringers, you can level your alternate jobs using Stormblood Beast Tribe quests. The only requirement is that the Job you want to boost must be at least level 60. The difficulty of these quests will scale from 60 to 70 based on your level. You can accept up to 12 Beast Tribe quests daily, but the tribes normally only offer three to six quests a day anyways.
In order to access these quest chains, you must complete the Main Scenario Quests for each area that the Tribe is located within. See below for information on how to unlock the Beast Tribes of Stormblood:
- The Kojin (Combat Beast Tribe // Located: Tamamizu, The Ruby Sea)
- Quest Requirement: MSQ “Tide Goes In, Imperials Go Out” (Combat Level 63 // The Ruby Sea)
- Beginning Quest: “Heaven-sent” (Combat Level 60 // The Ruby Sea)
- The Ananta (Combat Beast Tribe // Located: Castellum Velodyna, The Fringes )
- Quest Requirement: MSQ “The Rose Blooms Twice” (Combat Level 67 // The Fringes)
- Beginning Quest: “Brooding Broodmother” (Combat Level 60 // The Fringes)
- The Namazu (Crafting Beast Tribe // Located: Doroh Iloh // The Azim Steppe)
- Quest Requirement: MSQ “In Crimson They Walked” (Combat Level 66 // The Azim Steppe)
- Subquest Requirement: “Kurobana vs. Gyorin” (Combat Level 64 // Yanxia)
- Beginning Quest: “Something Fishy This Way Comes” (Crafting Level 60 // The Azim Steppe)

Begin Doman Reconstruction – Final Fantasy 14: Shadowbringers
Once you progress well into the post-Stormblood Main Scenario Quest, you will eventually unlock a new Aetheryte and area: The Doman Enclave. This location serves as the hub for the majority of the post-version 4.0 plot; however, it also features a side quest with both rewarding story and loot
You see, The Doman Enclave is kind of ragged and worn-out. War is apparently bad for small villages… Who knew? That’s where you come in, though! By simply donating a pittance of items every week, you can help restore the Enclave back to its former glory.
Doman Reconstruction actually restricts how much you can donate every week — equivalent to 20,000 gil per week, at most. But that number resets on Tuesdays like every other weekly event. The total, required amount of money to complete the side quests is 270,000; therefore it will take a full 14 weeks to max out your contributions and unlock every item from the corresponding vendor. Better get started now, because odds are good you’ll forget this place exists once Shadowbringers launches!
You can start the Doman Reconstruction quest chain here:
- Doman Enclave Reconstruction
- Quest Requirement: MSQ “Elation and Trepidation” (Combat Level 70 // The Ruby Sea)
- Beginning Quest: “Precious Reclamation” (Combat Level 70 // The Doman Enclave)

Boss FATEs (Fox & Ixion) ASAP – Final Fantasy 14: Shadowbringers
These two big FATEs aren’t going anywhere after launch the launch of Shadowbringers, but you can bet that interest in actually completing these events will wane once the new expansion lands — and these particular FATEs require a lot of players to clear. You will absolutely need all the help you can get, while you can still get it. Farm them now while there’s still time!
- Foxy Lady (Level 70 UNMARKED FATE // Yanxia // Respawn Timer – 12-24 hours)
- Spawns 5 to 45 minutes after clearing the marked FATE “Outfoxed”, also in Yanxia.
- Drops “Sassho-seki Fragments,” which are traded in for fox-related pets and gear in Rhalgar’s Reach. You can earn 15 Fragments for a Gold clear, and only need 12 for all the items.
- If Foxy Lady is active, a Namai Elder will spawn at the broken shrine located in The Heron’s Flight.
- A Horse Outside (Level 70 UNMARKED FATE // The Lochs // Respawn Timer – 36-72 hours)
- When Ixion is active, the weather changes to a unique type – Quicklevin.
- Requires the item “Stygian Ash” to be used, to remove an invulnerability shield. Stygian Ash can be obtained from Timeworn Gazelleskin Maps uncommonly.
- You need 17 “Ixion Horns” to get both the mount and the pet, also sold in Rhalgar’s Reach. You can get six horns for a Gold clear, and three horns for a Silver clear.

Eureka, The Forbidden Land; AKA “Wow It’s Final Fantasy XI Why Is This in My Good MMO?”
If you’ve never been to Eureka, or even just heard about it, it’s essentially a Final Fantasy XIV recreation of Final Fantasy XI. You do not level via quests: only from killing monsters or participating in Notorious Monster fights (basically giant boss FATEs). Your combat level is further replaced with an “Elemental Level.”
Monsters themselves range from levels 1-25 in Anemos, and higher in Pagos, Pyros, and Hydatos. You cannot even mount at first (not until you reach level 17). Oh, and if you die from level six onwards, you will lose experience… as well as whole levels, if it happens enough. Needless to say, Eureka is dangerous.
Starting out, you will need to spend time grinding monsters for your Challenge Log. There is a Eureka-only section, and completing all of the log entries for your first week will jump you to around level 11. Then you can participate in the “NM Train,” or a Notorious Monster hunting party. It’s the same as a FATE train — where players herd together and finish event after event as a group — if you’re an old hat like me and remember grinding through from level 40 to 50 in Northern Thanalan.
You will also need to get used to the Magia Board, which allows you to change your element on the fly to meet different enemies strengths and weaknesses. It’s recommended that you dump your points into one column, then switch elements as needed. You gain Magia Board points, or magicite, via leveling up and completing quests from Krile.
So what’s the prize for putting up with all this nonsense? Thankfully, the carrot-on-the-stick is pretty good: your Stormblood “Relic” weapon, and “Relic” gear, to boot. Eureka weapons in Final Fantasy 14 can eventually reach level 405, putting them on par with Savage Raiding weapons… but it will take a long time to get there. You can, however, simply advance as far as possible before Shadowbringers; that gear will likely last you well into your mid 70s once the expansion drops.
You can begin your journey into Vana’diel Eureka here:
- Eureka, The Forbidden Land (Port of Entry Located: Kugane, Pier #1)
- Quest Requirement: MSQ “Stormblood” (Combat Level 70 // The Lochs)
- Beginning Quest: “And We Shall Call It Eureka” (Combat Level 70 // Rhalgar’s Reach)

Complete the Garo Collaboration Final Fantasy 14 PVP Event
Now, I know what you’re thinking. “I don’t pay a subscription fee to play PVP in FF14! It’s not fun and I don’t care about it at all.” You’re at least partially right, too. PVP is definitely not everyone’s cup of tea! The Garo titles, items, and mounts are unique, though, and if you’re a collector you definitely want to add these to your pile. You should do it soon, too. The event ends with patch 5.1, which is very shortly after Shadowbringers’ release date!
But don’t sweat it. I’ve assembled a quick guide for you, the Final Fantasy 14 PVP Disliker, to get these items relatively painlessly.
- Step 1: Do Frontlines: Healing, DPS, and Tanking
- With Freelancing, you don’t have to worry about not being on the “winning team,” because the sides fluctuate every game. If you’re unsure about how to play Frontlines properly, though, you can’t really go wrong with rolling a healer. Just stay in the backlines of the mob and support your group.
- If you want to DPS, simply follow the mob. Focus your damage on desirable targets (melee and ranged DPS, as well as overextended healers). The trick is to avoid overextending yourself — becoming a target in the process.
- Finally, if you’re tanking, get in the middle of things and be an annoyance: stun and silence healers, as well as float around your own team so you can disable overzealous DPS (to save your own healers). You can also do Frontlines starting at Level 30, so you can double-dip and level some alternate jobs while earning Wolf Marks!
- Step 2: Spend your Wolf Marks at the Disreputable Priest in The Wolves’ Den
- Focus on getting a weapon and gear set for one class at first. The stats are irrelevant; as is the belt. Equip everything you just bought and receive a title from the Disreputable Priest (such as “Makai White Mage”) and equip the title. It does not have to be the same title as your job (so you can wear the “Makai White Mage” title as a Machinist and still get credit!).
- Step 3: Rotate between Frontlines and Feast
- From now on, whenever you win a game of Frontlines or Feast (Including Training Feast) you will receive credit towards two of the three mounts obtainable in the Garo Collaboration event. You eventually need to play Feast to get the third and final mount, though. Here’s a quick guide for new Feasters from a relatively experienced White Mage:
- Pick either White Mage, Monk, Dragoon, Bard, Black Mage, Dark Knight, or Paladin. These jobs have what I feel is the lowest barrier of entry for each of the respective roles.
- Do not line-of-sight your healers. This means try to stay visible to them so that they can heal you. If you’re healing, constantly reposition yourself so that you can heal your team.
- Stay mobile on all jobs. Do not sit and stand in one location more than necessary (to finish casting) unless you are being totally ignored.
- The tank should grab the first two or three medal drops; the melee DPS gets the next one or two; the ranged DPS goes last. Healer should only pick up medals if it would win the game.
- Secure objectives. If it’s safe to do so, take out the adrenaline boxes for your DPS and the Wolf’s Heart for your healer. Let your healer get the Wolf’s Heart. It’s important for their mobility!
- Coordinate your burst damage. Use the “Hello!” quick chat action to signify that your abilities are ready, and use the “Focus Target” quick chat action to single out a target.
- From now on, whenever you win a game of Frontlines or Feast (Including Training Feast) you will receive credit towards two of the three mounts obtainable in the Garo Collaboration event. You eventually need to play Feast to get the third and final mount, though. Here’s a quick guide for new Feasters from a relatively experienced White Mage:
There’s a lot more to do before Final Fantasy 14: Shadowbringers lands, of course — such as leveling alternate Jobs via Heaven-on-High, leveling crafting Jobs (which, even with all the money in the world, is still time-gated), maximizing your gear (which should last well into your mid-70s), and completing the Omega raids. However, the tasks listed here will either permanently disappear, or become very troublesome to complete when the new expansion arrives. Get on that grind and good luck, adventurers!