In Final Fantasy XIV, there are many choices players have when it comes to picking a playstyle. Of the physical ranged jobs, there are three; Machinist, Bard, and Dancer.
The Dancer job is one of the easiest in the game, but just like any of the other jobs, it can be difficult to master and play at the highest level. There are some intricacies in timing, resource management, and skill priority that can separate a good Dancer from a great one.
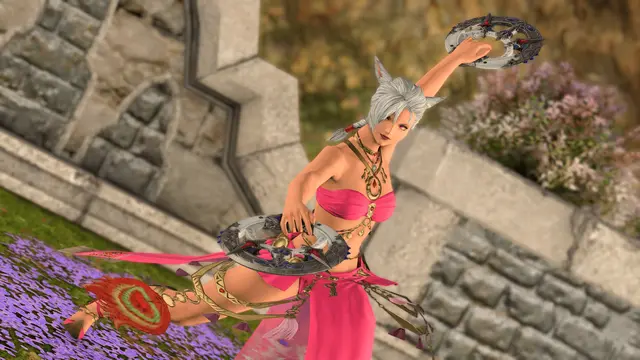
Dancers are physical ranged attackers who have little restriction in movement, are able to buff their party members, and can provide some support. If Dancer seems like an interesting job, this guide will teach you everything you need to know about leveling it and mastering it.


How to unlock the Dancer job in FFXIV
In order to unlock the Dancer job, players need to own Shadowbringers on their account and reach level 60 in any other Disciple of War or Magic job. Once that prerequisite is satisfied, players can head to Limsa Lominsa Lower Decks at X: 9.8 Y: 12. Once there, speak to the Eager Lominsan to begin the quest Shall We Dance.
An introduction to Dancer
To succeed in the Dancer job, players need to know a few skills that they will be using on the regular. Here are the very basics of the class players need to know:
- Closed Position (Dance Partner): This is a level 60 skill that allows players to choose a partner. That partner will get the effects of Standard Step, Curing Watlz, Devilment, and Tillana.
- Standard Step: This skill requires players to hit two additional proc’d skills, then it concludes with Standard Finish. Players then get raised Esprit Gauge when they or their partner uses a skill, and increased damage for them and their Dance Partner.
- Technical Step: Same process as Standard Step that is learned at level 70, but with four proc’d skills to hit instead of just two. A damage buff is applied to the entire party.
- Devilment: This level 62 skill is the buff you should always hit right before you do your Standard Step. It will provide you and your Dance Partner with an increase in critical hit rate by 20 percent.
These are the primary skills you should always look to have on cooldown. Cascade and Fountain are the one-two combo for single-target, and Bladeshower and Windmill are the AoE one-two combo for Dancers. Always hit Cascade/Bladeshower first and then hit the proc’d skill for optimal DPS.
All other skills are going to be used on a case-by-case basis. To see what all of the skills do, head to the job guide.
Level 90 Dancer skill rotation and opener
The level 90 Dancer opener requires a 15-16 second countdown in order to be effective.
 Image via Fanbyte
- Standard Step (-15 seconds)
- Peloton
- Pot
- Standard Finish
- Technical Step
- Technical Finish
- Devilment
- Starfall Dance
- Flourish
- Fan Dance III
- Tillana
- Fan Dance IV
- Saber Dance (Fountainfall if Saber Dance hasn’t proc’d yet)
- Dispel any additional feathers/Fan Dance III
- Standard Step
- Standard Finish
Once your opener is complete, Dancers will need to pay attention to the glowing skills on their bar. Always hit the glowing proc’d skills as opposed to your 1-2 combo, but there is a priority in which you’ll want to use skills if more than one is available at a time. Here is that priority:
- Saber Dance
- Tillana
- Reverse Cascade/Fountainfall and Bloodshower/Rising Windmill
- Fan Dance III/IV
- Cascade/Fountain and Bladeshower/Windmill
For a more detailed look at the Dancer rotation, check out our full rotation guide.
What to do with Dancer Feathers and Esprit Gauge
 Screengrab by Fanbyte via Square Enix
Players should pool their feathers, indicated in the gauge by the four green and blue feathers sticking out of the top, keeping at least three on them at all times except for when they are bursting. The beginning of the burst is triggered by Devilment, which is when all of your feathers should be expended.
The best practice is to keep four feathers saved up at all times, but expend one just before using Reverse Cascade/Bloodshower or Fountainfall/Rising Windmill. This ensures that you will always have four feathers when your Devilment comes back up.
Esprit is granted to you and your Dance Partner after Standard Finish, which is indicated by the number and bar fill just under the feathers, and to all nearby team members after Technical Finish. Players under this effect will help fill your Esprit Gauge, which can then be consumed by using Saber Dance. Make sure you are using this skill as soon as it pops up so that your Esprit Gauge never caps, or it will result in a massive loss to DPS.
Dancer utility skills and when to use them
The best part about Dancers is their ability to help out the party. Several skills can be used to mitigate damage or help a little with healing. The one you’ll likely use the most is Sheild Samba, which provides a 10 percent damage reduction for the whole party for 15 seconds.
Improvisation is a skill that players need to stand still for, but is good when big party attacks are used in conjunction with the boss you’re fighting being untargetable, or as a last ditch effort to get the party’s health
Curing Waltz and Second Wind are the Dancer’s healing skills. Curing Waltz will heal you, your Dance Partner and everyone around the two of you, while Second Wind only affects you. Only use these when you’ve made a mistake or were the only one that took damage, since your healer should be healing you up for each party slap.
Dancer food, pots, and gear – current for Patch 6.5
Those doing end-game content will want to keep a few consumables on them. Currently in Patch 6.5 the best food is high quality Baked Eggplant. For pots, Grade 8 Tinctures of Dexterity is what you’ll need if you’re running content that requires that little extra boost in stats. Refer to the guide for the specific fight you’re doing to find out when you should use pots.
For gear, players will want to look at what their Best in Slot (BiS) gear will be. For Dancers just starting out, using the most recent tomestone gear is the best option. Using a combination of Determination, Critical Hit, and Direct Hit materia, pentamelding your gearset will give you the best possible damage until you can farm out an entire Savage gear set.
For the Savage gearset, check out Etro for the recommended gear and melds.
Typically, Dancers will want to priorities Critical Hit first, then Determination, then Direct Hit when looking at their stats, but for most content in the game, even gear that isn’t BiS will result in successful boss pulls such as the newest Extreme trials. Even some of the Savage fights have such low DPS checks that players don’t need the absolute best gear in the game to clear it, and now that Dawntrail is approaching, the Echo has made it even easier to achieve a kill if your group has been having trouble.