The layout that likely comes to mind when imagining the control scheme for an MMO is the tried and true mouse and keyboard's WASD and number keys with various modifiers. Final Fantasy XIV managed to fit that classic layout to controllers through clever game design, making the game playable without the need to touch a mouse or keyboard.
FFXIV uses up to 10 "classic" hotbars with 12 slots each for mouse and keyboard controls, meaning that you can configure 120 possible key combinations or on-screen buttons to click at any given time. With only four face buttons, a d-pad, and triggers on a controller, it's hard to imagine somehow mapping each control to its own button. When releasing the game on PlayStation 3 alongside PC in 2013, Square Enix's solution was to add an entirely new type of hotbar tailored for controllers — the Cross Hotbar.
How to set up the Cross Hotbar in FFXIV
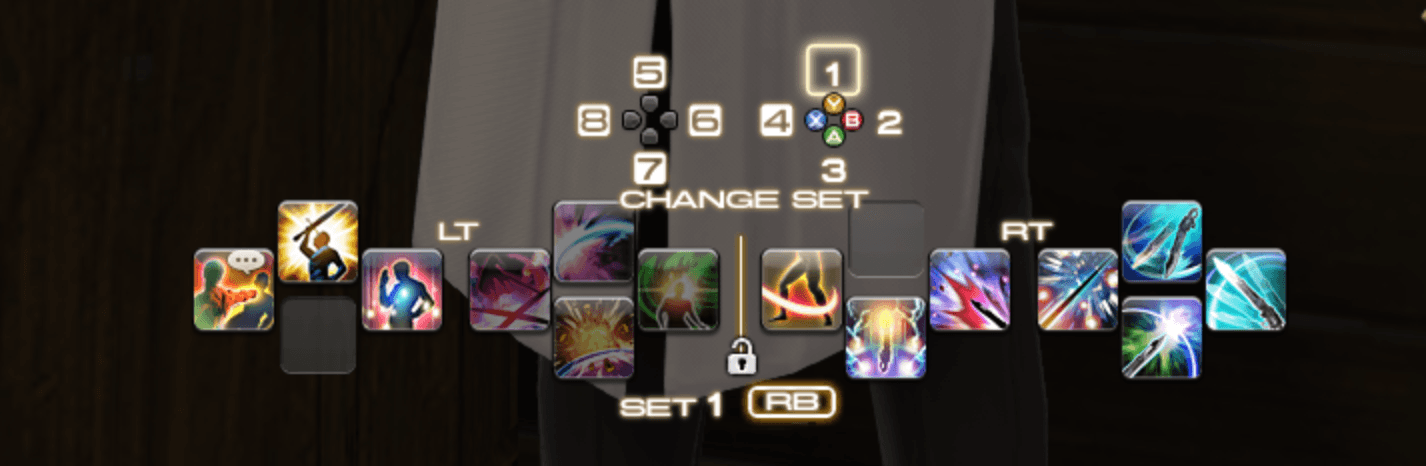
The Cross Hotbar comprises two sets of two plus or cross-shaped hotbars marked with a divider to split the groups between the left and right trigger. Within either group, the four buttons to the right of its group indicate your face buttons, which are ⒶⒷⓍⓎ on Xbox controllers and ✕⭘□△ on PlayStation. The left side represents the directional pad, or d-pad, giving you eight buttons per group for 16 buttons per set.
The face buttons and d-pad have various actions, like interacting with items and people in the world, targeting, navigating UI, and jumping, but they won't interact with the Cross Hotbar when pressed on their own. To make these buttons use an action set on the Cross Hotbar instead, you must hold down either LT/L2 to interact with the eight abilities on the left side or RT/R2 for the eight on the right.
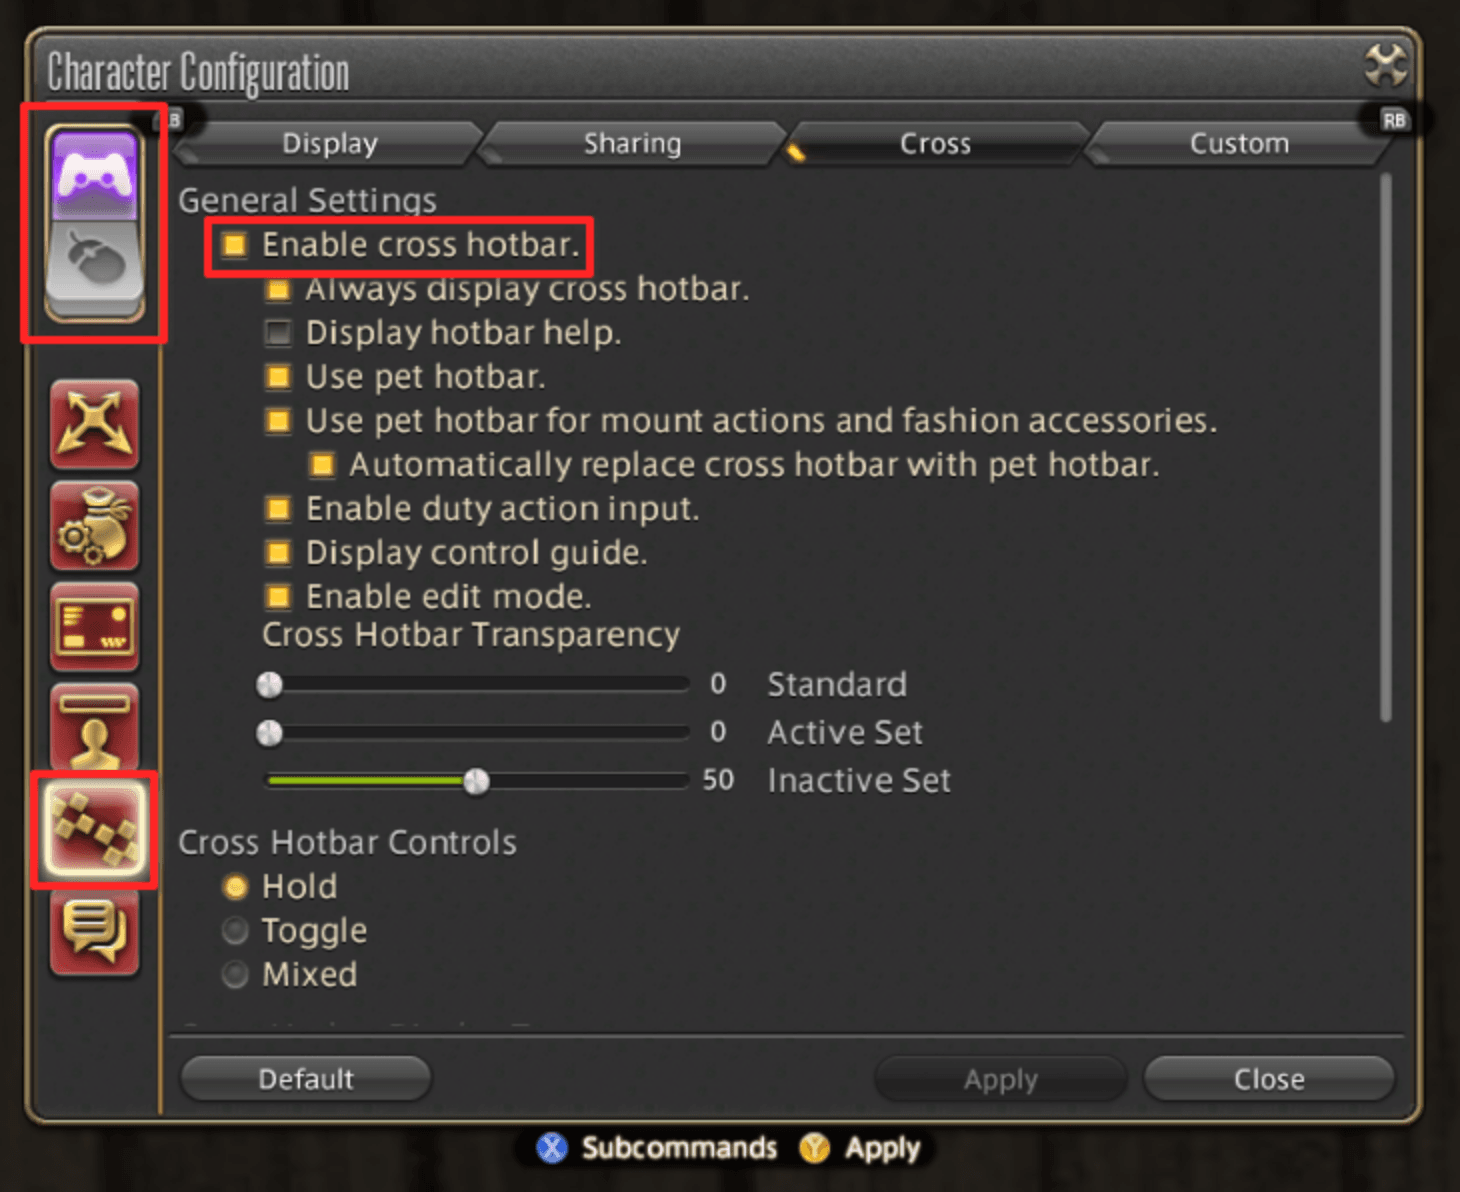
You can access the Cross Hotbar by changing the game's control scheme to Gamepad Mode in the Character Configuration menu. Any traditional hotbars intended for mouse and keyboard are hidden in Gamepad Mode, but you can easily reactivate them by entering the HUD Layout menu of the main menu. If the Cross Hotbar isn't visible while in this mode, ensure that "Enable cross hotbar" is checked in the Character Configuration menu under the Cross category of Hotbar Settings.
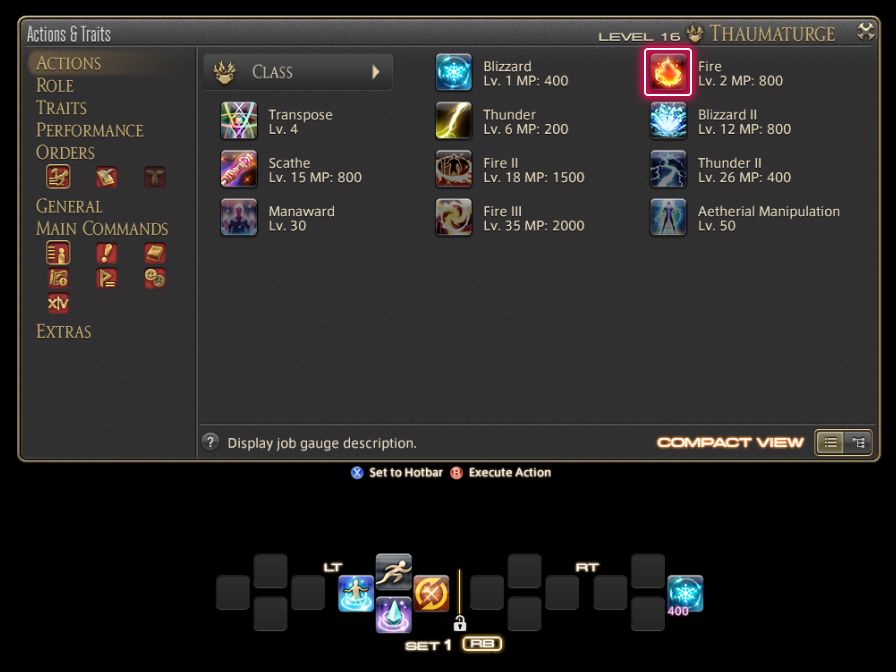
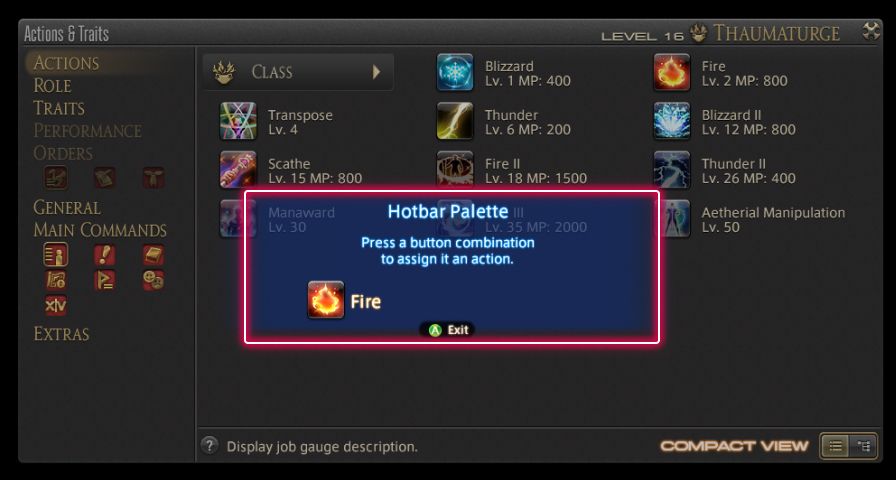
To add an ability to the Cross hotbar, navigate to the Actions & Traits menu to find each of your job's skills. Pressing Ⓧ on Xbox gamepads or □ on PlayStation will allow you to add the desired action to your Cross Hotbar by holding one of the two triggers and pressing one of your face buttons or a direction on the d-pad. Once added, the same combination of trigger and button will use the ability.
If you're unhappy with an ability's placement on the Cross Hotbar, holding the respective trigger the ability belongs to and pressing Select on Xbox or the Touchpad on PlayStation will toggle Edit Mode. This allows you to select the ability directly from your hotbar and move it elsewhere by pressing the desired trigger and button combination.
Cross Hotbar Sets
You'll need more than 16 hotbar slots for any job to utilize their kit fully or have miscellaneous abilities like Teleport or mounts at the ready. The problem is you don't have the benefit of having several hotbars on screen simultaneously. Instead, you'll use Cross Hotbar Sets to cycle through your hotbars.
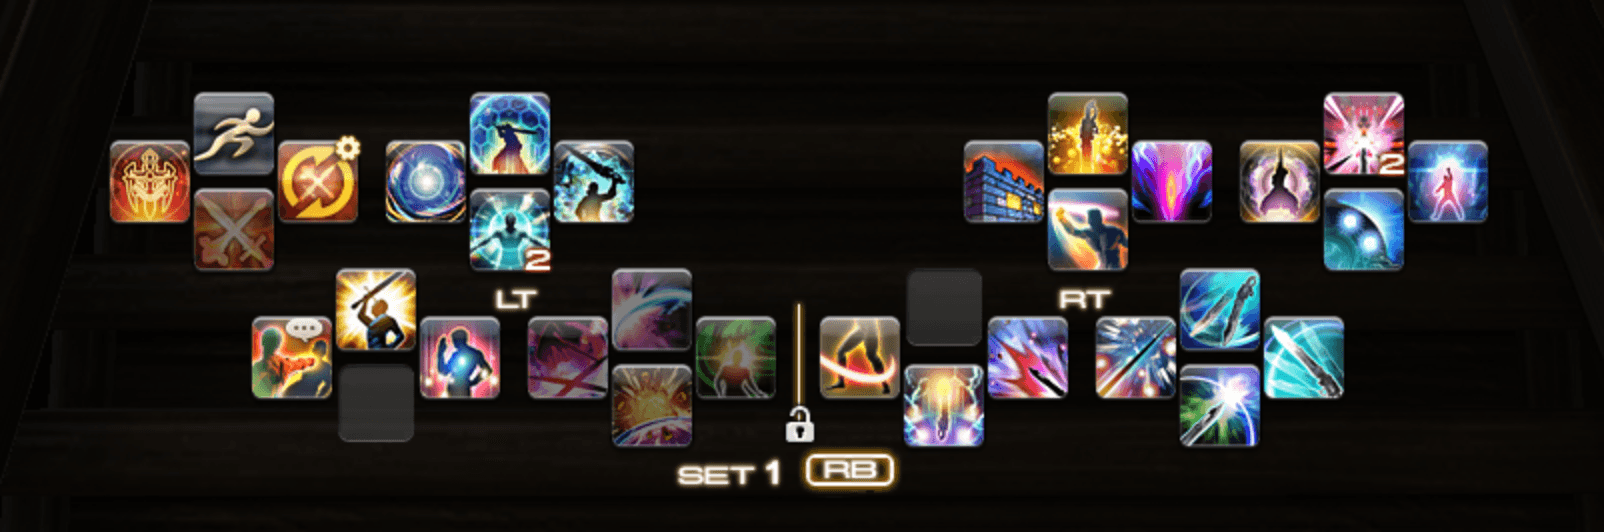
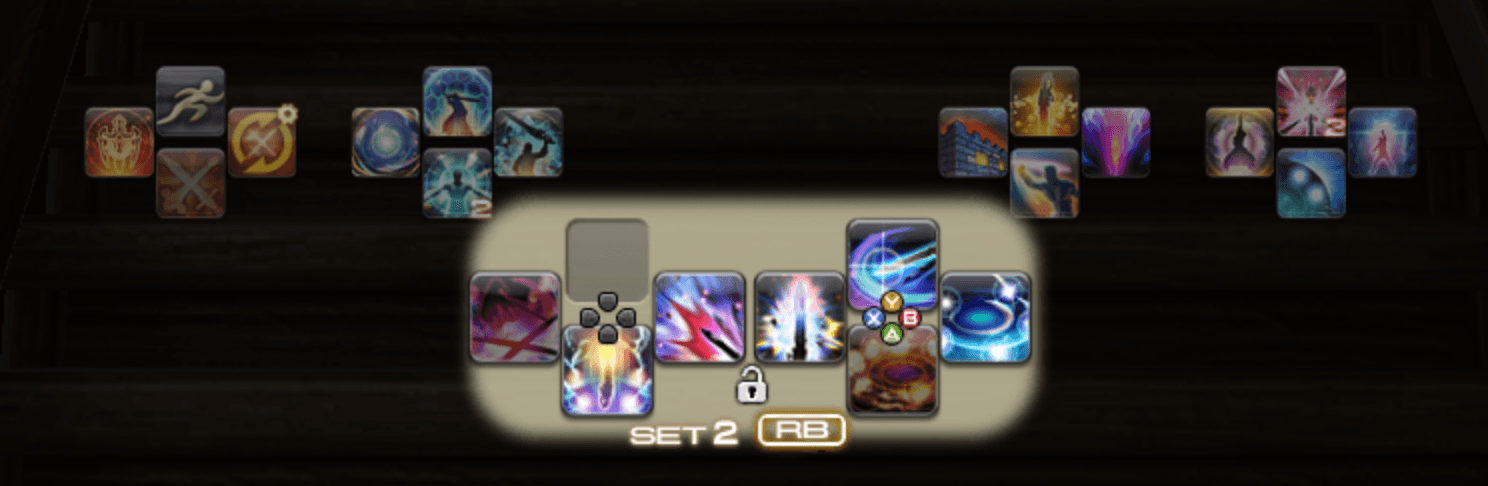
Sets are essentially "extra" Cross Hotbars with their own abilities applied to them, and you can cycle through them by holding RB/R1 and pressing any direction on the d-pad or face button to swap to the numbered set prompted on-screen. The base Cross Hotbar you initially set up is Set 1, and adding abilities to the other seven hotbars requires you to swap to that set with RB/R1 before placing it.
Expanded Hold Controls and WXHB
Swapping sets when you need to use an ability not in the currently active set requires a few extra button presses to swap back and forth. While you can undoubtedly get very quick at this method, using the Expanded Hold Controls and WXHB allows you to quickly access other sets' abilities without swapping from your active set.
The Expanded Hold Controls allow you to combine the triggers to reveal another set of your choosing by pressing them in a particular order. For example, with Set 1 as the active XHB, holding down RT/R2 before holding down LT/L2 can reveal the right side of Set 2, and the opposite order can reveal the left side, giving you an extra 16 buttons to use without switching sets.
To use the Expanded Hold Controls, you must enable them in the Custom category of the Hotbar Settings. Here, you can also decide which XHB set will appear for either order of trigger combinations.
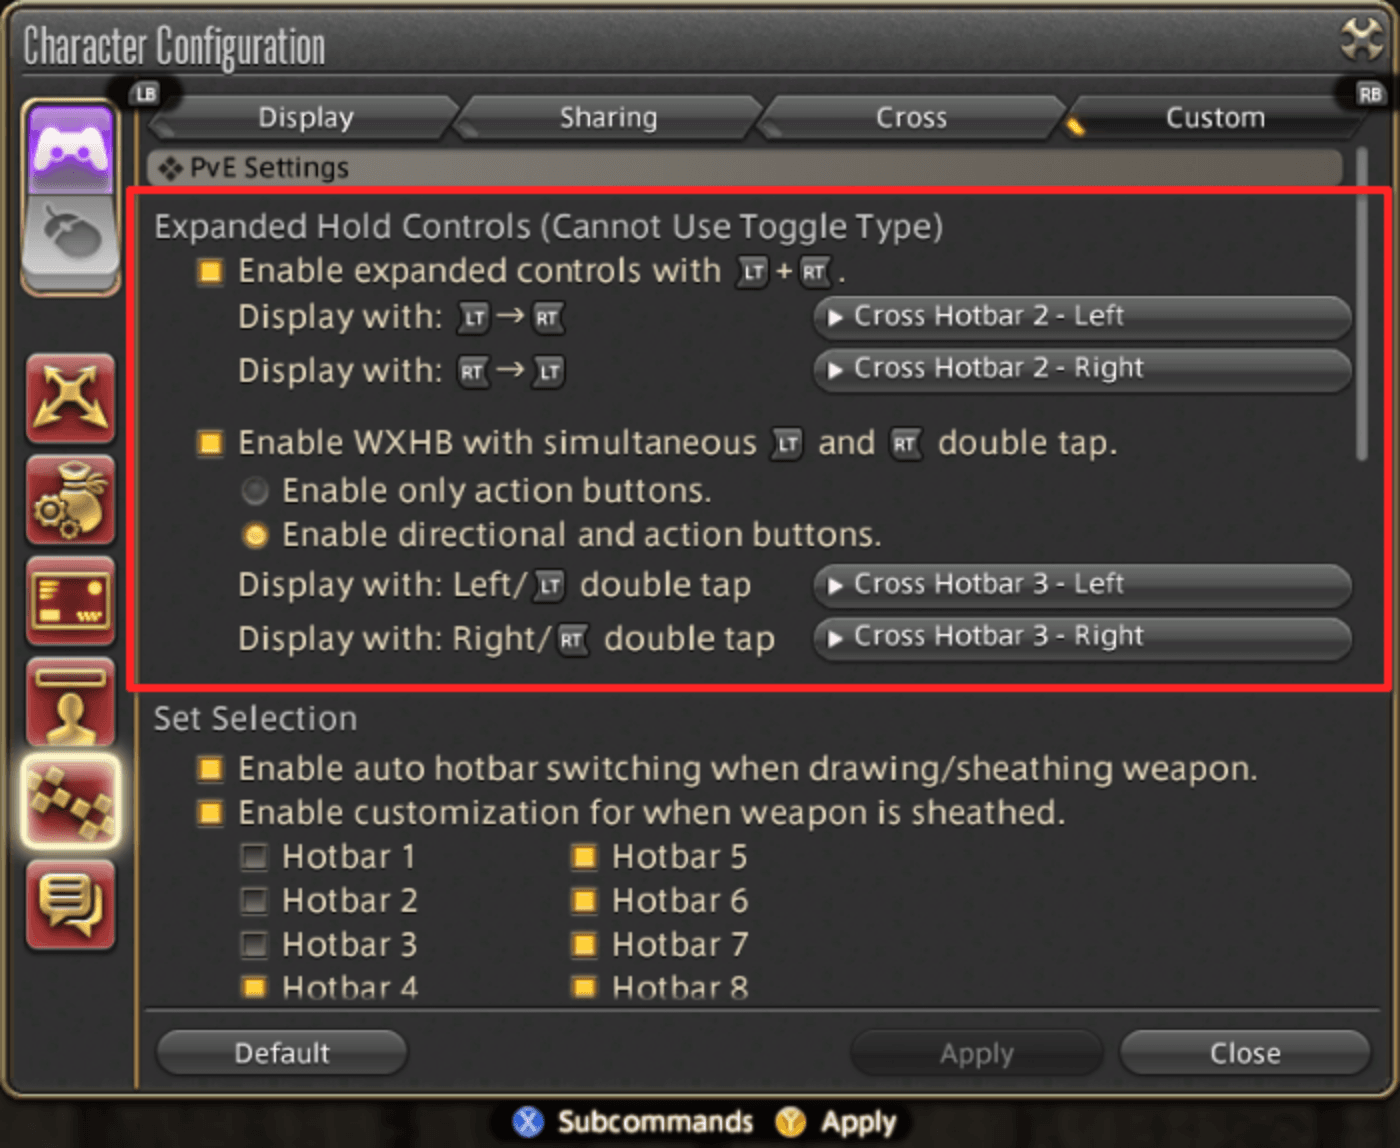
WXHB allows you to access another set's abilities by double-tapping either RT/R2 or LT/L2. The WXHB has more configuration options than Expanded Hold Controls, such as only showing the face buttons of that set rather than the full eight buttons, or automatically returning to the XHB after using an ability on the WXHB. Settings for the WXHB are found alongside the Expanded Hold Controls configuration.
By combining the Expanded Hold Controls with the WXHB, you'll have up to 32 extra hotbar slots on top of the original 16 from your active Cross Hotbar set. A total of 48 slots is more than enough room to allocate every skill in any job's kit, and not having to cycle through sets can make you far more efficient.
Tips, tricks, and recommended configurations
The "best" configuration for hotbars, whether using the Cross Hotbar or the traditional hotbars, boils down to user preference. As you become more familiar with your chosen control scheme, you'll rely on muscle memory to locate your skills, so lay out your actions and abilities in a way that's most comfortable to you. That said, you may need a good starting point before making the Cross Hotbar more suited for you:
- Use Sets 1, 2 and 3 exclusively for your job's abilities, and set the other five sets as shared Cross Hotbars in the Sharing category of Hotbar Settings. This way, you won't have to put frequently used miscellaneous actions like mounts, consumables, and teleports for every job if they're on a shared bar.
- Choose both the left and right sides of Set 2 as your Expanded Hold Controls and assign multi-target attacks to that Set. Since rotations for multiple targets are generally shorter, you can tuck them away in the Expanded Hold Controls until you need them.
- Keep your left and right sides of Set 2 nearly identical. You will only be able to see these abilities once you hold down the combination of your controller's triggers, so keeping them mostly similar will allow you to avoid fumbling your rotation if you press them in the wrong order.
- Use Set 3 as your WXHB hotbar, and use it to assign your job's abilities with cooldowns. Configure it in the Custom category of Hotbar Settings to use both the d-pad and face buttons, then turn on "Always display WXHB" and "Return to XHB after WXHB input" in the Cross category. Having the WXHB always visible allows you to keep an eye on your cooldown timers, and you'll automatically move back to Set 1 after since you won't use them as frequently.