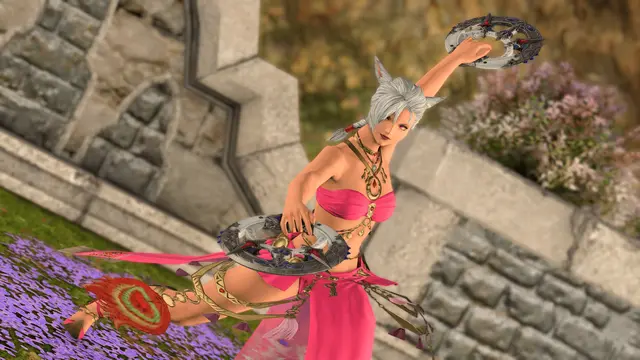
Bard in Final Fantasy XIV is a complex job to learn, and to perform it well demands that you increase your skill level and understanding of the job. At the same time, this job is capable of causing considerable damage and assisting the party in different ways. As a Bard, you’re responsible for helping your party to improve and get that clear you’ve been looking for.
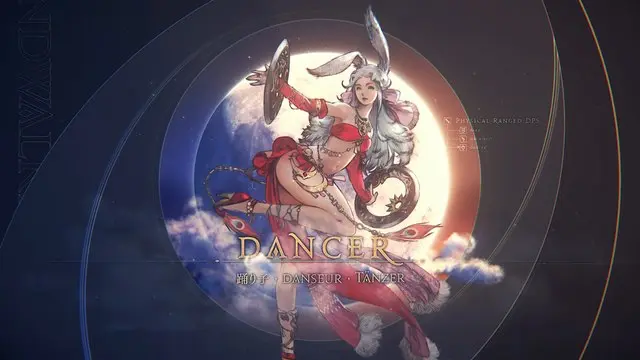
Several factors determine the importance of a job in FFXIV. Some are a high priority to a party due to their capacity to cause lots of damage, such as Monk, or heal the group while providing damage, such as Scholar. Bard has a kit of abilities that brings damage and utility, turning it into a great job to play in a group running endgame content. In this guide, we cover what you should know to start the real journey that begins once you get to level 90.
For a leveling guide and a more in-depth look at the job, check out the full Bard job guide.

The basics of the Bard job
While every job in FFXIV challenges players to perfect positioning and keep uptime, very few sound as complex as Bard. Although this is an early impression that most new players have regarding the job, if you’re considering playing Bard, you must know about the demands that come with it.
Currently, Bard is the only job in FFXIV characterized by its focus on causing damage by using DoTs. One of your responsibilities while playing Bard is to keep Stormbite and Caustic Bite up as you juggle using GCD and oGCDs. Keeping track of DoTs might sound daunting especially as you learn a fight. However, it’s more a matter of understanding the fight and memorizing how long they last. Once you get that, both abilities won’t be a problem anymore. Besides, Iron Jaws is a useful tool for the level 90 Bard that allows you to refresh both DoTs with a single skill.
Bard takes seriously the “be always casting” motto. This job has a fairly large number of oGCDs and a few procs, which means you'll rarely find yourself lacking a skill to weave between the GCD abilities. At first, all the options at your disposal can disorient you, causing you to hesitate to cast or clip them as you try to press them all. What you want is to know which of these to prioritize. Not wasting them is key to reaching high numbers of damage output.
Even though playing Bard comes with the responsibility of managing several skills and DoTs, this job is an invaluable asset to any raid group because of its innate capacity to offer support to the team. The Bard’s signature skills are the three songs. Each has a different effect for the Bard but by activating them, you buff the rest of the group as well. This means that every two minutes you have a new raidwide buff. Moreover, besides the other two buffs that increase the party’s damage, Bard has Nature’s Minne to increase healing received by 15% and Troubadour which mitigates damage received.

Bard rotation
Like Dancer and Machinist, FFXIV's Bard rotation is different from the more common combo-based sequences or two-skill damage rotation like healers. Instead of a fixed rotation, what you have is skills that have higher or lower priority during a fight.
The highest priority is to keep rotating your songs and refreshing DoTs. Your second priority is to use procs of Refulgent Arrow/Shadowbite, oGCDs (Bloodletter, Rain of Death, Sidewinder, Empyreal Arrow, and Pitch Perfect), and Apex/Bash Arrow. If any of these options are available, you can use Burst Shot which is your main filler GCD. This sequence of priorities works the same for single and multiple target scenarios. You just need to change Burst Shot to Ladonsbite when dealing with three or more enemies.
Alongside the regular damage rotation, the Bard also has the song rotation. Army’s Paeon, Mage’s Ballad, and The Wanderer’s Minuet have a two-minute cooldown each and their effects last for 45 seconds. However, to have the right song ready for your burst window, it’s important to cast them at the right time and sequence. The order is:
The Wanderer’s Minuet > Mage’s Ballad > Army’s Paeon.
You want to change from The Wanderer’s Minuet to Mage’s Ballad when there are three or fewer seconds left for the buff to fall. The same goes for the transition between Army’s Paeon to Wanderer’s Minuet. For Mage’s Ballad, you want to change it a little bit earlier. You should cast Army’s Paeon when there are 12 seconds left. This order is mandatory to have The Wanderer’s Minuet out of cooldown for the burst window as well as the Army’s Muse buff.
All three songs have an 80 percent chance to proc Repertoire, which has different effects depending on the song.

When using The Wanderer's Minuet, you increase your critical hit rate by 2%, and you also buff players within 50 yalms of you. You also have an 80% change to gain a stack of Repertoire, which procs Pitch Perfect. The more stacks of Repertoire (which caps at three), the more potent Pitch Perfect becomes, so wait until all three are built up before you use it.

The Mage's Ballad buff increases the damage dealt by you and party members within 50 yalms of you by 1%. Repertoire is present here, too, and has the same 80% chance of appearing. Each time Repertoire is granted, it reduces the cast time of Bloodletter and Rain of Death by 7.5 seconds.

As long as the Army's Paeon song is up, the direct hit rate of yourself all party members within 50 yalms is increased by 3%. Repertoire gives you one stack of Army's Paeon and you have have a total of four. For each stack, your weaponskill cast and recast time, spell cast and recast time, and auto-attack delay are reduced by 4%.
Bard’s burst window
In general, when dealing with endgame encounters, groups organize their buffs and abilities for what is known as the two-minute burst windows. When playing Bard, there is a long sequence of abilities that you need to use within the party buffs to maximize your damage.
For the sake of making the understanding of the Bard’s burst window easier, we will split it into three phases.
The first phase is when you start to prepare for the burst window. As a bard, this means that you’re at the end of Army’s Paeon. At this moment, you want to hold your Bloodletter charges to make sure you have three of them for the burst. You also want to refresh both DoTs with Iron Jaws. Doing so will guarantee you have them up to refresh them again under the buffs in the next phases.
It’s in the second phase that the burst actually begins. This part of the burst has five GCDs split into Burst Shot or Refulgent Arrow only. Weaved between them, you want to use a pot, The Wanderer’s Minuet, a Bloodletter, Raging Strikers, Empyreal Arrow, Radiant Finale, and Battle Voice. By the end of this phase, all your buffs will be up and ready for the last phase.
In the third and last phase of the burst, you want to use six GCDs while the buffs are up. This time, you don’t have a fixed order but it would be wise to use the skills based on their priority. Among the options you have, there are Apex Arrow, Blast Arrow, Burst Shot, Refulgent Arrow, Barrage to proc Refulgent Arrow, and Iron Jaws. It’s totally fine to refresh the DoT earlier for them to receive the buffs. Between these GCDs, you need to weave all the oGCDs as they come up. The options you have are Pitch Perfect, Bloodletter, Barrage, Sidewinder, and Empyreal Arrow. Just pay attention to avoid using Barrage if you already have a proc of Refulgent Arrow.
The phase two and three goes as follows:
- GCD
- Tincture
- GCD
- The Wanderer’s Minuet
- GCD
- Raging Strikes and Empyreal Arrow
- GCD
- Bloodletter - if you have all the charges
- GCD
- Radiant Finale and Battle Voice
- Burst Shot or Refulgent Arrow
- oGCD
- Apex Arrow
- oGCD
- Blast Arrow
- oGCD
- Burst Shot or Refulgent Arrow
- oGCD (Barrage)
- Refulgent Arrow
- oGCD
- Iron Jaws
Bard opener
Although staying alive during a fight is important, doing your rotation and burst windows correctly is fundamental to completing an encounter, and you shouldn’t underestimate the importance of doing your opener correctly. When playing Bard, this might mean more than one variation but here is the general order.

- Tincture of Dexterity (-1.5 seconds)
- Stormbite
- The Wanderer’s Minuet
- Raging Strikes
- Caustic Bite
- Empyreal Arrow
- Bloodletter
- Burst Shot
- Radiant Finale
- Battle Voice
- Burst Shot
- Barrage
- Refulgent Arrow
- Sidewinder
- Burst Shot
- Burst Shot or Refulgent Arrow
- Burst Shot or Refulgent Arrow
- Empyreal Arrow
- Iron Jaws
You might have to change the opener a little bit if, before using Barrage, you already have a proc of Refulgent Arrow. In this situation, you swap it with Sidewinder. Doing so will inevitably give you another Refulgent Arrow proc, which you should use instead of the Burst Shot as noted in the image above.
Bard tips
The rule of thumb regarding Apex Arrow is to only use this skill when the Soul Voice gauge is 80 or higher so you get a Blast Arrow proc. Since this is one of the GCDs part of your burst, you might feel forced to hold it once the gauge is ready. However, between the two-minute windows, you should try to use Apex Arrow whenever you can and as soon as you can. If you cast it as soon as it gets 80 points, you will have the Apex Arrow ready to proc in the next burst window and improve your overall damage output.
As a Bard, it’s important to talk to your party and see how you can help your tanks and healers. You have Troubadour to reduce damage taken, Nature’s Minne to increase the HP recovered by healing actions, and The Warden’s Paean to remove debuffs from other players. By settling when you will use these with your healer, you can make their lives easier.