No Man’s Sky Expedition 8: Polestar follows shortly after the Endurance Update. As such, like the recent Expeditions before it, the content focuses on the star of the new content: freighters! The capital ship type got a major overhaul, becoming more like a proper mobile base you can take through the stars. Though the new content in NMS Expedition 8 includes a lot more than just that.
Note: Like our previous No Man’s Sky Expedition guides, we will be updating this document over time as we complete each milestone. Please be patient with us as we continue through the puzzles and mysteries of the event!

Polestar is already slightly unique among No Man’s Sky Expeditions, too. It doesn’t appear to be set to Survival difficulty, though, which caused many to struggle through Expedition 7: Leviathan.
However, it does come with its own restrictions. Players will be “forsaking starship warping and planetary base building.” You need to rely on a Freighter instead to warp around the galaxy. You can do this by entering the bridge of your Freighter and selecting the “Freighter Warp Map” from the central console in the command bridge (as indicated in the screenshot above). Though Polestar actually starts you on a Freighter from the beginning.
The Freighter has unique upgrades and modules, as well, which isn’t too uncommon for an Expedition. Prepare to gather different resources than usual to build them. You also need to get familiar with Salvaged Frigate Modules, which are one of the bigger pains in the game to acquire.

Expeditions are also typically split into five “phases,” with subsets of objectives called Milestones along the way. The total number of objectives per phase varies. However, there is only one optional Milestone this time around (during Phase Two) which tasks you to enter another player’s Freighter base.
Finally, Expeditions are time-limited events. Players usually have about six weeks to complete all the objectives. After which, the rewards will be available account-wide. You can pick them up on the Space Anomaly by the Nexus! This Expedition will actually last a bit longer, though. It’s scheduled to last for two months, meaning it will end sometime toward the end of September.
Some past Expeditions have actually been shorter, but those were specifically “reruns” of past events and not brand new like Polestar.
Beginning with Expedition 8: Polestar, players can also choose to finish an Expedition early, which converts the save file into a “normal” No Man’s Sky campaign. That way you can continue the base story using all the save-specific items and upgrades you already acquired. Old Expeditions also converted to normal saves, but players previously had to wait in real time until the event was finished.
NMS Polestar Expedition Phases & Steps

Phase 1 – No Man’s Sky Expedition 8: Polestar
The first phase of Polestar begins by simply talking to your freighter captain. You begin the Expedition right on the command bridge, where you’re going to be spending a lot of time from now on, and the captain can be found where they always appear: up the short set of stairs facing the forward window. They’re sitting in a chair by a control console. Select “Access ship’s log” and then… You’re done! That’s it for the first step.
However, be sure to manually claim your reward from the Expedition menu. Just clicked on the colored badge marked with “Collect Reward!” These rewards aren’t purely cosmetic or for fun; Milestone rewards during Expeditions are needed to finish certain other steps along the way. For instance, they might award you with blueprints or resources needed to craft items that solve future steps.
In this case, we get extra Starship Inventory Slots, Salved Frigate Modules (used to upgrade your freighter despite the name), Cargo Bulkheads (used to expand your freighter inventory), and two Wiring Looms. Plus some purple paint, which is purely cosmetic.

Speaking of resources, you actually start with a few more in your freighter and starship inventories. Check that freighter inventory to see three damaged modules. We couldn’t repair the Atmospheric Control Unit before, but with the Wiring Loom from the previous Milestone rewards, now we can. Select the Atmospheric Control Unit and place the resources into the damaged slots to repair it.
While there are multiple damaged systems, this is the only one we can fix right now. It’s also the only one needed for “All Hands On Deck,” so you’re now done with step two! Grab those rewards.

While you’re at it, you can also access the “Upgrade Control” terminal on the large, circular table in the middle of the room. Select the option “Add Additional Storage” to trade those bulkheads from earlier in for extra inventory space. These last two steps will already start filling up your freighter inventory. Best to start opening up some room right away!
Now it’s time to “set foot on land.” That means heading to the freighter hangar to enter your standard starship. After which you can fly to a nearby planet.

You could just walk to the hangar. However, as of the Endurance Update, No Man’s Sky added a feature that now lets players warp back and forth between the bridge and hangar automatically. Just step into the white circle of light on the bridge! You don’t even need to press a button!
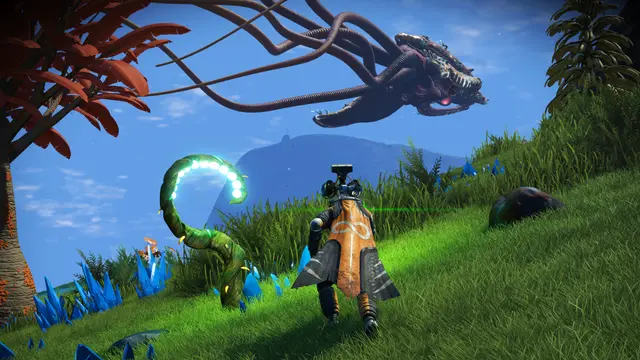
Hop into your starship and fly on down to a nearby planet. None of the worlds in this starting system are especially hospitable, but you should probably pick one that doesn’t mention “Aggressive Sentinels” or something similar. Environmental hazards are easier to deal with than killer robots. Just find some Sodium.
Speaking of which: the “Planetside” Milestone rewards should include a Hazard Protection Upgrade and a Mining Beam Upgrade. Make sure to use these from your inventory and slot them into your Exosuit and Multi-Tool, respectively. The Hazard Protection Upgrade should specifically go into your “Technology” inventory to save space. You can also safely move your Jetpack, Hazard Protection, and Life Support into this tab to free up even more inventory slots!

While you’re on your first planet, you should also stock up on the basics. Sodium, Oxygen, Ferrite Dust, Carbon, etc. It’s all good stuff. However, you especially want to scoop up some Di-hydrogen — the blue crystals marked by an “H” icon after using your Scanner. You will need two Di-hydrogen Jelly globs to construct the Refiner Room unlocked by this step. That requires a total of 80 standard Di-hydrogen to craft!
However, you should actually collect at least 120 Di-hydrogen. You’ll need one more unit of Di-hydrogen Jelly to craft a Terrain Manipulator later. Not to mention this blue material is also used in Frigate Fuel, which you’ll need for the Phase 3 Milestone “Called by the Stars.”
On the subject of killing two birds with one stone, there are several other later Milestones you can get a head start on now. “The Engine of Life” requires you to scan 20 plants; “Prospector” wants 15 minerals discovered; “A Life Beneath the Sky” asks for 25 animals. You can even complete “Stardust,” which tasks you to destroy 50 asteroids with your starship’s weapons, while you fly back to your freighter. That might seem like a lot, but it only takes a minute or two.

In other words: scan everything. That’ll save you some trouble down the line if you do it right away each time you touch down on a new planet. Might as well begin the process now! Animals will probably be the most annoying of the bunch, so prioritize them for now if you don’t want to do everything just yet. Simply look for the red dots roaming on the horizon (like in the screenshot above) with your Analysis Visor. These are undiscovered animals that you can to your log.
This is also a good time to point out that you can complete most Expedition Milestones in No Man’s Sky out of order. Milestones like the ones listed above don’t require you to complete previous objectives or even previous phases. Make sure to read ahead in this guide and get a sense of what you need to watch for!
As mentioned above, it will soon be time to return to your freighter. Fly back to it directly or summon your freight just above the planet by using the “Summon Freighter & Squadron” tab of the NMS Quick Menu.
Now let’s build a Refiner Room. This part can actually trip some players up because of how the Endurance Update changed the way your freighter base works. The basics are the same as base building, though. You open the building menu, select what sort of room you want, and then place it. You just need to know where to go.

After the recent update, “where to go” means “up these green stairs” shown in the screenshot above. That is the door that leads to the actual base part of your freighter — where you can build things like the Refiner Room. You’ll need to craft two Di-hydrogen Jelly balls in your inventory, first, of course. Hopefully you grabbed some of the blue crystals like I mentioned earlier!
Note that you can open the Build menu with “up” a D-pad or “Z” on a keyboard. Once that’s done, pick the Refiner Room and plop it anywhere you like!
That will complete “A Well-Oiled Machine,” so grab those rewards. One such reward is a Storage Room blueprint, which you can also build right now to immediately complete the “Supercargo” Milestone. If you find yourself running short on Gold and/or Silver, and didn’t destroy those asteroids earlier, just hop into your ship and start shooting rocks. They’re full of Silver, Gold, Tritium, and sometimes even Platinum.
While you’re placing the Refiner Room, I also recommend placing the Save Point item the game gives you near the door to the base area. This allows you to save your game manually without returning to your ship every single time!

We should have everything we need now to repair the Freighter Hyperdrive. The only things you need to craft separately to finish the repairs are two units of Antimatter Housing. These require Ferrite Dust (found in rocks on planets) and Oxygen, which you should have left over from the Planetside rewards. If you burned too much of that supply on Life Support, you need to go Oxygen farming.
With the hyperdrive fixed, insert a Warp Cell as fuel. You can also use the Warp Hypercore got from A Well-Oiled Machine to power the sucker. However, you will need a Warp Hypercore later for a blueprint late in the Expedition, so you can hold onto this for now instead, if you prefer.
The chokepoint here is finding a Storm Crystal: which you can get from bounties, Crystal Fragments mined in Di-Hydrogen Crystal fields, Derelict Freighters, and most obviously on Extreme Weather planets during storms. This can be difficult or annoyingly random for some. I happened to find a number of crystals from bounties and derelicts as I played through the expedition normally. It’s even possible to get a fully complete Warp Hypercore from bounties, as well. However, everyone’s mileage may vary.
Either way, with the fuel selected, you’re ready to warp!
As mentioned at the top of this guide, you can warp your freighter using the Freighter Warp Map at the center console of the bridge. Where you warp doesn’t technically matter. You just need to complete a jump to unlock the “Engage Engines” objective. However, you should follow the green line of the Expedition Route which NMS sets by default. This will lead you towards the first rendezvous point needed to complete this phase.
Besides reaching the rendezvous (after several more warps) all we have left for this phase is building an Interstellar Scanner. This is not a base object, like the Refiner Room, but a module that goes into your freighter inventory. Preferably under the Technology tab!

The first two crafting requirements aren’t too complicated. you need 160 Chromatic Metal and 70 Magnetised Ferrite. Both can be created via refining in the Refiner Room you just built! First you need some Ferrite Dust, which transmutes into Pure Ferrite, which becomes Magnetised Ferrite. There’s a good chance you already have as much Ferrite Dust as you need, too, if you did any mining on the first planet. Just hit the refiner.
Chromatic Metal is a bit trickier. You first need to create a Terrain Manipulator module for your Multi-Tool. Expedition 8: Polestar starts you with the proper blueprint, luckily, so you just need the crating materials. That means one more Di-hydrogen Jelly and two Carbon Nanotubes (made from simple carbon).
![]()
With the Terrain Manipulator active, you can soak up certain large metal deposits on any planetary surface. We specifically want Copper in this case. Though you can also find Magnetised Ferrite in deposits like this as well. And just like Ferrite Dust or Pure Ferrite, Copper can be processed in the Refiner Room. Copper transmutes into Chromatic Metal. This is all extremely basic stuff in NMS, but I’m reiterating it here for newcomers.
To find mineral deposits, pull up your Analysis Visor and look for the checkboard diamond icons. These icons will indicate by name if the deposit sports Copper, Paraffinium, etc. Copper isn’t the only such metal that makes Chromatic Metal, either. It’s simply the only one we have access to right now. Later we will be able to find Cadmium, Emeril, and Indium as well.
There’s a chance you already collected all the copper and ferrite you need from the first planet, of course. Just remember that it’s worth stopping by other worlds and scanning plants, rocks, and animals for those discovery Milestones down the line! You should also pick up some Di-hydrogen to replenish what you lost earlier. If you’re running low.

Finding a Wiring Loom is actually often trickier. You can’t craft these or harvest them from planets. Instead, you need to buy them from a Galactic Trade Terminal. You can find such a terminal aboard any space station — such as the one in the system after your first hyperdrive jump. The issue is that Wiring Looms are often very expensive (at least on a fresh save like this one). So, you might need to make some quick Units by selling some resources.
I recommend offloading some Gold to the Galactic Trade Terminal to make enough money for an extra loom. Gold is only slightly uncommon, since you can harvest it from any asteroid in the universe, and you can find more by opening Gold Nuggets (which also drop from asteroids).

While you’re on the space station, you can also use the Starship Outfitting table on a nearby space station. Here you can use those five Starship Storage Augmentation devices you might have already acquired from the Stardust Milestone. This will net you five more inventory slots on your basic ship. All for free!
Once everything is in place, and you have your scanner, you’re good to go! Go across the stars, that is. It’s time to start warping (following the Expedition Route on the Galaxy Map) until you reach the first rendezvous marker. This will require you to exit your capital ship again and fly down to a planet with your starship.

Since the first rendezvous is a normal Crashed Freighter, it’s also worth looking around for normal Cargo Pods. These are large storage containers that can include common but still very useful materials — like Starship Launch Fuel and Warp Cell resources. They also have an (exceptionally rare) chance to drop a Salvaged Frigate Module. Which is great! Just be ready to run away, as the Cargo Pods will bombard you with lethal radiation once you open them.
And that’s it! You’re done with Phase 1. Head back to the freighter.
- Log 1: Emergency – Read the first entry in the ship’s log.
- All Hands On Deck – Repair vital freighter systems.
- Planetside – Set foot on land.
- A Well-Oiled Machine – Construct a Refiner Room.
- Engage Engines – Warp with your capital ship.
- Supercargo – Construct a Storage Room.
- Galactic Catalogue – Install an Interstellar Scanner.
- Rendezvous 1 – Reach the first rendezvous.
Reward: You get several cosmetic items to place inside your bases and/or freighter when all is said and done. These include: the Pilgrim Poster, Polestar Poster, and Heavy Shipping Poster.

Phase 2 – No Man’s Sky Expedition 8: Polestar
This phase starts with another trip to the captain to read the logs. Interestingly, you need to make another couple warp jumps before you can do so, which already puts you in the same system as the second rendezvous point. Make the jumps, read the log, and get ready to fly down again.
One last reminder: make sure to scan any plants, animals, and minerals you find when you get there. Of particular note are the stalactites and stalagmites found in underground caves. These are useful for scanning, of course, but also always contain Cobalt. You’re going to need Cobalt shortly. Specifically, you need to refine it into Ionised Cobalt for the Orbital Exocraft Materialiser. The blueprint for which is awarded for reading the second log. You also need some for Magnetic Resonators, the blueprints for which were awarded back in Phase 1.
This rendezvous actually takes place underwater. As such, there are a few things to note for those that haven’t had many aquatic NMS adventures.
First is that your Hazard Protection will not drain when you’re underwater — under certain circumstances. Hyper-cold planets, like this one, will still affect you. Meaning you should bring some Sodium and/or Ion Batteries to refill your Exosuit. The same goes for Oxygen and/or Life Support Gel. Your Life Support will continue to drain underwater. In fact, it will likely drain much faster, since you can use your jetpacks underwater to boost in any direction. The tradeoff is that your jetpack drains from your Life Support module when swimming.
Now there’s also a third gauge to worry about, too. Staying underwater too long will cause a separate O2 bar to drain. You won’t die immediately if this reaches zero! However, you will periodically take shield damage and eventually health damage (the same as if your Life Support and/or Hazard Protection wear out).

There are two ways to get around this. One is to simply return to the surface. Your air gauge will refill as long as you’re floating at the top of the water. The second method is to find Candle Kelp: an underwater-only resource. This is found in every aquatic area in the game, so it’s quite plentiful. It also has two functions. Candle Kelp can be mined to produce Kelp Sacs or you can approach it and interact with the plant manually to recharge your air gauge. This allows you to stay underwater much longer.
It’s also worth noting that the second rendezvous point is another Crashed Freighter. This means more Cargo Pods to claim. Just be careful if you do! The water should protect you from the radiation, but you can still find yourself running out of air while digging around to open each hatch. We also have no way to recharge this air gauge manually right now, except for Candle Kelp, so you’re going to take damage if you get too greedy and too far away from safe spots.
At this stage, I also ran into players exploring the crash site at the same time as me. One invited me to a squad to get the optional Milestone “Hospitality.” This feels like as good a time as any to mention that you should absolutely accept these invites or send them out yourself.

The reason being? Hospitality offers some incredible rewards. Five million Units is a hefty chunk of change, for one. It’s enough to buy your first coordinates to a Derelict Freighter. You also get a full Atlas Pass set: one level one, one level two, and one level three.
The true prize, however, is a full Portal glyph set. These are a real pain to find in No Man’s Sky the natural way. You either need to play almost entirely through one of the game’s main story quests or make dozens of warp jumps hoping to meet Travellers. This skips all that — eliminating one of the biggest hurdles in the game towards acquiring a Living Ship. New players, in particular, who might not already have a “main” save with lots of upgrades and resources should make this objective a priority.
Just note that you must dismiss your own freighter to land on another player’s capital ship. You can do this from the Quick Menu (just like summoning). If you don’t, no friendly freighters will appear, despite the objective markers still floating in space. Be kind and take turns letting each other board your vessels!
Now it’s time to refine that Cobalt. You also need three Warp Cells (created from Antimatter and Antimatter Housing) and some Gold. Remember, you can also just purchase the Cobalt, Ferrite Dust, and Oxygen needed for these items from the nearby space station. If you’re flush on cash.
With everything complete, pop the Orbital Exocraft Materialiser wherever you like. That’s it for “Drop Protocol“! It will eventually allow you to summon a Nautilon — a.k.a. the No Man’s Sky submarine — and every other Exocraft more-or-less whenever you want.
The next step requires you to return to the world from the second rendezvous point. You can also find another water planet, if you prefer that for whatever reason.
While you’re building out your freighter a bit, now is also a good time to construct a Fleet Command Room. This requires a pittance of Gold, Silver, and Tritium. Though it will allow you to start sending your one and only frigate out on fleet expeditions. Construct the room and then speak to your Navigator by the circular console on the bridge. They will let you send your frigates out to gather items.

This isn’t actually necessary until Phase 3. However, fleet expeditions occur in real time. Even if you’re not logged into No Man’s Sky! That means you can make progress on Polestar Expedition even when you’re not playing. However, it also means that the Called by the Stars Milestone will be a bottleneck later if you don’t start completing missions now. Fleet expeditions can take anywhere between an hour and a whole day to complete (assuming you don’t cut that time with consumable upgrades).
Back to the task at hand… We now have the Orbital Exocraft Materialiser. However, we don’t have an Exocraft. We need to construct one first.
NMS Exocrafts are automatically built when you construct their respective Geobays. Or, in the cause of the submarine, the Nautilon Chamber. That means we need to land and open the base building menu outdoors. Once underwater, you can build the Nautilon Chamber, generating a Nautilon from thin air to go with it.

This requires three things: Metal Plating, Crystal Sulphide, and Salt. Metal Plating is easy. You just need Ferrite Dust. Salt is a little bit trickier, but you can find it in abundance inside rocks underwater. Just whip out that Mining Beam as per usual.
Crystal Sulphide is the outlier. You need to harvest it from special underwater geysers. These appear when using your Analysis Visor with the phrase “Crystal Sulphide.” Thus, they’re hard to miss. However, the geysers have a tendency to expel deadly heat if you get too close. The screen will start to rumble and you’ll hear a low burbling noise. That’s your cue to back off. Crystal Sulphide deposits can do a surprising amount of damage if you stay near!
Just take your time and collect the shiny, egglike gems sticking to the side of the geysers. After you have everything you need, you can create the Nautilon Chamber and move on! You’re done here. Though you should hold onto any extra Salt you gathered for future projects.

The next step of this quest requires an Amino Chamber. This is a crafting material that must be crafted itself. Yet we don’t have a blueprint for it. We can get one at the Synthesis Laboratory on the Space Anomaly. This is the giant, floating multiplayer hub usually introduced early in the story of No Man’s Sky. Yet Expedition 8: Polestar hasn’t brought us here yet.
Just hop into space with your starship and pull up the Quick Menu. The Space Anomaly can be summoned just like your freighter (and now your Exocrafts). The Synthesis Laboratory is a kiosk at the back of the building, on the right-hand side of the research room. Right next to the sharklike NPC named Iteration: Eos. The blueprint will set you back 250 Nanite Clusters. You should have far more than that from some of the previous Milestones.

Once again, most of this structure’s crafting components are pretty basic. We’ve already been over Metal Plating, but Condensed Carbon can be acquired by refining regular Carbon. That just leaves us needing a bunch of Chlorine.
You can acquire Chlorine in No Man’s Sky via several methods. Though the simplest for our purposes is probably mixing Salt (leftover from the submarine excursion) and Oxygen. We only need 20 Chlorine in total right now, so mixing it up in the Refiner Room shouldn’t take long.
Altogether these materials will let you build a Teleport Chamber — which you can use to jump directly between your freighter and any recent space stations you’ve visited. And vice version. It’s a handy device to have around.
The next step of Phase 2 is technically to scan 20 plants. If you’ve been following my advice up to this point, you’ve probably already done that or are very close. There aren’t really a lot of tricks to this one. You just need to scan. Jump between a few different planets to present yourself with more options. Also note that Oxygen, Sodium, and Deuterium plants all count. As does hazardous flora. You can also find more plants underwater and/or underground.
The “real” next step is to create a Double Cultivation Chamber. This requires some basic elements, but also Faecium. This is a somewhat… special resource. Which is to say it’s animal dung. You need to feed animals Creature Pellets (crafted from Carbon) and then waiting around for them to poop. Pick up the poop and that’s your Faecium.
Yes, really.

You can actually skip that particular step, however, if you once again followed my earlier advice to scan everything. The Phase 5 Milestone A Life Beneath a Sky awards 128 Faecium for discovering 25 unique animals. We only need 25 for the chamber, so this is more than enough to tide us over.
Construct the Double Cultivation wherever you want (it might be time to build some extra hallways) and you’re done! That’s it for Phase 2 of Expedition 8.
- Log 2: Into the Black – Read the second entry in the ship’s log.
- Rendezvous 2 – Reach the 2nd rendezvous.
- Drop Protocol – Construct an Orbital Exocraft Materialiser.
- Freedom of the Seas – Deploy a Submarine.
- Across Infinity – Construct a Teleport Chamber.
- The Engine of Life – Discover 20 Plants.
- The Air We Breathe – Construct a Double Cultivation Chamber.
- (OPTIONAL) Hospitality – Visit someone else’s freighter base.
Reward: High-Gravity Freighter Trail

Phase 3 – No Man’s Sky Expedition 8: Polestar
Another new phase, another new ship’s log. Though you need to do some traveling again. Access the Freighter Warp Map once more to travel to the next rendezvous point. After which you can talk to the captain to get your log before touching down at the next pit stop.
It may also be worth stopping at the space stations in between in order to increase your inventory space at the Exosuit upgrade kiosk. It’s far from mandatory, though. I only mention it because you can only get one Exosuit slot upgrade per space station. Since you’re traveling anyway, you might as well pick up a new slot. The early upgrades are cheap and you should have a bit of cash coming in now anyway.
Remember that you can simply teleport back to your freighter using the new Teleport Chamber, as well.

The third rendezvous is also underwater. Yet we don’t need to build another Nautilon Chamber. Instead, we can summon it directly from the Quick Menu thanks to the Orbital Exocraft Materialiser. You can choose to explore with the submarine, searching for Cargo Pods as before, or you can simply return to base. It’s up to you! Either way it’s time to head back to read that log.
Next up is building a Stellar Extractor. The crafting requirements are basic things we’ve already been over multiple times, so I won’t detail them all again here. There’s actually a very good chance you already have everything you need. The one possible exception is Silver. You should probably restock on from some nearby asteroids. Most freighter construction requires the stuff, so it’s good to have more than you think you need.

Once installed, the Stellar Extractor continuously draws in resources for you. Similar to fleet expeditions it works even when you’re not logged into the game. Make sure to check it every so often for Chromatic Metal, which you can use to craft Warp Cells to fuel your hyperdrive.
At this point, you can probably skip straight to building a Scanner Room, too. The only odd requirement for it is a single Ion Battery — which requires Cobalt and Ferrite Dust. If you ionized all your Cobalt earlier, you can revert it to the basic mineral by refining Ionised Cobalt again. You only need 10 units of the stuff.
You can probably also build a Galactic Trade Room. (You might see now why we needed all that Silver earlier.) We haven’t dealt with Microprocessors up to this point, but they’re easy to make. You just need 40 Chromatic Metal and one unit of Carbon Nanotubes for each. And if you’re running low on Carbon the indoor farm areas grow the stuff on their shelves. Enter one of them and interact with the plants on the walls to get some.
The next step, “Wing Commander, can be a little confusing thanks to the way it’s worded. It’s really not that bad, though. You just need to purchase more squadron slots.

The “Ship Bay” in question isn’t a structure inside your freighter. You actually need to interact with the “Manage Fleet” terminal at the circular console on your bridge. It’s the orange hologram closest to your captain. It’s also where you inspect frigates that go out on fleet expeditions.
More than that, though, this is where you manage your squadron. These are NPC pilots that aid you in combat whenever you come under attack. We already have a whole guide on how to recruit a squadron in No Man’s Sky, but to give the short version, you need to speak with pilots after they land. Whether that’s in the hangar of a space station, inside your own freighter, or on trade outposts. Simply choose the dialogue option asking them to join your squadron and they will! Assuming you have room, of course.

This is where the Manage Fleet menu comes in. Click on it, then select “Manage Squadron.” This shows four square padlock icons. These are those Ship Bays mentioned in the Milestone objective. You can purchase them with Nanite Clusters. The catch is that each bay costs successfully more than the last. You should have just enough after some of the previous Milestone rewards to purchase three, however.
When you’ve got the slots, simply sit in a hangar and wait, asking to “recruit” anyone that looks promising. This part is free!
This merry band will help you with the next step: killing some pirates. There’s actually a chance you’ve already completed this Milestone (or at least gotten close). Pirates will attack you as you mine asteroids. They also appear periodically when you’re flying around with the Pulse Engine.
Systems with higher conflict levels also have more pirates. You can see this with the crossed swords icon over systems in your Galaxy Map while standing on your freighter (now that it’s upgraded). The higher that number, the higher the conflict level. Jump to one of these locations to get into more fights.

Another way to actually force pirate battles is just accepting a bounty. You can get these from the mission agent on space stations or from the Nexus on the Space Anomaly. As shown in the screenshot above. This will spawn a skull-shaped objective icon for you to fly towards.
One quick tip for combat in general is to use your rockets. Your starting starship comes with both a set of lasers and a set of rockets as “secondary” weapon. This overheats after one shot, so you need to cycle between the two weapons frequently, but you should always use the Rocket Launcher on the enemy hull. That means lasering off their shields first. Once that’s done, the rockets are basically a one-hit-kill on most enemies in the game at this stage. They’re just tuned to do much more damage to raw hit points than shields.
Your reward for this mission is a set of upgrades that will make fleet expeditions even faster. Install all three right away! You need eight complete expeditions to finish this phase. You can wait for that, of course, or you can continue on to Phase 4 now.
It’s time to make more jumps, find the next rendezvous, and read another log! You’re essentially done here for now.
- Log 3: Homesick – Read the third entry in the ship’s log.
- Rendezvous 3 – Reach the 3rd rendezvous.
- Power and Industry – Construct a Stellar Reactor Room.
- Wing Commander – Recruit 3 pilots to your squadron.
- Galactic Defender – Shoot down 16 pirates.
- Called by the Stars – Complete 8 fleet expeditions.
- Farseer – Construct a Scanner Room.
- Home Comforts – Construct a Galactic Trade Room.
Reward: Flaming Barrel, Data Display Unit, Navigation Archive

Phase 4 – No Man’s Sky Expedition 8: Polestar
Warp. Rendezvous. Read the log. The cycle continues. The only issue is that you will need to refill your hyperdrive. Do so by crafting more Warp Cells or a Warp Hypercore if you can.
The latter option needs a Storm Crystal to craft. These are pretty rare; you can find them on extreme weather planets during deadly storms. However, you can very rarely find them while mining Di-hydrogen crystals. The crystals will sometimes drop a Crystal Fragment into your inventory. This Crystal Fragment can be cracked open to, usually, give you some extra Di-hydrogen. Every once in a blue moon, though, one will produce a Storm Crystal.
I got lucky and found one early on, so I had a spare Warp Hypercore ready to go for this screenshot.

You can also get these as bounty rewards from the Nexus. The bounties and the rewards cycle every few minutes. That means you can stick around the Space Anomaly until getting lucky if you like. The odds of finding a Warp Hypercore here are actually probably better than finding a Storm Crystal via Di-hydrogen mining. On the other hand: Warp Cells work just fine.
You should also have several parts of this phase, Stardust and Prospector, completed already. The same goes for “Gold Like Sand.” Between the pirate killing, fleet expeditions, and general exploration you will have plenty of opportunities to make cash. If you’re still short, though, just keep at it. More bounties are always great, quick moneymakers. Especially more of those piratical ones.
Asteroid mining is also a surprisingly lucrative job. Not because of the Silver, Gold, and Platinum. At least not just for that reason. What you really want to find are Anomaly Detectors.

These are uncommon consumables dropped by asteroids. Despite their rarity, however, you can score a bundle of them pretty quickly because of how fast and easy it is to destroy space rocks. This makes them a common way to make cash while normally playing No Man’s Sky. Expedition 8: Polestar is no different. You’ll get an onscreen prompt when you find one, too.
Once you have an Anomaly Detector, activate it from your inventory. Then initiate your Pulse Engine. You’ll eventually get a notification telling you to drop out of pulse speed because something has been detected. These can range from special encounters with space monsters to more living frigates for recruitment. More often, however, they’re simply special objects floating in space — waiting for you to shoot and “mine” them like an asteroid.
The items derived from these space encounters can be worth hundreds of thousands of Units in one gulp. That’s in addition to all the money you can make from selling the Gold and Silver earned along the way. It’s not a bad deal!

This is also a great time to recruit more frigates. Doing so usually costs 1.5 million Units or more, but it’s worth the price, as they will more reliably allow you to finish fleet expeditions — making even more money and finishing that time-gated step from Phase 3.
To recruit a frigate, you simply need to fly close to an NPC freighter in space. Any frigate you can recruit will be marked with a colored diamond and the currency symbol for Units. If you approach one of these marked frigates, you’ll receive a hailing channel message, which basically just means you need to open the Quick Menu. Select the radio signal icon labeled “Starship Communication” and the frigate will offer to join your fleet! At a cost…
You can also recruit organic frigates using a Dream Aerial. This is basically free, but also mostly random, so it’s not a reliable way to build up your fleet just yet.

We’re moving at a good clip now. Next, we need to find a crashed ship. Like most planetary objects of interest, you can find these using Planetary Charts. You can purchase these with Navigation Data from the Cartographer on any space station. We have a guide for that if you find yourself in need of extra Navigation Data as well.
We specifically want a Planetary Chart (Emergency Cartographic Data). This pulls from a particular list of possible outcomes: including a possible crashed ship. But don’t simply investigate every random set of coordinates that the charts provide. Instead, buy a stack of them and use them from your inventory back-to-back. Planetary Charts can only provide one set of coordinates to one type of location per system at a time. This means you can keep using charts to narrow down the list of possible results until you get the one you want. A crashed ship in this case.

In addition, don’t believe the charts’ lies. They will often tell you that you can’t use another chart because a certain type of location is already marked on your map. That’s because of a weird quirk in the way No Man’s Sky pulls from the list of possible locations included in each chart type. They always pull from the total list of possible locations — not the remaining list of possible locations. It’s weird.
Basically? Keep spamming the “use” button on Emergency Cartographic Data charts until you eventually get a red icon for a Distress Beacon. This will always be either a Crashed Freighter or the Crashed Ship we need. If you get a Crashed Freighter instead, open more charts until you get another Distress Beacon. Repeat as necessary. I personally received a Distress Beacon to a crashed ship right away, however, so it might be a scripted. This is good information to have in any case.
Oh, and make sure to bring the Repair Kits you received from previous rewards. They’re going to be useful for this next bit. You can also build a Matter Beam on your freighter to access its inventory from wherever you want, saving you the trouble of carrying them around.

Once you reach the ship, it’s time to claim it. This can be done simply by interacting with the damaged hulk and selecting “Claim Ship.” Normally we would then need to craft several basic items to restore the damage. However, we have Repair Kits.
Click on the damaged Pulse Engine and/or Launch Thruster in your new ship’s inventory. Then select the destroyed components and choose “Apply Repair Kit,” as you can see in the screenshot above. With those two items fixed you can take off and return to your freighter! Don’t worry about your old ship; it will be in your hangar when you get there.
Now, for the last step in this phase of Expedition 8: Polestar, we have a choice to make. We need to destroy one of our ships. Permanently.

You can do this by flying whichever ship you want to annihilate to the nearby space station. There’s a big, orange table with a hologram of your ship floating above it. It’s right next to the technology merchants. This is the Starship Outfitting terminal — where you may have already gone to permanently upgrade your starship inventory. It’s also where we can destroy ones we don’t want. The dead ship doesn’t sell for Units, though. It will actually be converted into sellable scrap which you can then sell at the Galactic Trade Terminal.
I personally sold my old ship. Despite the damage, the new one was an A-Class with a lot more potential inventory space. The choice is yours, though. There are plenty of other opportunities to get ships down the line (if you’ve got the cash).
With your newly made scrap, you should be done with Phase 4 of Expedition 8: Polestar in No Man’s Sky! Now for the final steps.
- Log 4: No Going Back – Read the fourth entry in the ship’s log.
- Rendezvous 4 – Reach the 4th rendezvous.
- Stardust – Destroy 50 asteroids.
- Reclamation – Restore a crashed ship.
- Recycling – Repurpose a starship for scrap.
- Prospector – Discover 15 Minerals.
- Gold Like Sand – Earn 9,000,000 Units.
Reward: A Fleet Commander’s Cape

Phase 5 – No Man’s Sky Expedition 8: Polestar
The last phase of this NMS Expedition looks a lot like the previous phases. Warp to the rendezvous point and read the log to begin.
Next is technically scanning 25 animals. If you’ve been following this guide, you’ve probably already done that. You probably know the drill by now anyway. Look for red dots with your Analysis Visor and scan away! One useful trick is to use the Scanner Room on your freighter first. This will show you the basic details of every planet in the system under your “Discoveries” tab in the pause menu. Click on one any of the planets here to see how many total animals exist on that world (as well as however many you’ve already scanned). This will tell you which planets have the most wildlife to discover all in one place.
After that is “Mission Control.” This means recruiting more frigates. Just like I already laid out in the previous section. Find freighters, approach them, and hail the marked frigates.

You might also be lucky enough to get a Dream Aerial from one of your earlier fleet expeditions. In that case, you can get at least one organic frigate for free. After which you can also hunt for more using the Anomaly Detectors. Trigger the device and then look for a “Whalesong” notification to find another living frigate.
You shouldn’t have too much trouble finding neutral freighters. Just in case, though, they tend to spawn more often near thick asteroid belts and just outside of space stations. If you still can’t find any, just try pulsing around and stopping. One will sometimes warp in near you (with its frigates in tow).
If you’re still having trouble, try warping around a bit. There’s typically a fresh freighter near where you spawn after making a hyperdrive jump.
Players that previously finished Expedition 7 might also like to know that claiming the Leviathan from your Expedition rewards does count. Speak to the Quicksilver Synthesis Companion on the Space Anomaly to grab it.

Speaking of pulse, that’s what we need to do next. The “Log 5: Horizons” Milestone will award a device called the Homeworld Repeater. Hop into your starship, activate the device, and then trigger your Pulse Engine. Just as if you were using an Anomaly Detector, Dream Aerial, or Emergency Broadcast Receiver. Eventually you will receive the order to stop your ship; then you can speak to the giant object that appears in space by activating the Starship Communication tab from your Quick Menu.
This will provide us with a blueprint for the Singularity Engine freighter upgrade. It doesn’t require anything we haven’t already talked about before, though. You need a Warp Hypercore, some Crystal Sulfide, and 120 Ionised Cobalt. There’s a good chance you already have all of that already.
Though toughest potential item is the Warp Hypercore. As mentioned above, these are awarded from certain Nexus bounties. You can also craft them with Antimatter and Storm Crystals. Storm Crystals are (once again) found on extreme weather planets during storms and inside Crystal Fragments harvested by mining Di-hydrogen Crystals. You can even get Storm Crystals as rewards for bounties at the mission agent on space stations. Last but not least, you can find them on Derelict Freighters.
You should be able to afford your first Emergency Broadcast Receiver — the item that spawns a Derelict Freighter — from the Scrap Dealer on any space station at this point. Though you can also get one for free from Iteration: Helios on the Space Anomaly. Though you may need to speak to them twice to get the dialogue option.

This NPC passes out one free receiver per week on any save. Not just during Expedition 8: Polestar! No Man’s Sky players should get familiar with these pseudo-dungeons anyway. They’re extremely profitable. If you need a refresher, there’s a link to our Derelict Freighter guide back in the Phase 3 section.
You can move on as soon as you have the Singularity Drive. Whether you’ve got all your frigates and finished all your fleet expeditions or not! The device will simply warp you to a distant part of the galaxy — where you can still find freighters and frigates as normal. You just need to speak to the captain. They will have a new dialogue option encouraging you to activate the Singularity Drive. Hit it and you’re done!
In fact, you’re basically done with No Man’s Sky Expedition 8: Polestar. The only issue might be that pesky Phase 3 Milestone which requires you to complete eight fleet expeditions, as this is gated by real-time waiting.
To help this step along, you can actually build multiple Fleet Command Centers aboard your freighter. This allows you to send out multiple “mini fleets.” Though it does mean splitting up your available frigates into smaller groups. Still, this lets you complete the missions several times faster by letting you run them simultaneously.
Once you’re finished, make sure to grab your prizes from the Expeditions tab, and congratulations! You’re all set. In fact, new players looking for a “starting” save could do much worse than this one. You should now have some Quicksilver, some cash, a halfway decent starbase, and a lot more resources besides. That’s not even counting the Atlas Pass set and the glyphs you might have gotten from the optional Milestone. This will help you get underway for a lot more of the base content in No Man’s Sky; Expedition or not.
- Log 5 Horizons – Read the final entry in the ship’s log.
- Rendezvous 5 – Reach the final rendezvous.
- A Life Beneath the Sky – Discover 25 Creatures.
- Mission Control – Expand your fleet to 8 frigates.
- Deep Sleep Cruise – Make contact.
- Superluminal – Perform a gravity slingshot.
Reward: “The Seeker” Title, Polestar Expedition Banner, Polestar Expedition Decal

NMS Polestar Expedition Rewards
Because of the way rewards are doled out via the Quicksilver Synthesis Companion, you can actually see some of the No Man’s Sky Expedition 8 rewards without acquiring them first. Some of which were already laid out in the patch notes. Here are some pics from the companion’s stock!


The full Expedition awards the Helios Egg: a floating, glowing jellyfish companion. It functions pretty much the same as other companions available from certain past Expeditions. It is pretty, though!
And that’s basically all we have for this No Man’s Sky Expedition guide right now. Once again: we’ll update this article with any other important information if it comes. Be sure to check back in frequently for more NMS Expedition help if you need it to get through!