A new DLC story chapter for the Final Fantasy 7 Remake has arrived! The story revolves around Wutai operative Yuffie Kisaragi’s attempt to infiltrate Shinra’s headquarters to steal their ultimate Materia. Set after the events of the base game, players will control Yuffie in this bite-sized adventure. While you can simply focus on beating the main story missions, the new Final Fantasy 7 Remake Intergrade DLC (Titled INTERmission) comes with several side quests you can also partake. One of these is locating six hidden flyers for the Happy Turtle. Scattered throughout Sector 7, players will unlock this quest after speaking to Billy Bob twice upon arriving in town.
Happy Turtle Flyer Locations

1. Some Kids Hid One Somewhere
The first poster is near the Happy Turtle quest giver. After speaking with him, take a right and then enter the playground directly on your right. You will see a massive stack of cardboard boxes that Yuffie can run through. On the other side of the boxes will be your first Happy Turtle flyer.

2. Floating Through the Air
Your second flyer can be found in an alleyway in the bottom right corner of the Sector 7 Slums. This is where you can find Wedge, along with a group of children debating how to pop a suspicious turtle balloon hidden behind a metal fence. When looking at the turtle, hop over the small box on the right to get behind the fence and then press Triangle to hurl Yuffie’s shuriken at the balloon. This will pop it and cause the second flyer to float the ground by the group of children.
3. Near Old Snapper’s Friend’s Apartment Building
Once you’ve collected the second poster, head to the top left corner of the slums where Cloud’s apartment is in the main game. When you arrive you’ll see the poster in the top right corner on the second floor of the apartment complex. Head up the stairs to trigger a brief cutscene where a guard dog wakes up and then promptly falls back asleep. To get this poster, you need to slowly walk down the balcony without the dog catching you. This means, whenever the dog doesn’t have white bubbles over its head, hide behind one of the large boxes on either side of the balcony. Upon reaching the read bucket, slowly walk around it and grab the poster hanging on the wall before the dog wakes up.
Don’t worry if you’re caught, Yuffie will just get scared and need to try the entire sneaking sequence over again. Wutai’s elite ninja, ladies and gentlemen.

4. A Cat Took One on Culvert Street
You can find the fourth flyer in the northern tunnel near the apartment complex. When you enter the tunnel, Yuffie will notice a cat carrying the Happy Turtle poster in its mouth. The animal will run off into a small junkyard that’s filled with cats. You will need to find the correct cat, which is located behind the large grouping of blue barrels at the far end of the junkyard. There will also be a chest which contains two hi-potions so make sure to open it up. Interacting with the poster will scare the cat off, allowing her to nab this flyer.

5. On The Town Bulletin Board
The easiest of all the posters to acquire, just make your way to Pillar Plaza on the eastern side of the slums. When you arrive a guard will inform you about a poster being hidden in the factory. Ignore this for now and approach the bulletin board by a small gathering of people. Yuffie can interact with it, ripping off a Shinra poster to reveal the fifth Happy Turtle flyer. You should also just chill here and listen to the absolute banger being played over the radio.

6. Near the Old Talagger Factory
Here’s the real meat and potatoes of this side quest. To obtain this last flyer you’ll need to battle through three rooms of monsters, with the last one being particularly tough. From Pillar Plaza, go north through the door that has a single guard standing by it. Head down the path into the first warehouse and take a left. Follow the path until you reach a second warehouse that has two low-level enemies in it. Kill them both and head out the door along the right wall. Make your way down the small path until you reach a fork in the road.
Go to the right, up the small incline, and use Yuffie’s shuriken to break the boxes above to earn some free antidotes. Before you head inside you’ll want to equip an Ice Material to Yuffie’s weapon so you can cast Blizzard in the next two fights. Enter the warehouse to trigger the Trepiscolt’s to attack you. These enemies are pretty easy to dispatch, just make sure to keep dodging since they can quickly zoom around the room. Once defeated, make sure to upgrade your weapon if you haven’t and head into the final battle.
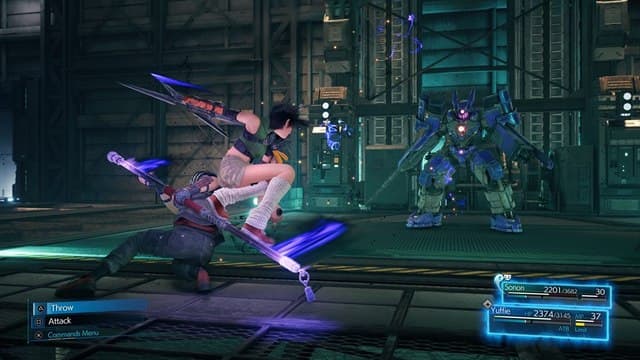
This one was surprisingly tricky on Normal difficulty due to the Venomantis’ affinity for poison and their ability to put Yuffie to sleep. Because of this, fighting them at close range is extremely dangerous. They are very mobile creatures and can easily swarm you if you’re not paying attention. You will always want to have both of them in your sights at all times, so you can dodge their high-damaging attacks. The main one to look out for is a tail swipe that, if it connects, will instantly put Yuffie to sleep. Venomantis deal a lot of damage quickly, so getting slept essentially means you’re guaranteed to lose a big chunk of health. Also, try to avoid their webbing as it will inflict the poison status effect on Yuffie.

I found a combination of throwing out Yuffie’s shuriken, her ninjutsu magic, and casting Blizzard was the best strategy. If they ever get too close just roll away and gain some distance. Fighting them up close can drain your resources, so try to always stay away from these bugs. Once you’re down to just a single Venomantis, you can start doing more close-range attacks, just be mindful of its tail attack. After both of these enemies are vanquished, the poster can be found in the corner of the room on the left.
Collecting all six posters will give you the option to return to Old Snapper. Upon speaking to him, he will praise your accomplishment and invite Yuffie to the bar (once she is of age!). You will also earn the