Destiny 2 Revision Zero Catalyst - Should You Choose to Accept It Quest

Destiny 2 Season of the Seraph has arrived and it’s time to reunite with everyone’s favorite, murderous Warmind, Rasputin. Revolving around repairing the broken remnants of Rasputin, players will need to team up with Clovis and Ana Bray to fix one of the Vanguard’s strongest allies. This season also includes a new dungeon, seasonal activity, weapons, armor, and an updated loot pool for the Deep Stone Crypt raid. Additionally, players can hunt down the new Revision Zero pulse rifle, which promises to be the most customizable exotic weapon yet. Boasting four catalysts, players must complete the Should You Choose to Accept It Parts 1, 2, 3, and 4 to unlock everything this firearm offers. At the time of writing this, only Should You Choose to Accept It Part I is available, but over the next few weeks more steps will be added. Here’s how to complete each quest step and earn the Revision Zero catalysts.

(Author’s Note: The Division Zero catalyst quest is only obtainable after you complete the weekly story mission. Once you complete the weekly story mission, speak to the EXO Frame at the H.E.L.M. to receive this quest.)

Destiny 2 Revision Zero

How to Get Revision Zero Catalyst – Should You Choose to Accept It Part 1

1. Download the Cryptographic Index at the Archimedes Annex

Your first step in the Revision Zero catalyst quest is to download the Cryptographic Index at the Archimedes Annex. This is accessed by opening up your destination map in the H.E.L.M. and selecting “Operation: Archimedes” in the bottom right corner. This is a pretty simple mission that involves dodging Seraph tower lasers and then infiltrating one of the many Warmind bunkers. Inside will be several rooms filled with Hive enemies, some of which need to be opened up via Arc Charges that yellow-bar Knights drop. Once you kill the boss, and his minions, and turn on the power you will gain access to the terminal. Download the Cryptographic Index to complete this step.

2. Travel to Europa

Just land at any patrol zone on Europa to progress this step.

3. Complete Patrols and Defeat Combatants on Europa

For this step, you’ll just need to complete patrols and defeat enemies anywhere on Europa. I recommend snagging any of the kill-focused patrols as these are the fastest to finish and you’ll also be slaying combatants. Try to avoid any item Patrols (the white triangle symbol) as these usually take longer and can be a nuisance since you need to wait for specific enemies to spawn.

Revision Zero Catalyst

4. Locate the Dead Drop in the Cadmus Ridge “Perdition” Lost Sector

Stay on Europa and make your way to the Cadmus Ridge patrol zone. When you arrive, head towards the only Lost Sector in this area which is located along the northern rocky walls. You’ll be entering a small cave system that eventually spits you out into a Braytech facility. Once you complete the Lost Sector and slay the boss, you’ll see a terminal to the left of the final chest by the exit door. Interacting with it will give you the dead drop and progress the quest.

5. Launch “Operation: Seraph’s Shield” and find the dead EXO

Now bring up your H.E.L.M. destination map and launch the Legend version of the Operation: Seraph’s Shield mission. This is the exotic quest found in the bottom right corner of the H.E.L.M. destination screen. Once you’re in the mission, make your way through the level until you reach the room where you need to carefully navigate across the floor. After activating all the terminals inside this room and lifting the security protocols, you’ll find the dead Exo by the door.

6. Complete “Operation: Seraph’s Shield” on Legend difficulty

This is the most difficult portion of the quest. Operation: Seraph’s Shield can be pretty tricky to solo on Legend, mainly because the game will always have you facing enemies who are 10 Power above you. Because of this, you will want to prep by bringing in the right items. During my Legend runs, I found that having a ranged weapon like a sniper rifle is terrific since a lot of the enemies are quite strong. Arbalest is also great for this mission since enemies have all three types of elemental shields. Alternatively, exotic weapons like Gjallarhorn, Grand Overture, The Lament, and Thunderlord are also quite strong in this mission.

Remember, you don’t have to have a flawless run and the checkpoints are pretty generous. The only tricky sections are the two main boss rooms, with the former being a bit of a headache since you need to kill three Brigs and a ton of Fallen. Just take your time in this room and focus on dealing with each Brig individually along with the sniper Shanks floating around it. These are the biggest threats in the room and should be prioritized. If you need a refresher on Operation: Seraph Shield you can check out our complete walkthrough here. Upon completing this quest and opening the chest you will be rewarded the first of four catalysts for Revision Zero.

Completing this will unlock the Frenzy Refit for this firearm.

How to Get Revision Zero Catalyst – Should You Choose to Accept It Part 2

1. Download the Cryptographic Index (Again)

Just like last week, you will need to complete a short story mission. This revolves heading into the Diocles Annex to download the next Cryptographic Index. Once again you will be dodging laser, battling Hive enemies, and destroying crystals to lower barriers blocking the doors. It’s a fairly easy mission that can be done solo without any trouble — especially if you have a tuned build. After all the Hive have been cleared out of the main chamber, interact with the console to progress the quest.

2. Land on the Moon

This is an extremely straightforward step that just tasks you with landing at any patrol zone on the Moon. Once you arrive on the Moon the quest will progress.

3. Complete Patrols and Defeat Combatants on the Moon

For this step, you’ll just need to complete patrols and defeat enemies anywhere on the Moon. I recommend picking up any of the kill-focused patrols as these are the fastest to finish and you’ll also be slaying combatants. Avoid any item-focused Patrols (the white triangle symbol) as these usually take longer and can be a nuisance since you need to wait for specific enemies to spawn. I like going to the Anchor of Light, as you can also complete the Toland-centric patrols which just requires you to go stand in an area for a few seconds.

4. Locate the Dead Drop in the K1 Logistics Lost Sector

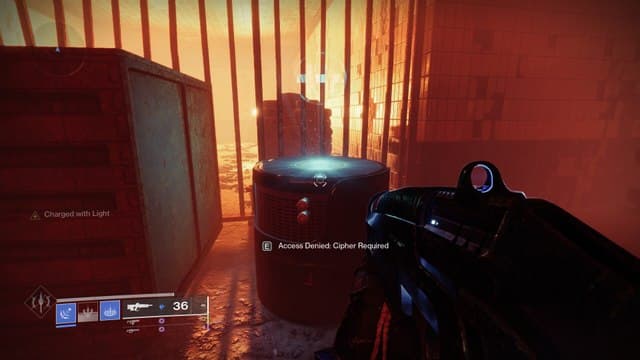
Similar to last week, you will need to interact with a Hakke podium at the end of this Lost Sector. You can find K1 Logistics in the Archer’s Line patrol zone which is to the north west of Sanctuary landing zone. Once you arrive at this activity, make your way through the Lost Sector until you reach the boss room. Kill the large Servitor and then interact with the dead drop (shown above) that has a large H projected over it. This will complete this step and progress the quest.

5. Launch “Operation: Seraph’s Shield” and find the weapon schematic

Now bring up your H.E.L.M. destination map and launch the Legend version of the Operation: Seraph’s Shield mission. This is the exotic quest found in the bottom right corner of the H.E.L.M. destination screen. You can find the next weapon schematic in the vents right after you get the Operator buff for the first time. When you enter the room, open up the secondary chamber filled with Hive enemies and head into the vent. You’ll get an indicator on the HUD that showcases where this dead Exo is located in the vent.

6. Complete “Operation: Seraph’s Shield” on Legend difficulty

Now just complete Operation: Seraph Shield on Legend difficulty to finish the last step of this quest. Doing so will unlock another set of perks and the Pressurized Refit catalyst for the Revision Zero.

Destiny 2

How to Get Revision Zero Catalyst – Should You Choose to Accept It Part 3

1. Download the Cryptographic Index (Again, again)

Surprise, you have to download another Cryptographic Index in the Archimedes Annex. Just like the previous two weeks, after completing the seasonal story quest for the week and picking up the Should You Chose to Accept It Part 3, head to the mission via the H.E.L.M. destination map. Once again you will be dodging Seraph Tower lasers, fighting through hordes of Hive enemies and defeating a boss. Upon slaying the final foe, interact with the marked console to progress the quest.

2. Land on the EDZ

Upon downloading the Cryptographic Index your next step is to head to anywhere in the EDZ. It doesn’t matter which patrol zone you land at, as the quest will progress when you arrive at this destination.

3. Complete Patrols and Defeat Combatants in the EDZ

Now that at the EDZ, your job is to defeat enemies and complete any type of patrol. I recommend picking up any of the kill-focused patrols as these are the fastest to finish and you’ll also be slaying combatants. Avoid any item-focused Patrols (the white triangle symbol) as these usually take longer and can be a nuisance since you need to wait for specific enemies to spawn. Personally, I like completing patrols in Firebase Hades and The Sludge since there’s a good amount of enemies available at all times.

4. Locate the Dead Drop in the Terminus East Lost Sector

Now you need to locate the Hakke dead drop in the Terminus East Lost Sector. This can be found in the back right corner of the Trostlands patrol zone and only consists of some supremely low-level Fallen enemies. You should have no trouble fighting through this train station and killing the boss. Once defeated, interact with the terminal that’s projecting a large letter H. Doing so will complete this step and progress the quest.

5. Launch “Operation: Seraph’s Shield” and find the weapon schematic

The next weapon schematic is found in the first major boss room. Upon entry, don’t shoot the barrels to begin the fight. Instead, hang a right and look for the first open door on your right. Inside the small alvoce you’ll see the dead Exo resting against the wall. Remember, if you kill all the enemies and progress further you cannot return to this location without restarting. So make sure to grab this Exo first!

6. Complete “Operation: Seraph’s Shield” on Legend difficulty

Now just complete Operation: Seraph Shield on Legend difficulty to finish the last step of this quest. Doing so will unlock another set of perks and the Outlaw Refit catalyst for the Revision Zero.

Destiny 2 Seraph Shield

How to Get Revision Zero Catalyst – Should You Choose to Accept It Part 4

1. Download the Cryptographic Index (Again, again, again)

At this point this entire process should feel pretty familiar. After completing the weekly season story quest, open up the H.E.L.M. destination menu and select the Operation: Archimedes mission. Fight your way through the Warmind bunker, defeat the boss, and then interact with the sonsole at the end to download the last Cryptographic Index.

2. Head to the Cosmodrome

Upon finishing Operation: Archimedes, load up the Cosmodrome and land anywhere in this destination. Upon your arrival, you’ll progress this step.

3. Complete Patrols and Defeat Combatants in the Cosmodrome

Now that at the EDZ, your job is to defeat enemies and complete any type of patrol. I recommend picking up any of the kill-focused patrols as these are the fastest to finish and you’ll also be slaying combatants. Avoid any item-focused Patrols (the white triangle symbol) as these usually take longer and can be a nuisance since you need to wait for specific enemies to spawn. This section can be a bit tedious, so go to The Divide patrol zone as it often has the highest density of enemies. Alternatively, Skywatch is another terrific location to slay enemies or complete patrols.

Destiny 2

4. Locate the Dead Drop in the Exodus Garden 2A Lost Sector

Once the quest progresses, you’ll be tasked with going to the Exodus Garden 2A Lost Sector in The Divide patrol zone. This is in the northern protion of the patrol zone and is fairly simple to complete. Just keep killing all the enemies in each room until the shield wall drops and you can progress. Upon defeating the boss, approach the podium with the large letter H floating above it. Interacting with this will complete this step of the mission.

5. Launch “Operation: Seraph’s Shield” and find the weapon schematic

The final weapon schematic is found in Fallen Ketch that you’re transported to after the first major boss battle. Once you break out, enter the main chamber and kill the rest of the crew. Once they are all dead, use the terminal near the door you originally entered from to release all the BrayTech Security Frames if you haven’t already. You can find the dead Exo in second room on the right. Inside the prison cell, the Exo will be slumped up against the wall.

6. Complete “Operation: Seraph’s Shield” on Legend difficulty

Now just complete Operation: Seraph Shield on Legend difficulty to finish the last step of this quest. Doing so will unlock the final set of perks for this weapon, completing the Revision Zero and allowing players to fully customize it. Just make sure to visit Banshee-44 at The Tower when you’re done to complete this quest!

About the Author

Collin MacGregor

Collin MacGregor is the Guide Staff Writer at Fanbyte. He's also the person who willingly plays the support class (you're welcome) and continues to hold out for an Ape Escape remake.